MCP Integration
Introduction
The Model Context Protocol (MCP) enables AI assistants to interact directly with ChainLaunch for blockchain management. This guide covers how to set up and configure MCP with various AI tools and development environments.
Overview
ChainLaunch provides an MCP server that allows AI tools to:
- List and manage blockchain networks
- Create and configure nodes
- Manage cryptographic keys
- Deploy and manage smart contracts
- Monitor system status
Key Features
- 15 Tools: Comprehensive blockchain management operations
- 2 Interactive Prompts: Guided workflows for complex operations
- 1 Resource: Real-time network data streaming
- Streamable HTTP Transport: Modern, efficient communication
Server Information
| Property | Value |
|---|---|
| Version | 1.0.0 |
| Protocol Version | 2024-11-05 |
| Transport | streamable-http |
| Library | github.com/mark3labs/mcp-go |
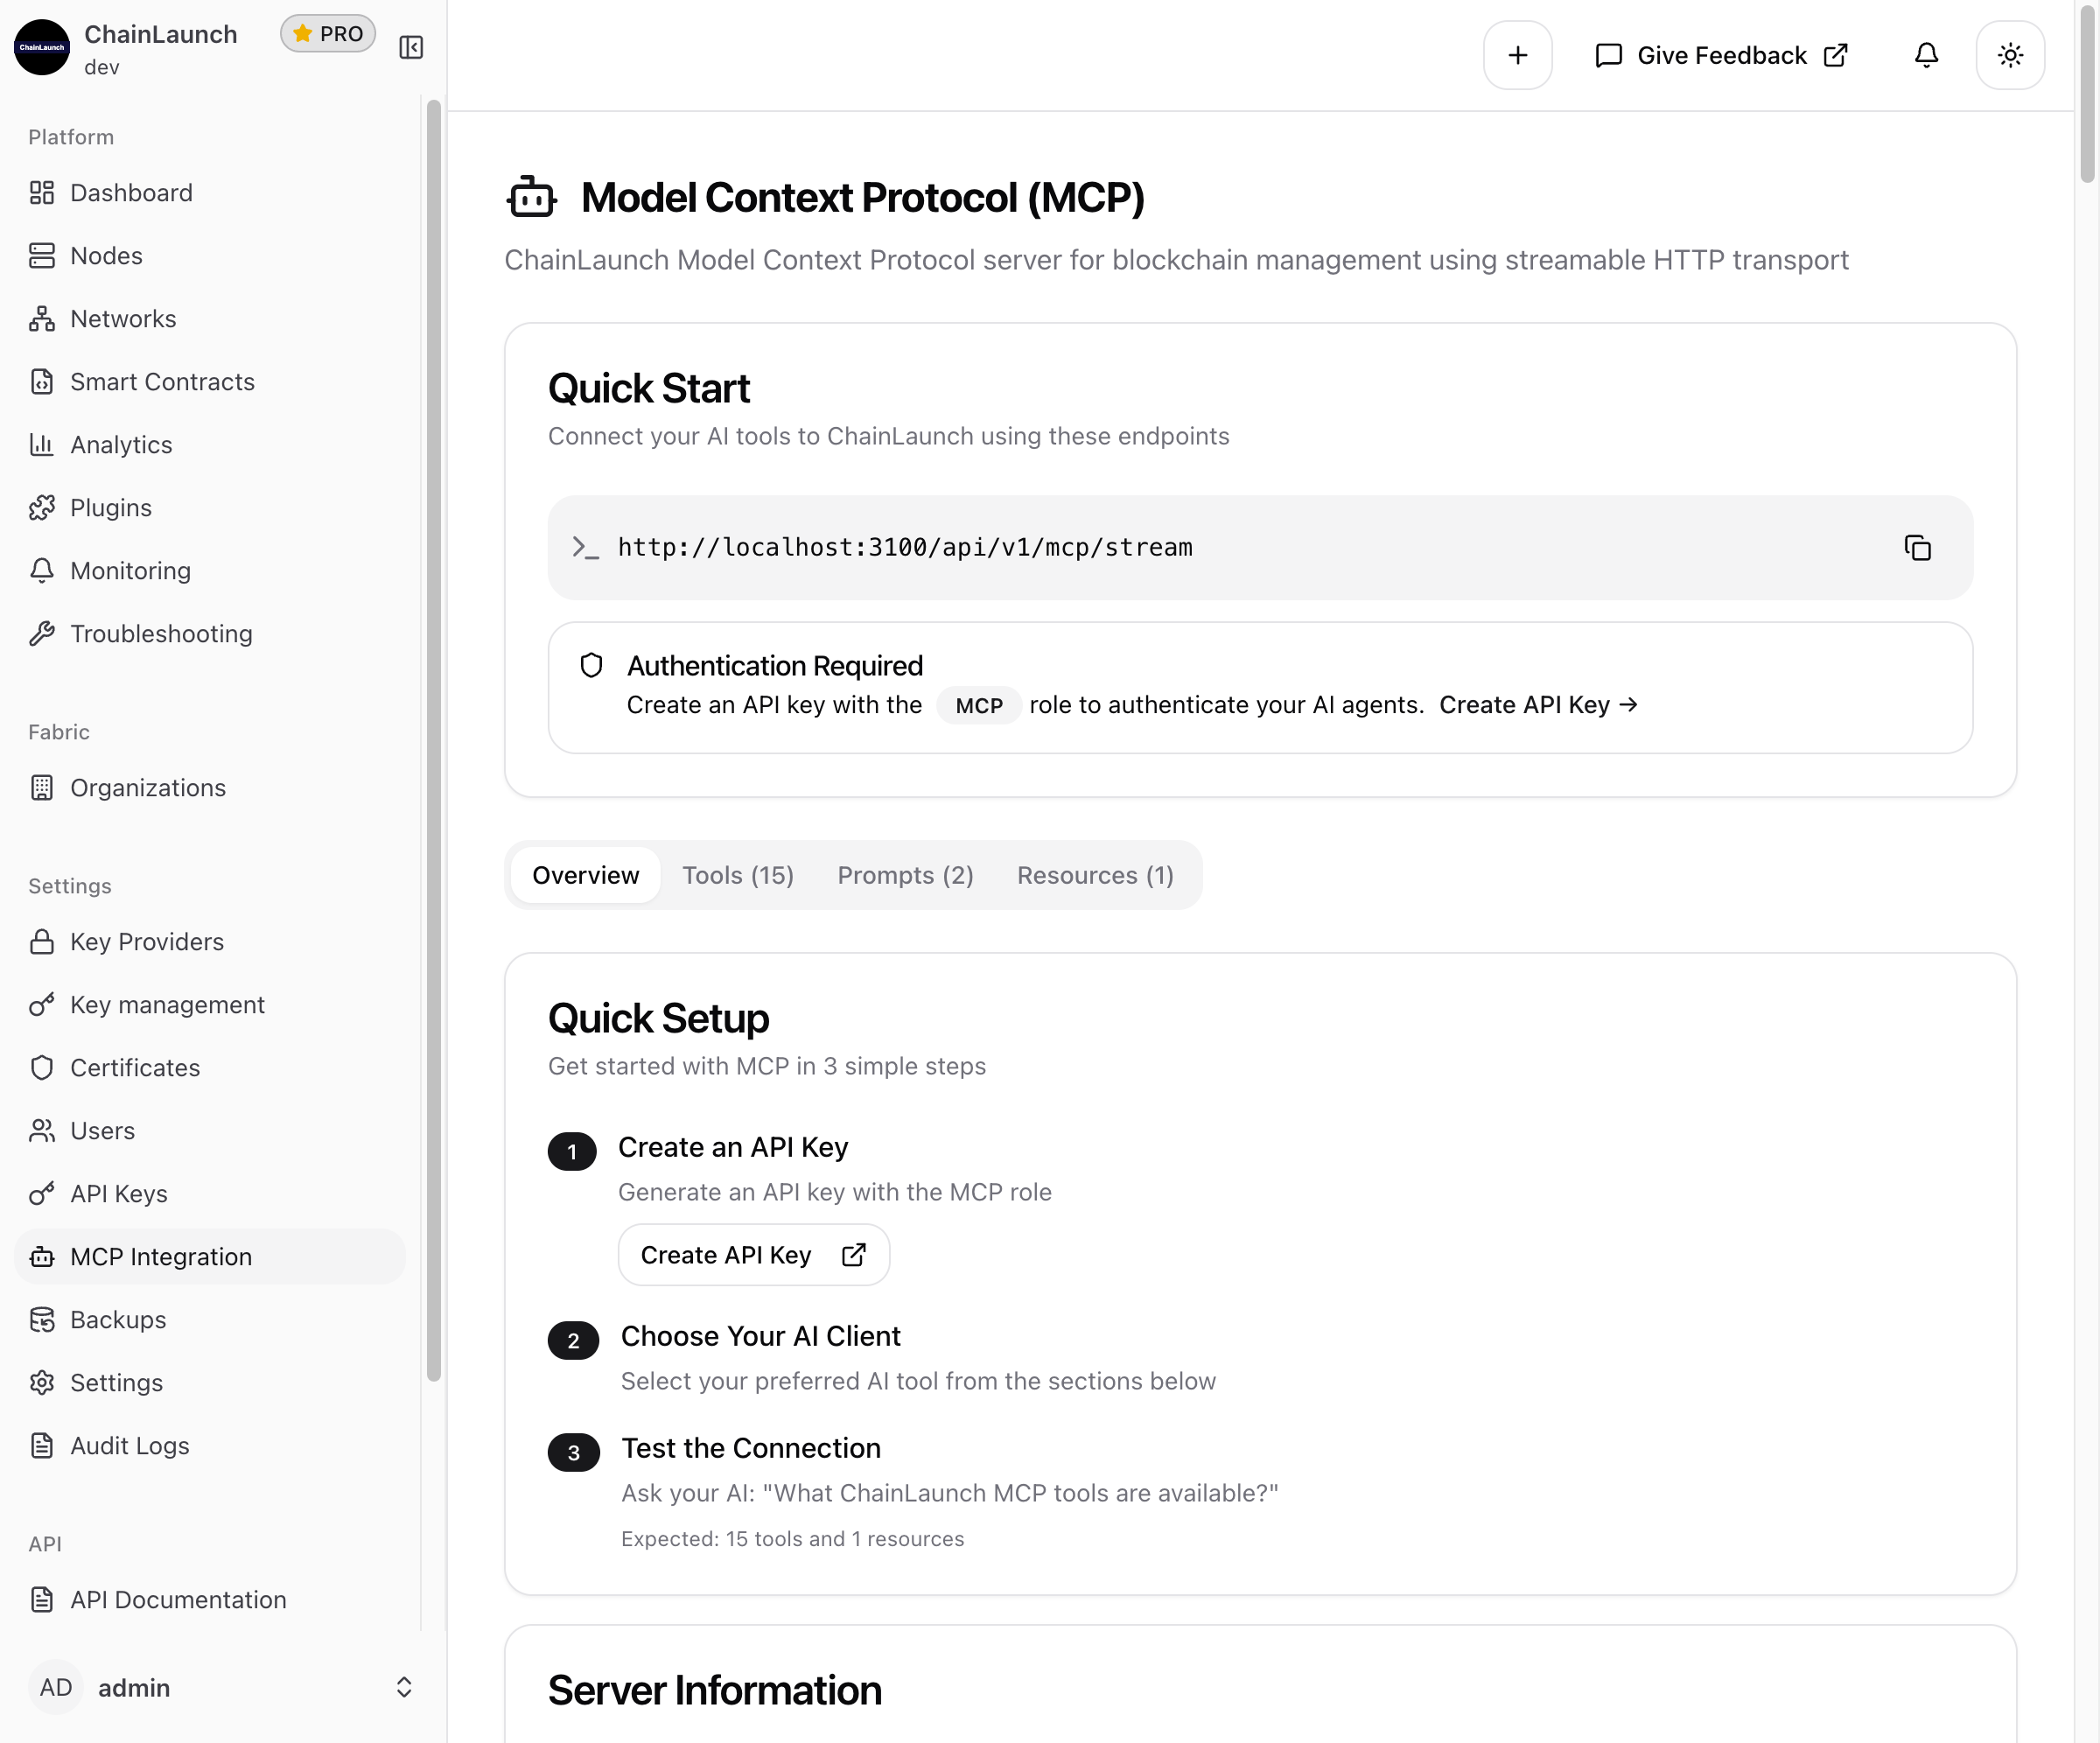
Quick Start
Prerequisites
- ChainLaunch running and accessible
- An API key with the MCP role (see API Keys)
- Your preferred AI tool installed
Setup Steps
- Create an API Key: Generate an API key with the MCP role
- Choose Your AI Client: Select from the options below
- Test the Connection: Ask your AI: "What ChainLaunch MCP tools are available?"
Expected response: 15 tools and 1 resource
MCP Endpoint
http://localhost:8100/api/v1/mcp/stream
Replace localhost:8100 with your ChainLaunch server address in production.
Client Setup Instructions
CLI Tools
Claude Code (Anthropic)
Claude Code is the official CLI tool from Anthropic with native MCP support.
claude mcp add chainlaunch \
  --url http://localhost:8100/api/v1/mcp/stream \
  --header "Authorization: Bearer YOUR_API_KEY"
Verification:
claude mcp list
Amazon Q Developer
q mcp add chainlaunch \
  --url "http://localhost:8100/api/v1/mcp/stream" \
  --header "Authorization: Bearer YOUR_API_KEY"
Code Editors
VS Code
Add to your MCP settings (.vscode/settings.json or global settings):
{
  "mcpServers": {
    "chainlaunch": {
      "command": "curl",
      "args": [
        "-X", "GET",
        "-H", "Authorization: Bearer YOUR_API_KEY",
        "http://localhost:8100/api/v1/mcp/stream"
      ]
    }
  }
}
Cursor
- Open Settings → MCP
- Click Add new server
- Configure:
| Field | Value |
|---|---|
| Name | chainlaunch |
| Type | url |
| URL | http://localhost:8100/api/v1/mcp/stream |
| Headers | Authorization: Bearer YOUR_API_KEY |
Windsurf
Add to your MCP configuration:
{
  "mcpServers": {
    "chainlaunch": {
      "command": "npx",
      "args": ["@modelcontextprotocol/server-fetch"],
      "env": {
        "MCP_SERVER_URL": "http://localhost:8100/api/v1/mcp/stream",
        "AUTHORIZATION": "Bearer YOUR_API_KEY"
      }
    }
  }
}
Continue.dev
Add to config.json:
{
  "experimental": {
    "modelContextProtocol": true
  },
  "mcpServers": {
    "chainlaunch": {
      "command": "npx",
      "args": ["@modelcontextprotocol/server-fetch"],
      "env": {
        "MCP_SERVER_URL": "http://localhost:8100/api/v1/mcp/stream",
        "AUTHORIZATION": "Bearer YOUR_API_KEY"
      }
    }
  }
}
Zed
- Install the MCP extension from Extensions
- Add to
settings.json:
{
  "language_models": {
    "chainlaunch": {
      "mcp_servers": {
        "chainlaunch": {
          "command": "npx",
          "args": ["@modelcontextprotocol/server-fetch"],
          "env": {
            "MCP_SERVER_URL": "http://localhost:8100/api/v1/mcp/stream",
            "AUTHORIZATION": "Bearer YOUR_API_KEY"
          }
        }
      }
    }
  }
}
AI Assistants
Claude Desktop
Add to your Claude Desktop config file:
macOS: ~/Library/Application Support/Claude/claude_desktop_config.json
Windows: %APPDATA%\Claude\claude_desktop_config.json
{
  "mcpServers": {
    "chainlaunch": {
      "command": "npx",
      "args": ["@modelcontextprotocol/server-fetch"],
      "env": {
        "MCP_SERVER_URL": "http://localhost:8100/api/v1/mcp/stream",
        "AUTHORIZATION": "Bearer YOUR_API_KEY"
      }
    }
  }
}
Goose
- Open Advanced settings → Extensions
- Configure:
| Field | Value |
|---|---|
| Name | ChainLaunch |
| Type | HTTP |
| URL | http://localhost:8100/api/v1/mcp/stream |
| Headers | Authorization: Bearer YOUR_API_KEY |
Gemini CLI
Add to settings.json:
{
  "mcpServers": {
    "chainlaunch": {
      "command": "npx",
      "args": ["@modelcontextprotocol/server-fetch"],
      "env": {
        "MCP_SERVER_URL": "http://localhost:8100/api/v1/mcp/stream",
        "AUTHORIZATION": "Bearer YOUR_API_KEY"
      }
    }
  }
}
Development Tools
Cline/Clineage
Install from VS Code marketplace, then configure:
{
  "mcpServers": {
    "chainlaunch": {
      "command": "npx",
      "args": ["@modelcontextprotocol/server-fetch"],
      "env": {
        "MCP_SERVER_URL": "http://localhost:8100/api/v1/mcp/stream",
        "AUTHORIZATION": "Bearer YOUR_API_KEY"
      }
    }
  }
}
LM Studio
- Go to Program → Install
- Edit
mcp.json:
{
  "chainlaunch": {
    "command": "npx",
    "args": ["@modelcontextprotocol/server-fetch"],
    "env": {
      "MCP_SERVER_URL": "http://localhost:8100/api/v1/mcp/stream",
      "AUTHORIZATION": "Bearer YOUR_API_KEY"
    }
  }
}
OpenCode
Add to ~/.config/opencode/opencode.json:
{
  "$schema": "https://opencode.ai/config.json",
  "mcp": {
    "chainlaunch": {
      "type": "remote",
      "url": "http://localhost:8100/api/v1/mcp/stream",
      "headers": {
        "Authorization": "Bearer YOUR_API_KEY"
      },
      "enabled": true
    }
  }
}
Desktop & Mobile Apps
BoltAI
- Open Settings → MCP Servers
- Configure:
| Field | Value |
|---|---|
| Name | ChainLaunch |
| Server URL | http://localhost:8100/api/v1/mcp/stream |
| API Key | YOUR_API_KEY |
Perplexity Desktop
- Open Pro features → Integrations
- Configure:
| Field | Value |
|---|---|
| Integration Type | MCP Server |
| Endpoint | http://localhost:8100/api/v1/mcp/stream |
| Auth Token | YOUR_API_KEY |
IDEs & Enterprise
JetBrains AI Assistant
- Open AI Assistant settings → MCP
- Configure:
| Field | Value |
|---|---|
| Server URL | http://localhost:8100/api/v1/mcp/stream |
| Auth Header | Authorization: Bearer YOUR_API_KEY |
| Transport | HTTP |
Visual Studio 2022
- Open GitHub Copilot → MCP servers
- Configure:
| Field | Value |
|---|---|
| Name | chainlaunch |
| Endpoint | http://localhost:8100/api/v1/mcp/stream |
| Headers | Authorization: Bearer YOUR_API_KEY |
Warp Terminal
- Open AI settings → MCP integration
- Configure:
| Field | Value |
|---|---|
| Server | chainlaunch |
| URL | http://localhost:8100/api/v1/mcp/stream |
| Auth | Bearer YOUR_API_KEY |
Direct HTTP Integration
For custom integrations or unsupported clients:
| Property | Value |
|---|---|
| Endpoint | http://localhost:8100/api/v1/mcp/stream |
| Method | GET/POST |
| Headers | Authorization: Bearer YOUR_API_KEY |
| Content-Type | application/json |
Available Tools
ChainLaunch MCP provides 15 tools for blockchain management:
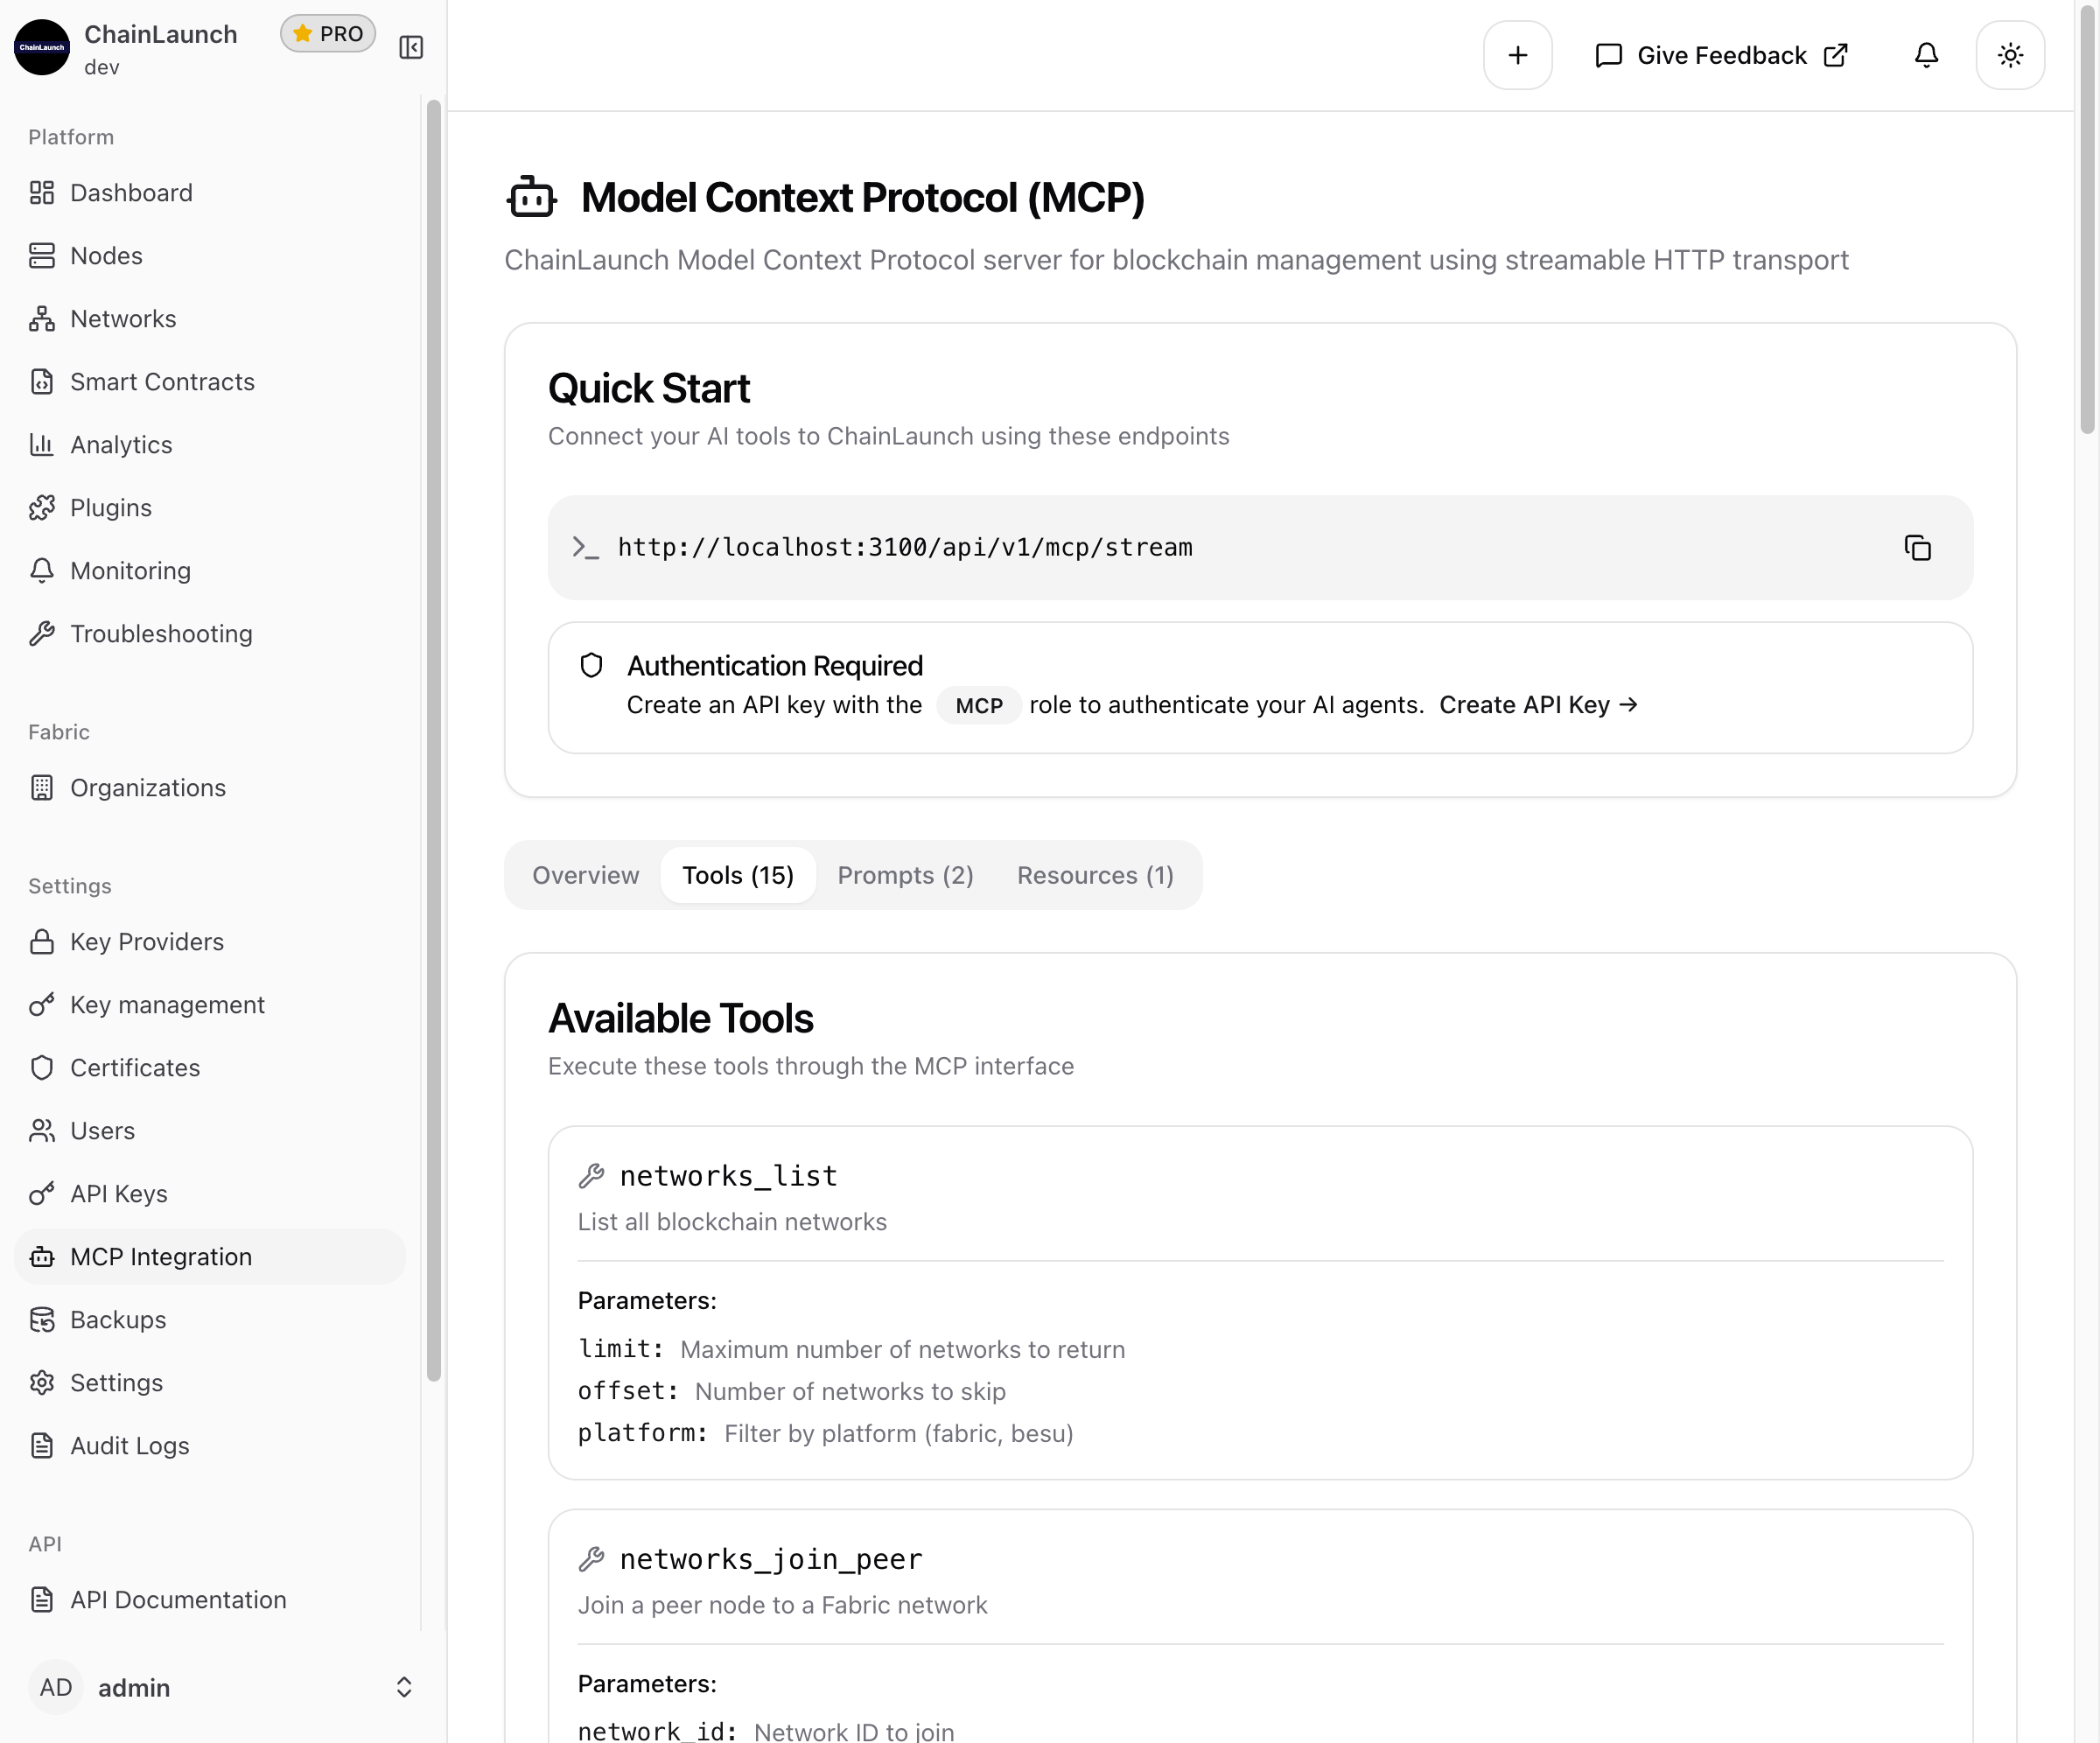
Network Management
| Tool | Description | Parameters |
|---|---|---|
networks_list | List all blockchain networks | limit, offset, platform |
networks_join_peer | Join a peer node to a Fabric network | network_id, peer_id |
networks_join_orderer | Join an orderer node to a Fabric network | network_id, orderer_id |
Node Management
| Tool | Description | Parameters |
|---|---|---|
nodes_list | List blockchain nodes | limit, offset, network_id, platform |
fabric_create_peer | Create a new Fabric peer node | name, msp_id, organization_id, external_endpoint |
fabric_create_orderer | Create a new Fabric orderer node | name, msp_id, organization_id, external_endpoint |
fabric_join_node | Join a node to a Fabric network | network_id, node_id, role |
Key Management
| Tool | Description | Parameters |
|---|---|---|
keys_list | List cryptographic keys | limit, offset |
keys_create | Create a new cryptographic key | name, algorithm, key_size |
Organization Management
| Tool | Description | Parameters |
|---|---|---|
fabric_create_org | Create a new Fabric organization | name, msp_id, organization_type |
fabric_add_org_to_network | Add organization to running network | network_id, organization_id |
Testnet Creation
| Tool | Description | Parameters |
|---|---|---|
testnet_create_fabric | Create a Fabric testnet | name, channel_name, consensus_type, peer_orgs_count, orderer_orgs_count, peers_per_org, mode |
testnet_create_besu | Create a Besu testnet with validators | name, nodes, prefix, version, provider_id, mode, initial_balances |
System
| Tool | Description | Parameters |
|---|---|---|
settings_list | List system settings | None |
system_info | Get system information and status | None |
Interactive Prompts
ChainLaunch MCP provides guided workflows for complex operations:

| Prompt | Description |
|---|---|
network_config | Generate blockchain network configuration |
deploy_contract | Generate smart contract deployment instructions |
Available Resources
Subscribe to real-time data streams:
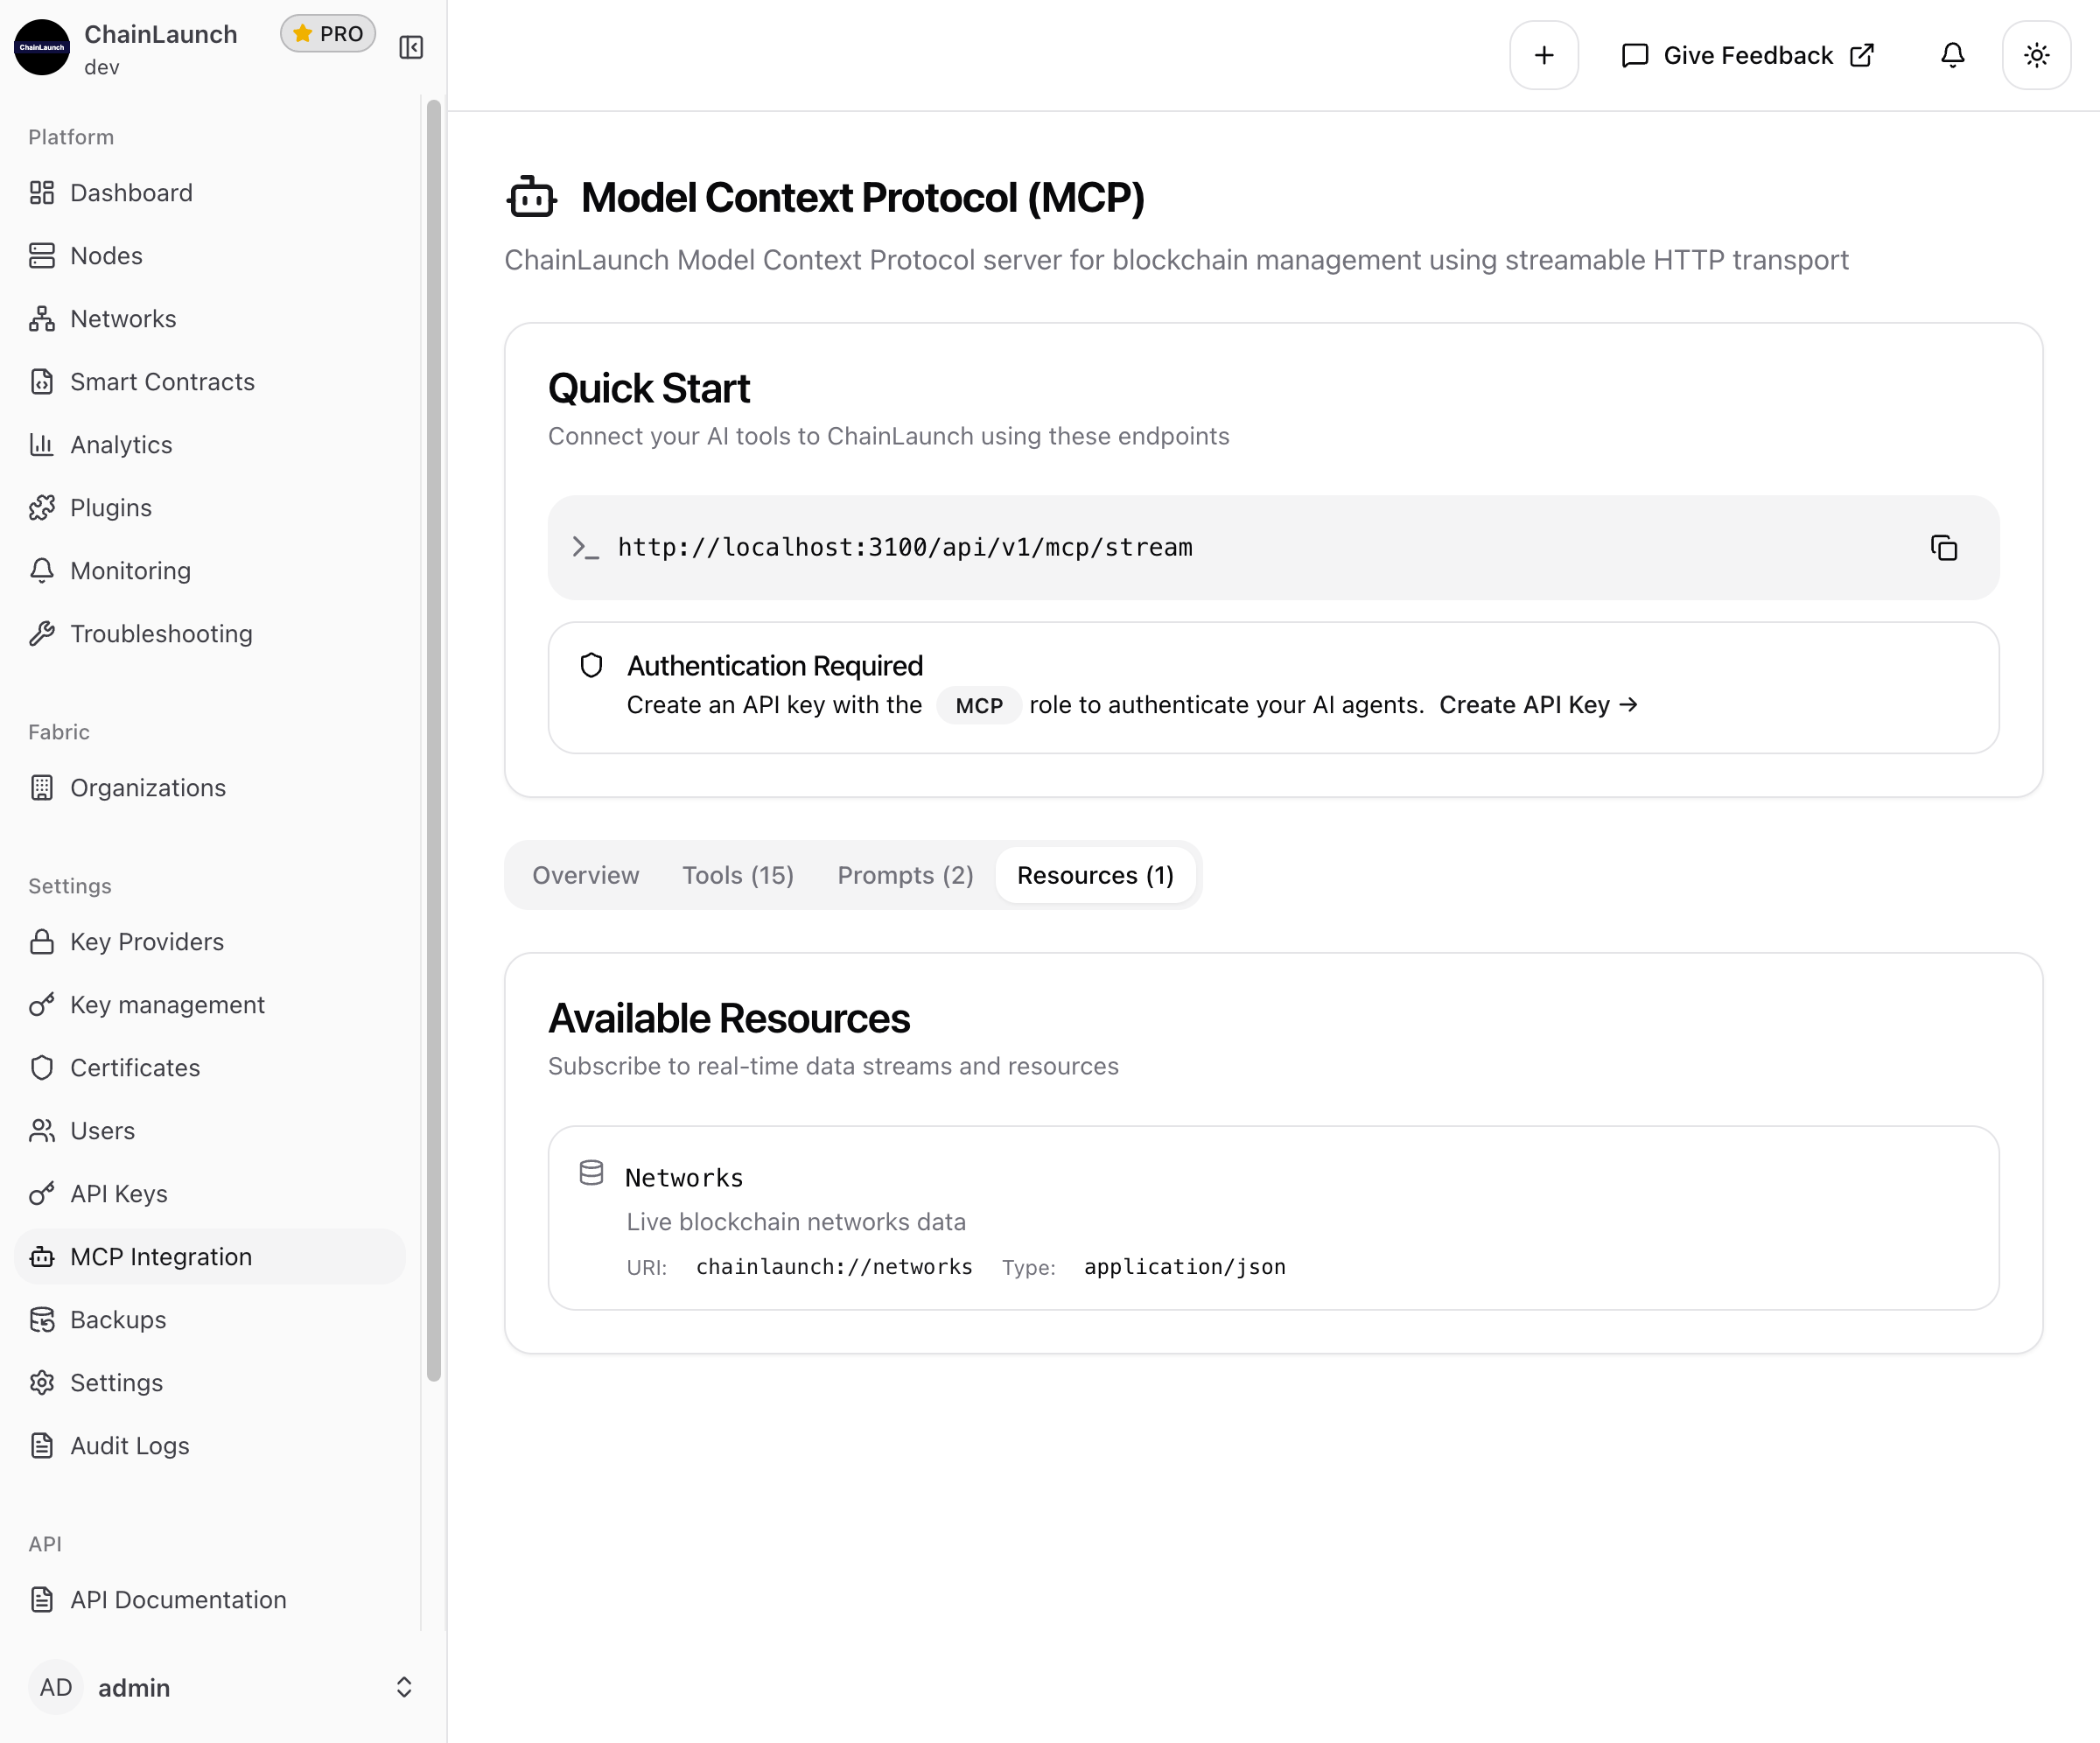
| Resource | URI | Type | Description |
|---|---|---|---|
| Networks | chainlaunch://networks | application/json | Live blockchain networks data |
Authentication
MCP requires authentication using API keys. The following roles are supported:
| Role | Access Level |
|---|---|
| ADMIN | Full access to all MCP tools |
| OPERATOR | Create/manage networks and nodes |
| VIEWER | Read-only access |
| MCP | Specialized access for AI agents (recommended) |
Tip: Use the MCP role for AI integrations. It provides the optimal permission set for AI agent operations.
Creating an MCP API Key
- Navigate to Settings → API Keys
- Click Create API Key
- Select the MCP role
- Copy the generated key immediately (it won't be shown again)
For detailed instructions, see API Keys.
Example Usage
Once connected, you can interact with ChainLaunch through natural language:
List Networks
"Show me all the blockchain networks"
Create a Fabric Testnet
"Create a Fabric testnet with 2 peer organizations and 3 orderers using etcdraft consensus"
Get System Status
"What's the current system status?"
Create a Key
"Create a new ECDSA key named 'production-key'"
Deploy Besu Network
"Create a Besu testnet with 4 validators"
Troubleshooting
Connection Issues
| Issue | Solution |
|---|---|
| Connection refused | Verify ChainLaunch is running and accessible |
| 401 Unauthorized | Check your API key is valid and has the correct role |
| 403 Forbidden | Ensure your API key has MCP or sufficient permissions |
| Timeout errors | Check network connectivity; increase timeout settings |
Common Problems
"MCP server not found"
- Verify the endpoint URL is correct
- Ensure ChainLaunch is running on the expected port
- Check firewall settings
"Authentication failed"
- Regenerate your API key
- Verify the key hasn't expired
- Ensure the Authorization header format is correct:
Bearer YOUR_API_KEY
"Tool not available"
- Check your API key has sufficient permissions
- Verify ChainLaunch version supports the requested tool
- Try refreshing the MCP connection
Testing the Connection
Use curl to verify the MCP endpoint is accessible:
curl -X GET "http://localhost:8100/api/v1/mcp/stream" \
  -H "Authorization: Bearer YOUR_API_KEY" \
  -H "Content-Type: application/json"
A successful response indicates the MCP server is working correctly.
Best Practices
Security
- Use dedicated API keys: Create separate keys for each AI tool
- Use the MCP role: It provides appropriate permissions for AI operations
- Set expiration dates: Rotate keys regularly
- Monitor usage: Review API key activity in Audit Logs
Performance
- Use specific queries: Be precise in your requests to reduce response time
- Leverage prompts: Use interactive prompts for complex multi-step operations
- Cache responses: For read-heavy operations, implement caching in your workflow
Development
- Start with Viewer role: Test with read-only access before enabling write operations
- Use testnet tools: Create testnets for development and testing
- Review tool parameters: Check required vs optional parameters before calling tools
Additional Resources
- API Keys Documentation - Create and manage API keys
- Getting Started - Initial ChainLaunch setup