API Keys
Introduction
API keys provide programmatic access to ChainLaunch resources, enabling automation, integrations, and secure access for external applications. This guide explains how to create, manage, and use API keys effectively.
Overview
API keys are authentication tokens that allow applications to interact with the ChainLaunch API without requiring user credentials. Each key can be assigned specific permissions through predefined roles or custom permission sets, ensuring secure and controlled access to your blockchain infrastructure.
Key Features
- Role-based access control: Assign predefined roles or customize permissions
- Expiration management: Set automatic expiration dates for enhanced security
- Audit trail: All API key usage is logged for compliance and monitoring
- Revocation: Instantly revoke compromised or unused keys
Prerequisites
- Access to ChainLaunch with Administrator privileges
- Understanding of the resources you need to access programmatically
Creating an API Key
Step 1: Navigate to API Keys
- In the ChainLaunch sidebar, click on Settings
- Select API Keys from the menu
You'll see the API Keys management page where all your existing keys are listed.
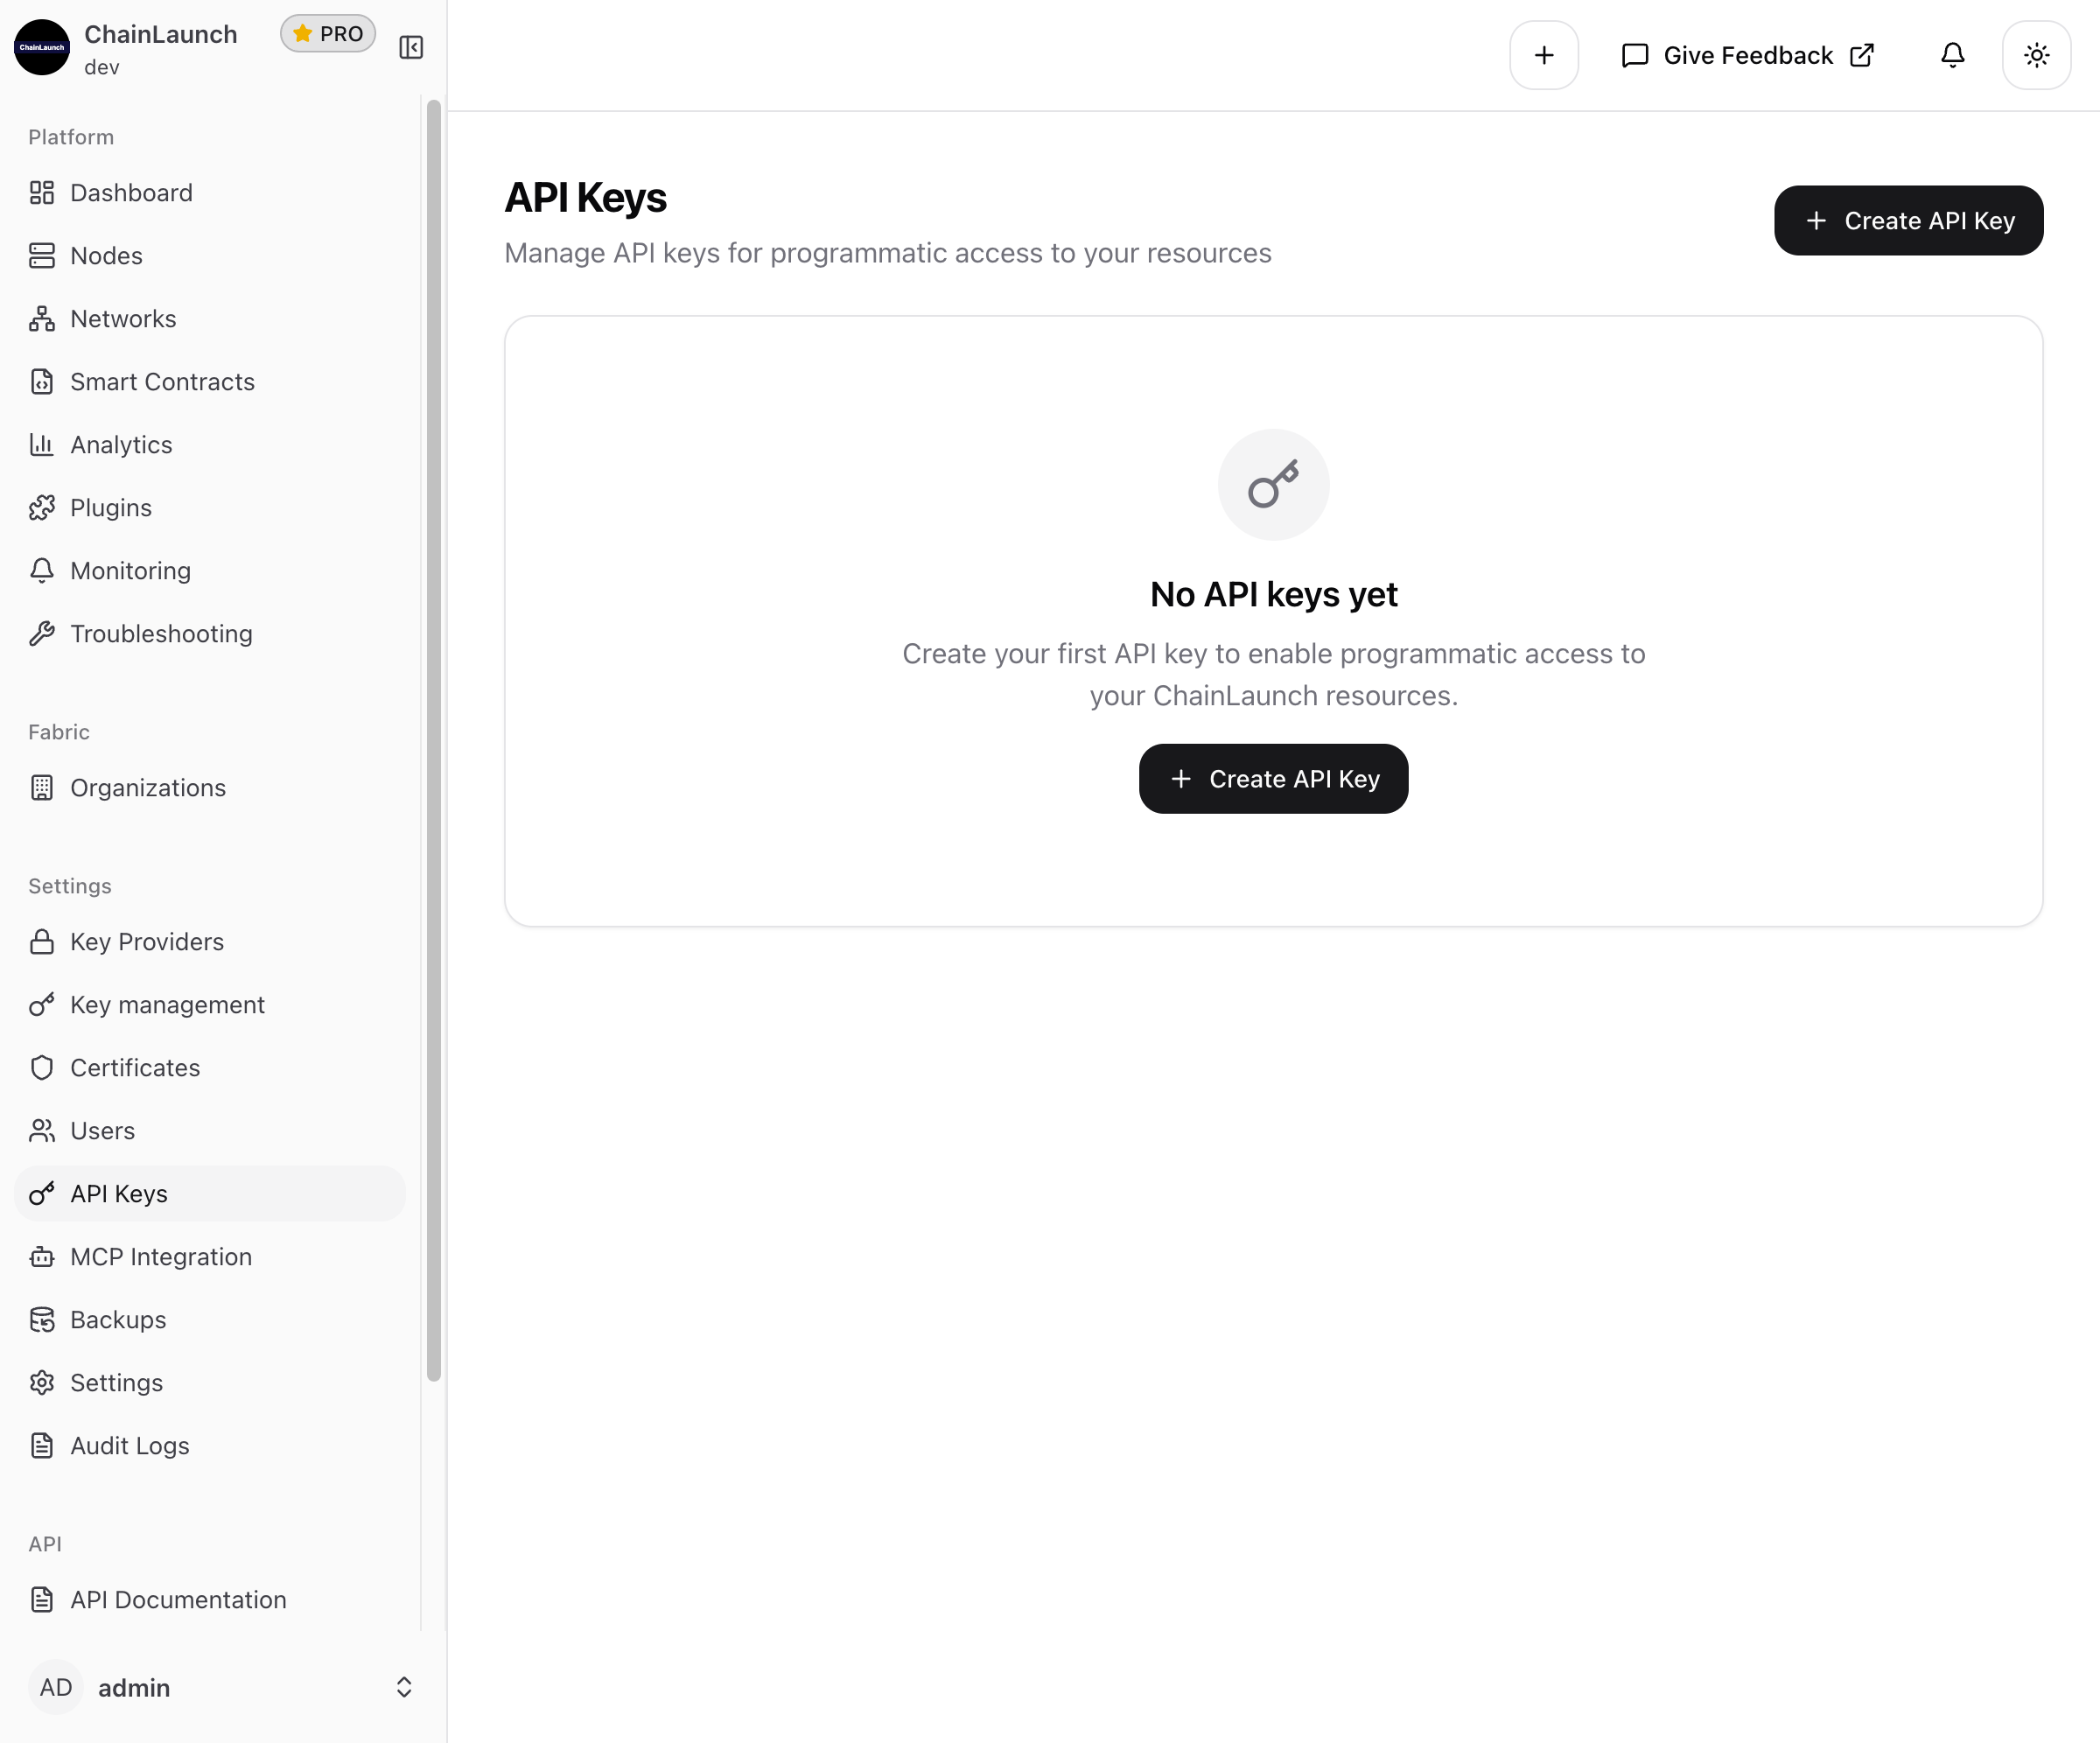
Step 2: Click "Create API Key"
Click the Create API Key button in the top-right corner of the page.
Step 3: Configure Basic Information
You'll see the API key creation form with two sections: Basic Information and Permissions.
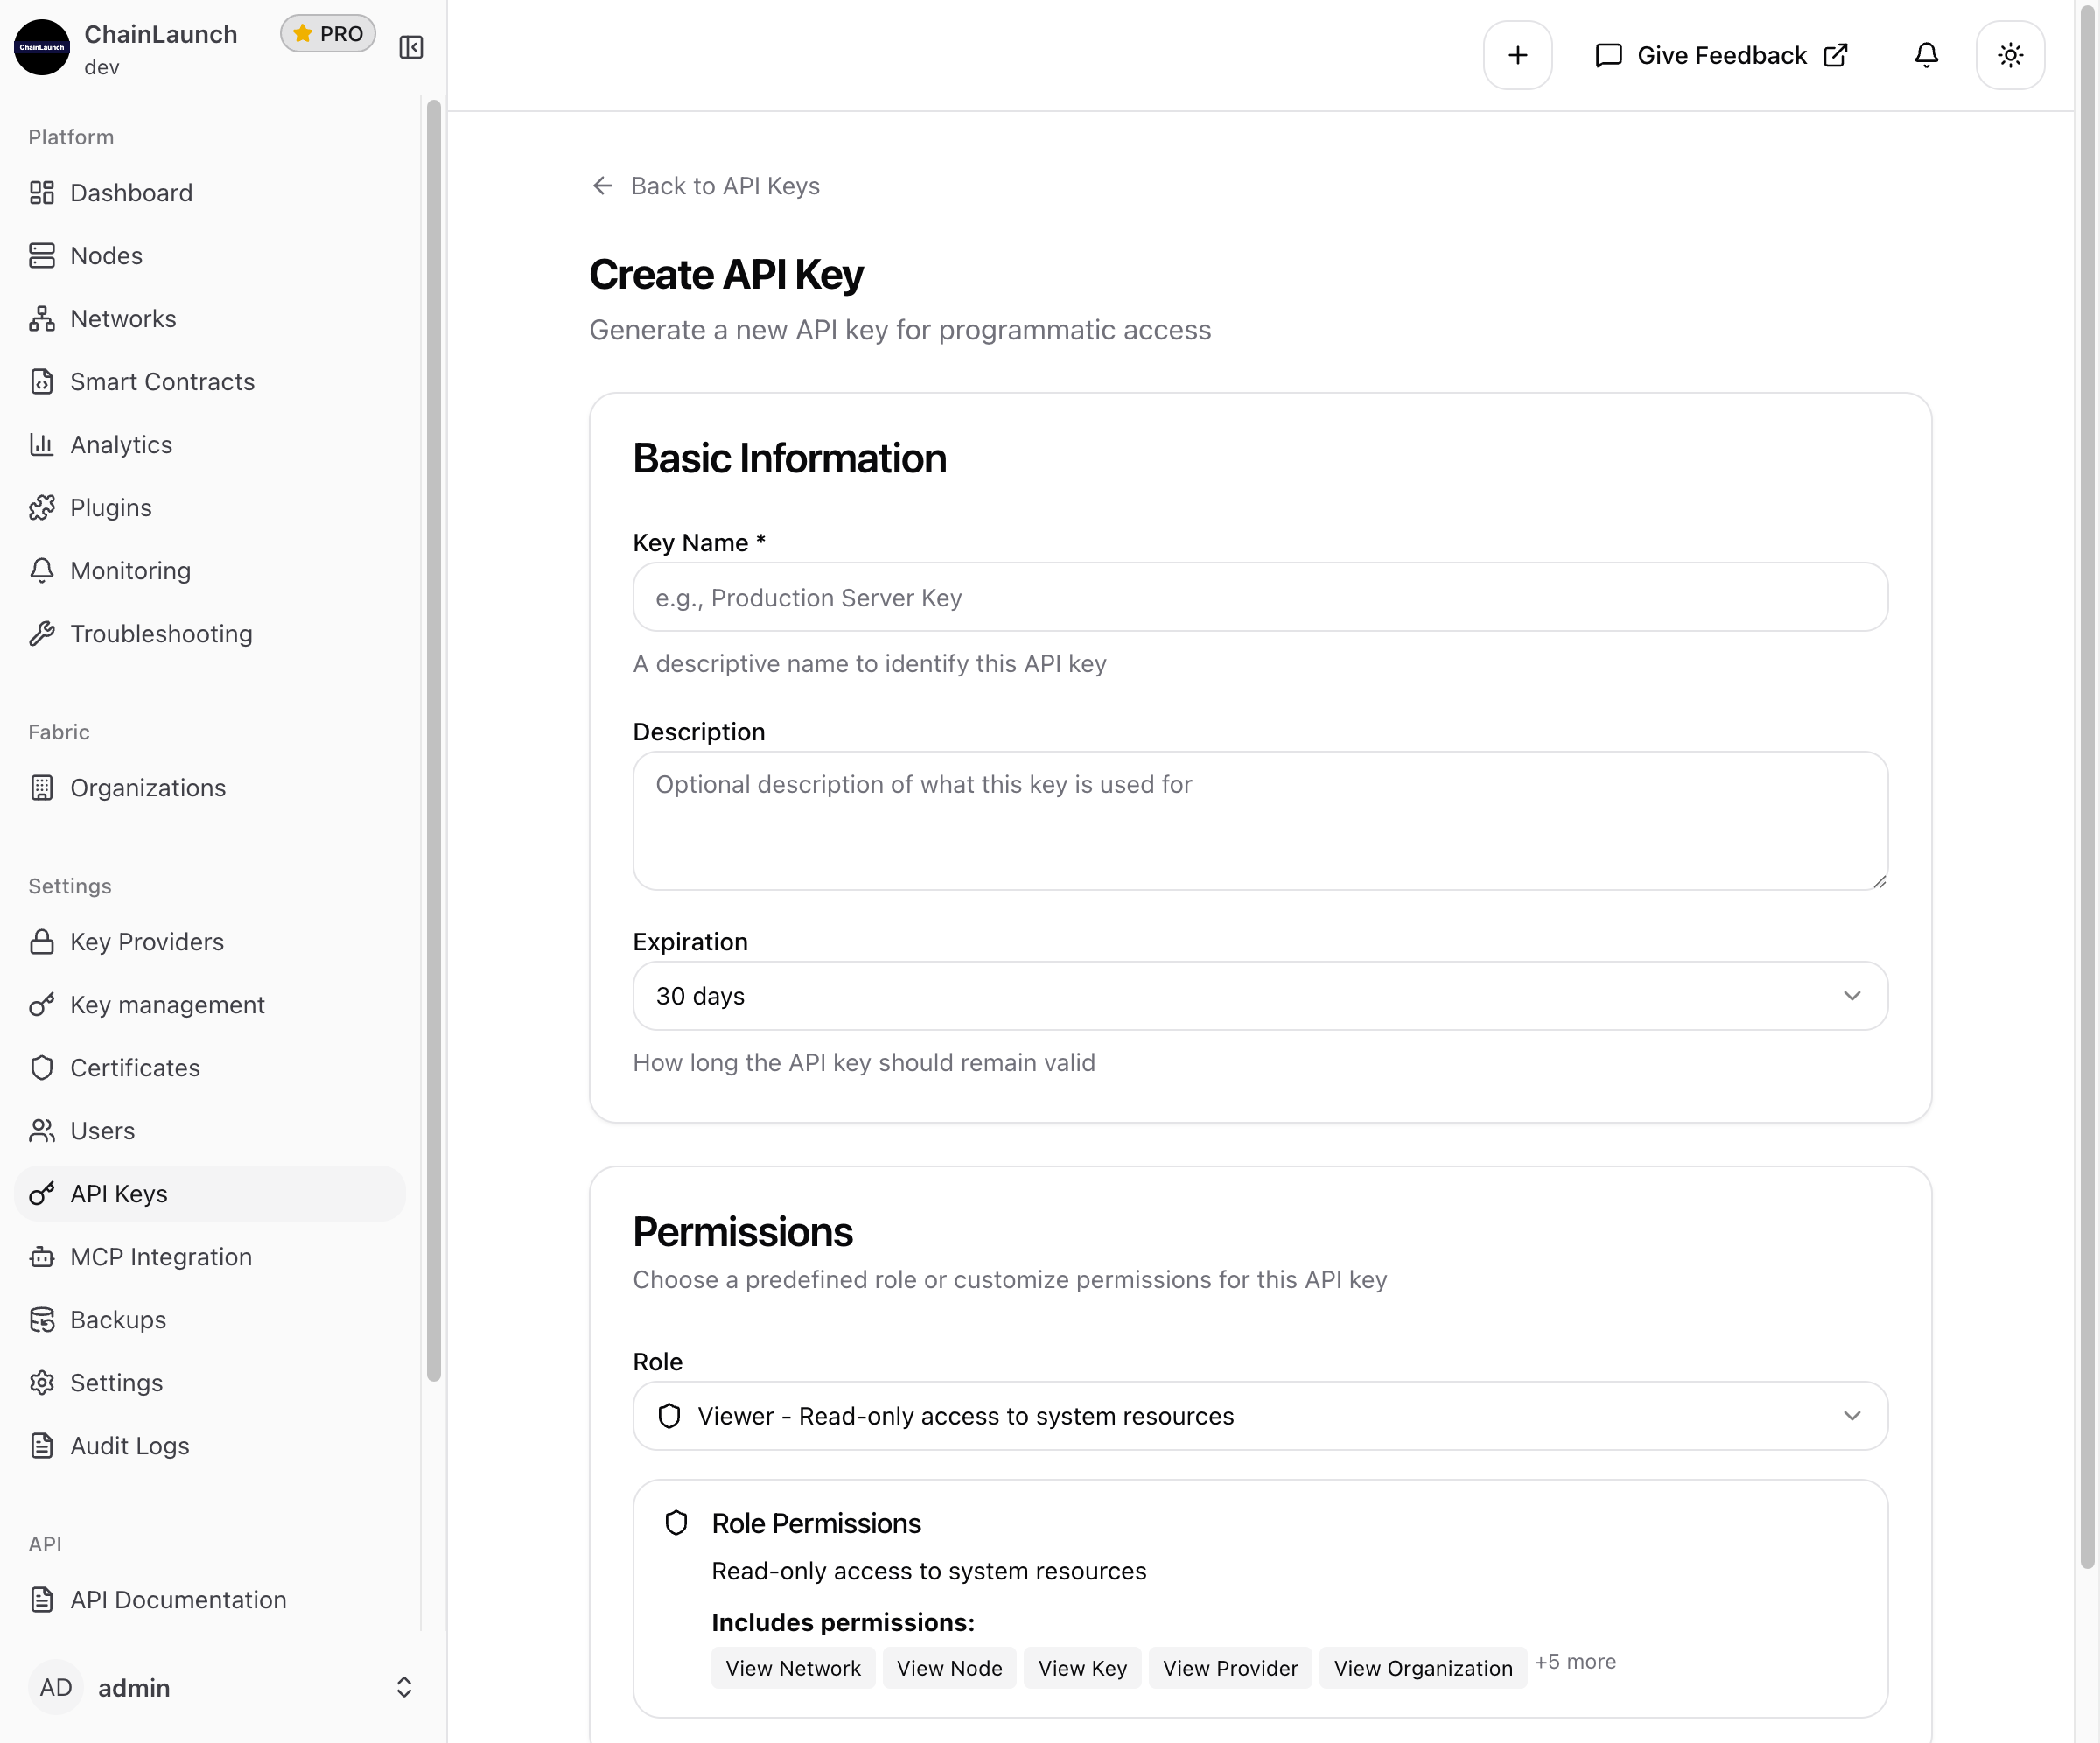
Fill in the following fields:
| Field | Required | Description |
|---|---|---|
| Key Name | Yes | A descriptive name to identify this API key (e.g., "Production Server Key", "CI/CD Pipeline") |
| Description | No | Optional details about the key's purpose or usage |
| Expiration | Yes | How long the API key remains valid |
Step 4: Select Expiration Period
Click on the Expiration dropdown to choose how long your API key should remain valid:

Expiration Options
| Option | Use Case |
|---|---|
| 7 days | Short-term testing or temporary access |
| 30 days | Standard development and staging environments |
| 90 days | Production environments with regular rotation |
| 1 year | Long-running integrations with established security |
| Never expires | Permanent integrations (use with caution) |
Step 5: Select Permissions
Choose a role that determines what the API key can access. Click on the Role dropdown to see all available options:
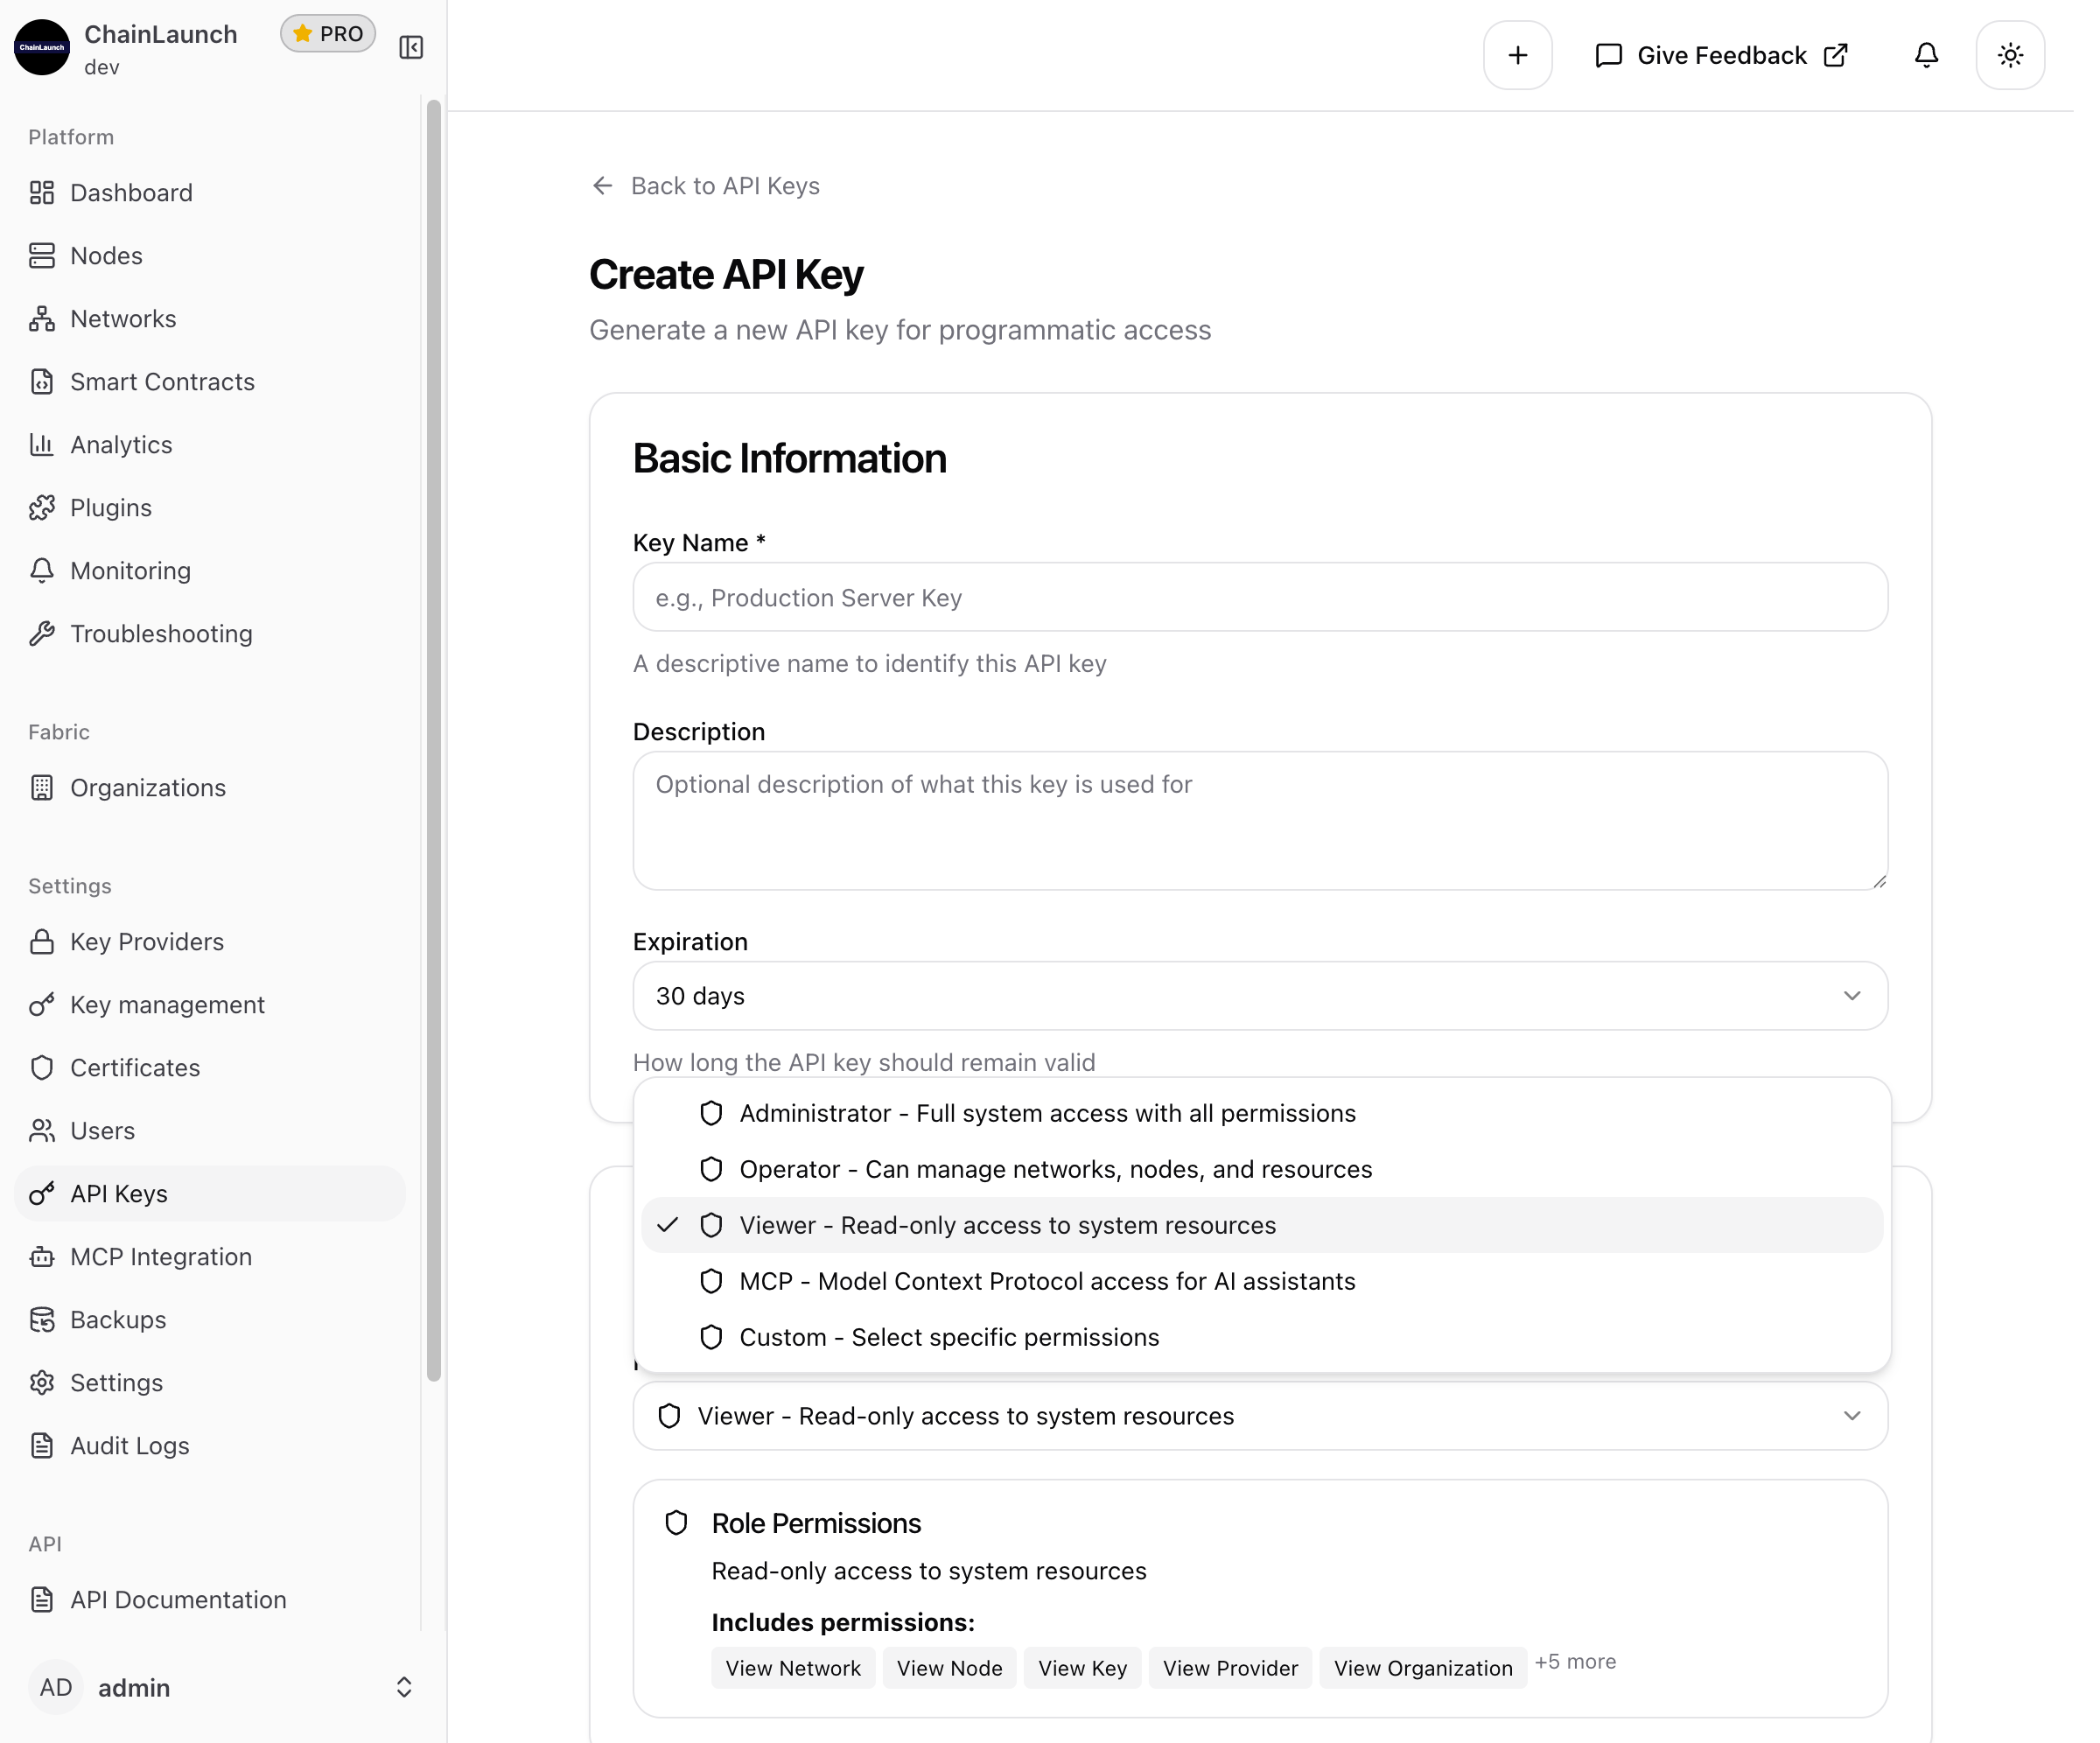
Available Roles
| Role | Description | Permissions |
|---|---|---|
| Administrator | Full system access with all permissions | Complete access to all resources and operations |
| Operator | Can manage networks, nodes, and resources | Create, update, delete networks and nodes; manage deployments |
| Viewer | Read-only access to system resources | View networks, nodes, keys, providers, organizations, and settings |
| MCP | Model Context Protocol access for AI assistants | Specialized permissions for AI agent integrations |
| Custom | Select specific permissions | Fine-grained control over individual permissions |
Role Permission Details
Viewer Role includes:
- View Network
- View Node
- View Key
- View Provider
- View Organization
- View Settings
- View Backups
- View Audit Logs
- View Certificates
- View Smart Contracts
Operator Role includes:
- All Viewer permissions, plus:
- Create/Update/Delete Networks
- Create/Update/Delete Nodes
- Manage Smart Contracts
- Execute Backups
- Manage Certificates
Administrator Role includes:
- All Operator permissions, plus:
- User Management
- API Key Management
- System Settings
- Key Provider Configuration
- Audit Log Management
MCP Role includes:
- Specialized permissions for Model Context Protocol
- Network and node information access
- Key management operations
- Settings retrieval
- System monitoring capabilities
Step 6: Create the Key
Once you've filled in the form, it should look similar to this:
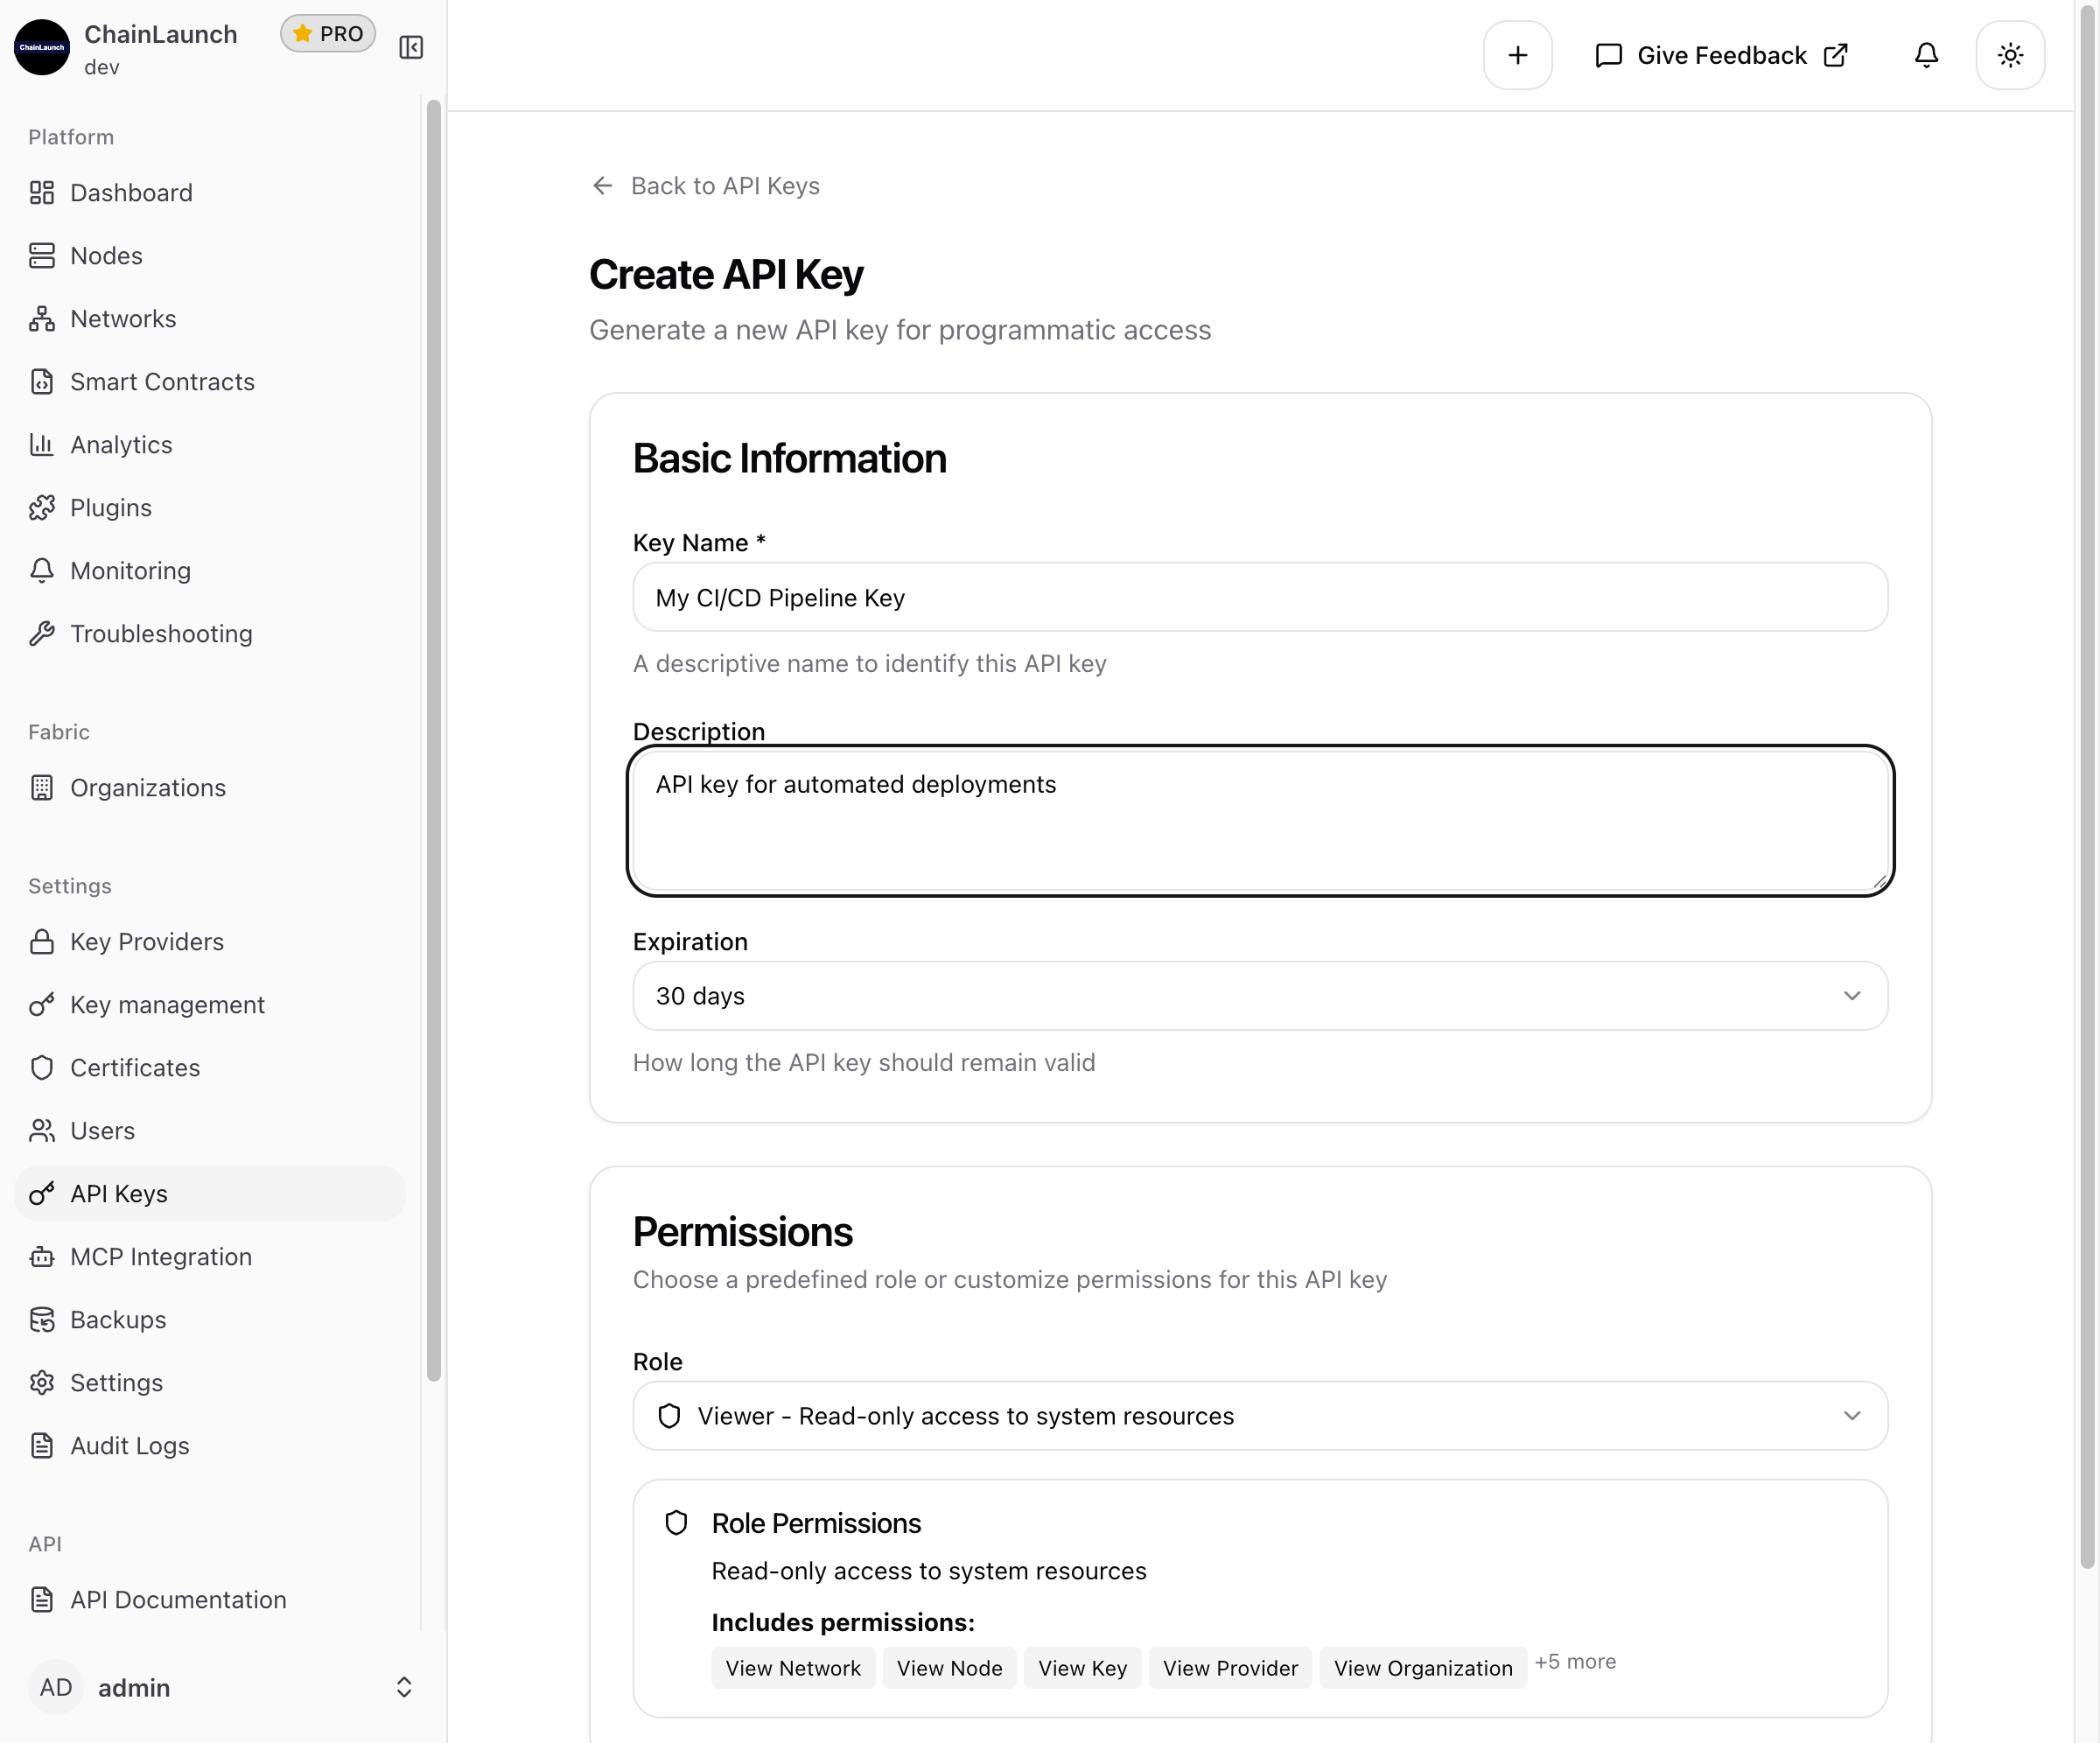
- Review your configuration
- Click Create API Key
Step 7: Copy Your API Key
After successful creation, you'll see a confirmation screen with your new API key:
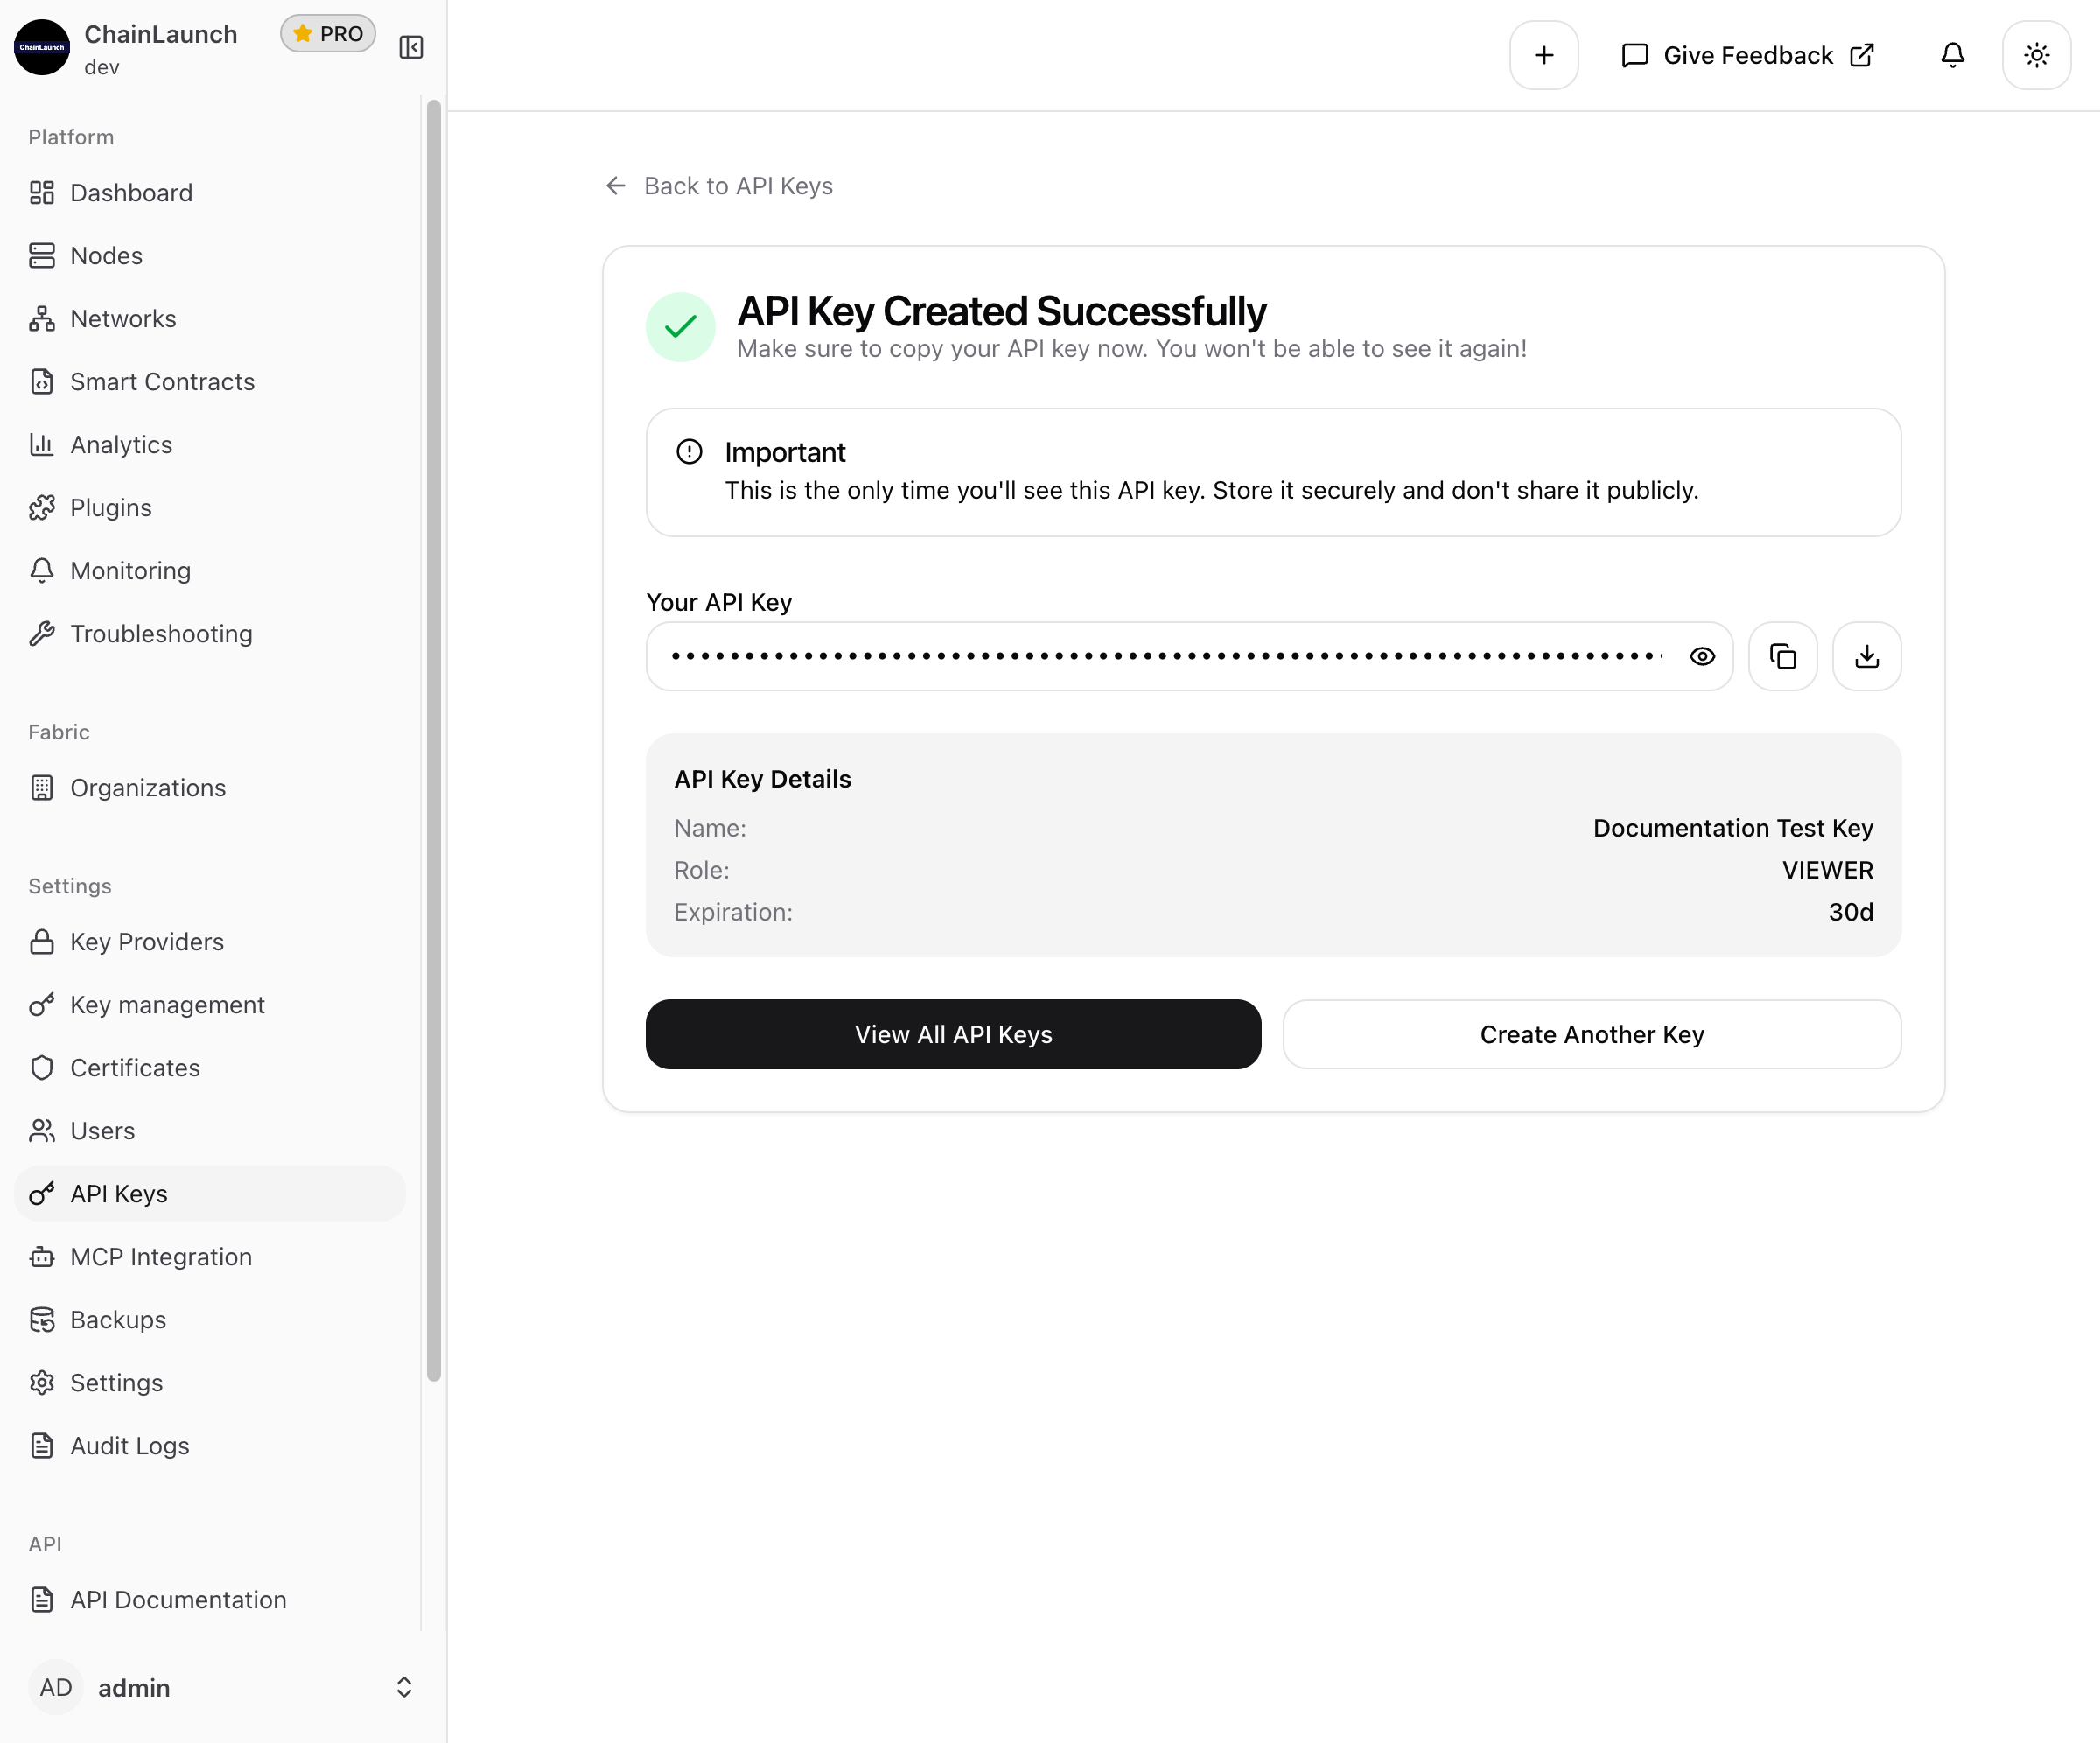
Important: Copy and securely store the API key immediately. It will only be shown once! Use the copy button to ensure you capture the entire key.
The confirmation screen shows:
- Your full API key (masked by default, click the eye icon to reveal)
- Copy and download buttons
- Key details summary (Name, Role, Expiration)
Managing API Keys
Viewing Existing Keys
Navigate to Settings > API Keys to see all your API keys in a table format:
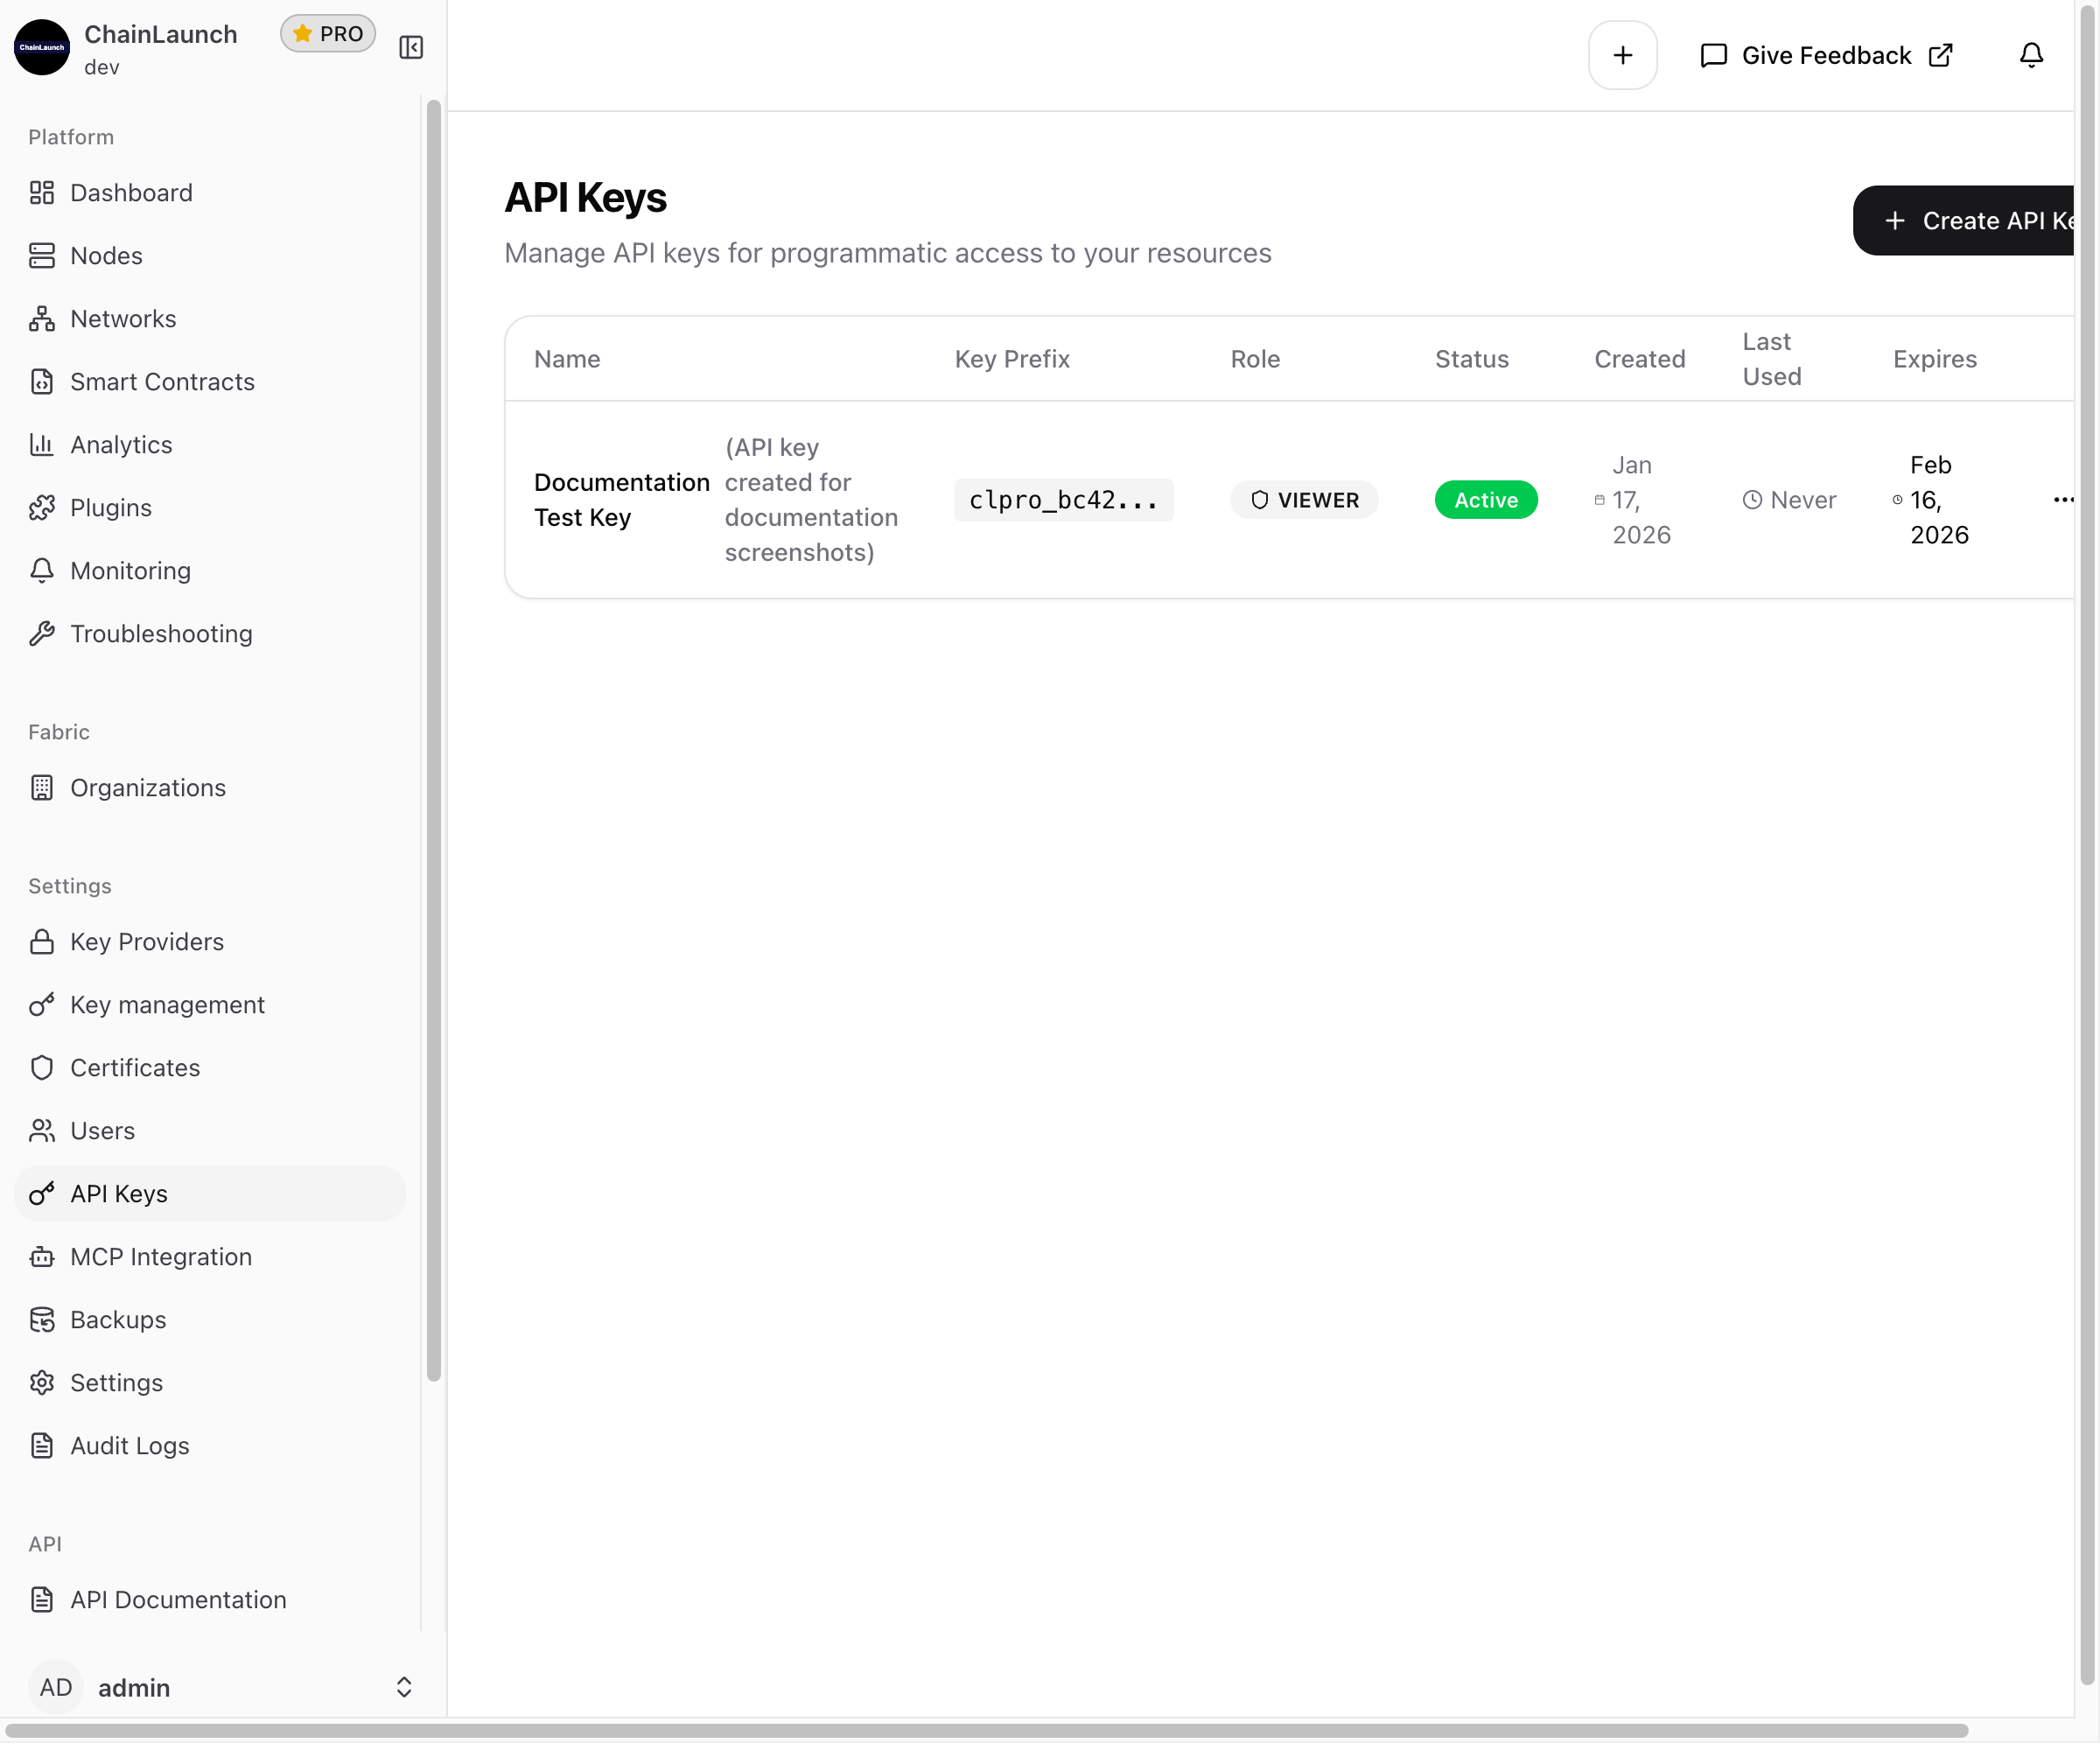
The table displays:
- Name: Key name and description
- Key Prefix: First characters of the key for identification
- Role: Assigned permission role
- Status: Active or Inactive
- Created: Creation date
- Last Used: When the key was last used for authentication
- Expires: Expiration date
API Key Actions
Click the actions menu (three dots) on any key to see available options:
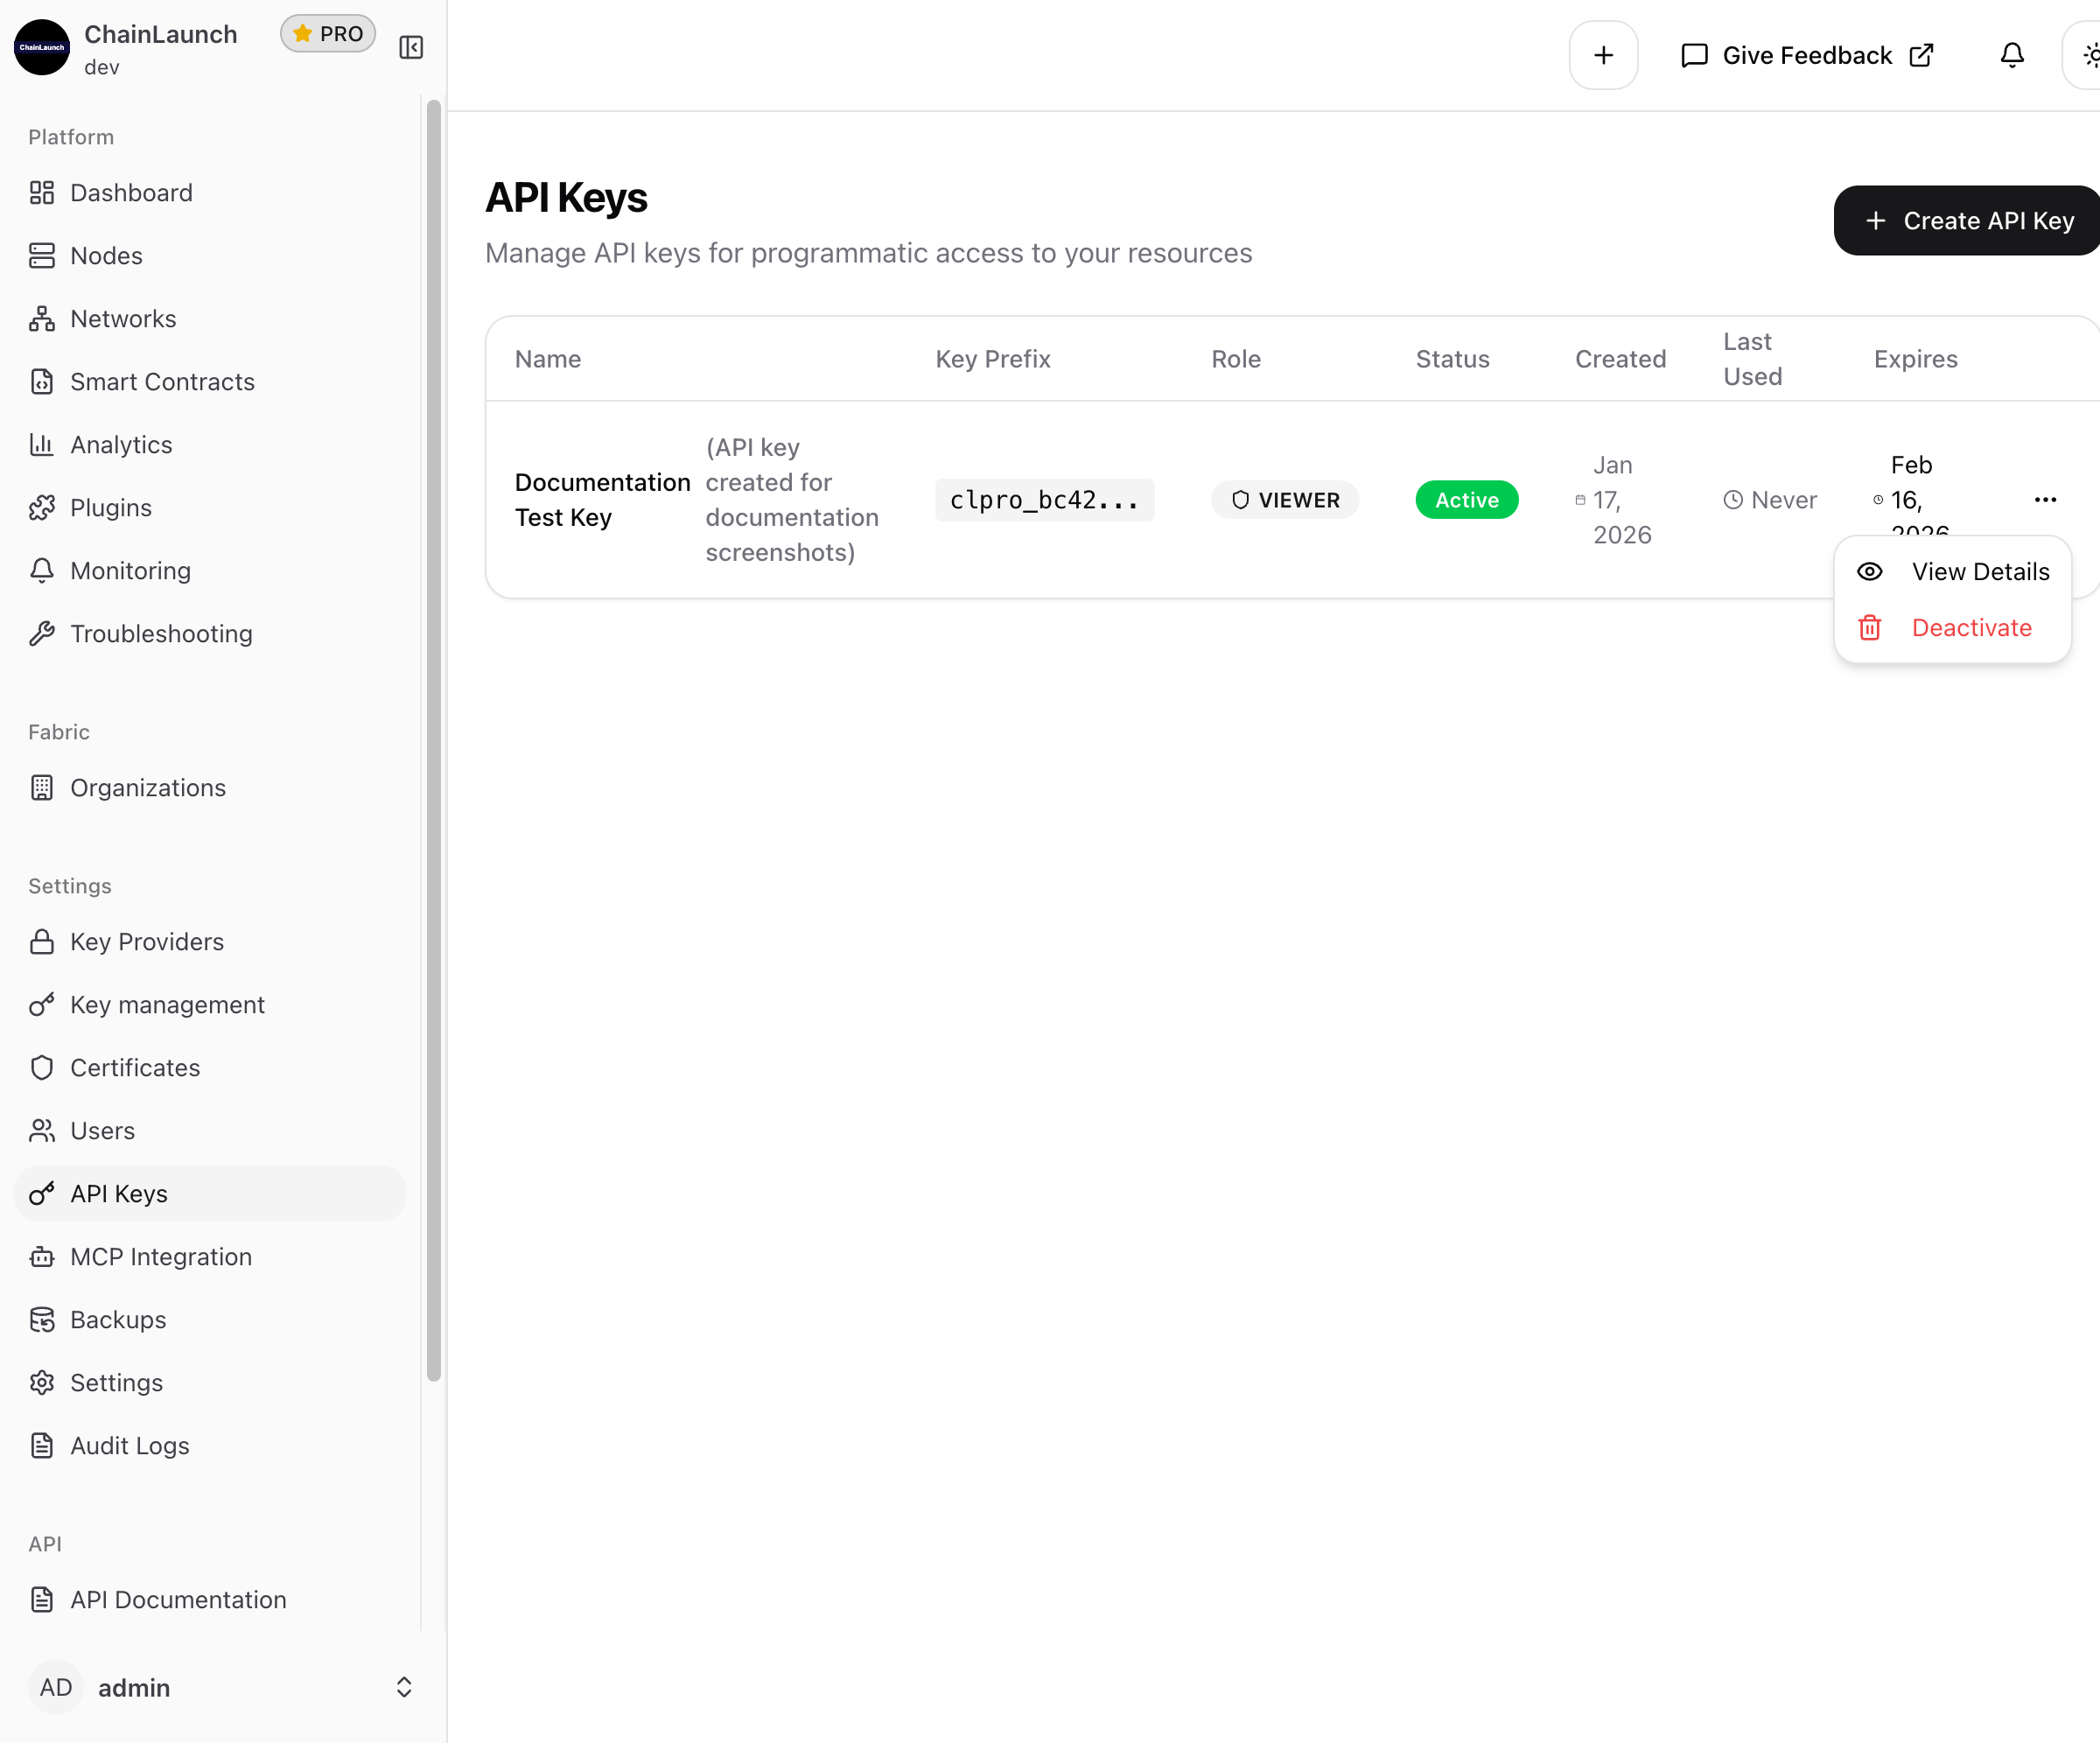
Available actions:
- View Details: See complete information about the key
- Deactivate: Temporarily disable the key (can be reactivated)
Viewing Key Details
Click on a key name or select "View Details" to see the full API key information:
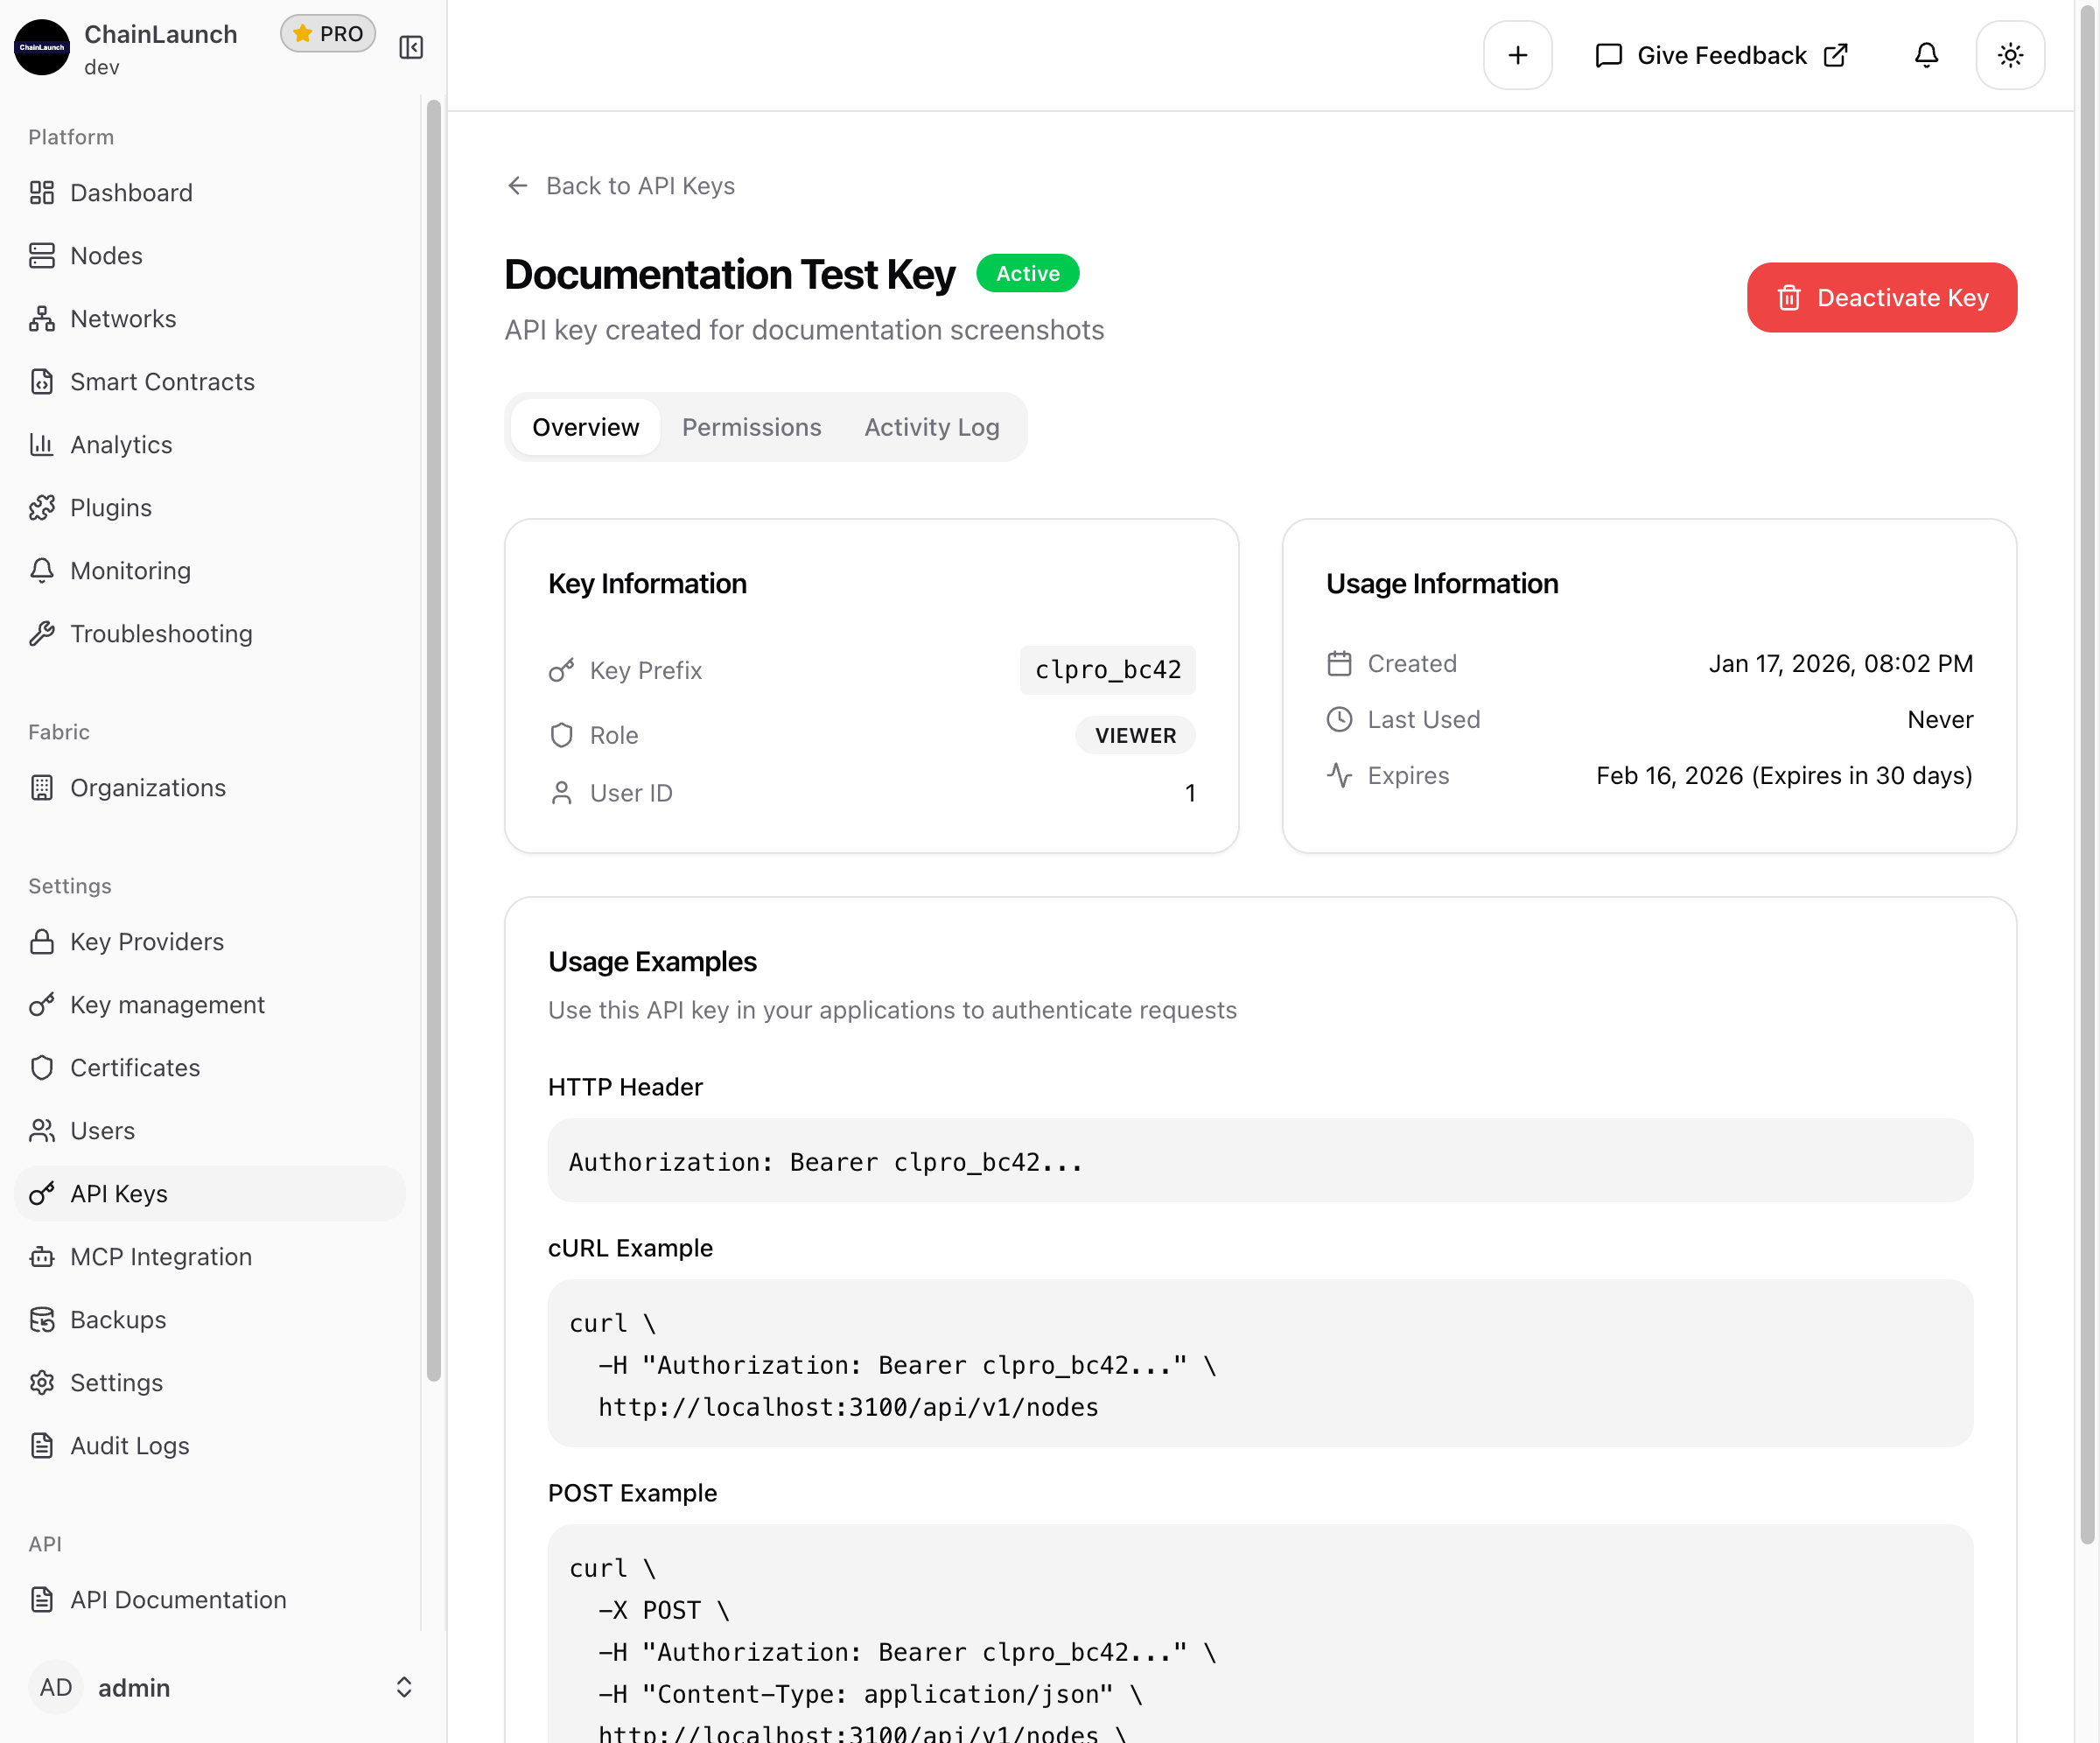
The details page includes three tabs:
Overview Tab
- Key Information: Key prefix, assigned role, and user ID
- Usage Information: Created date, last used timestamp, and expiration
- Usage Examples: Ready-to-use code snippets for HTTP headers, cURL commands, and POST requests
Permissions Tab
View all permissions assigned to this API key based on its role:
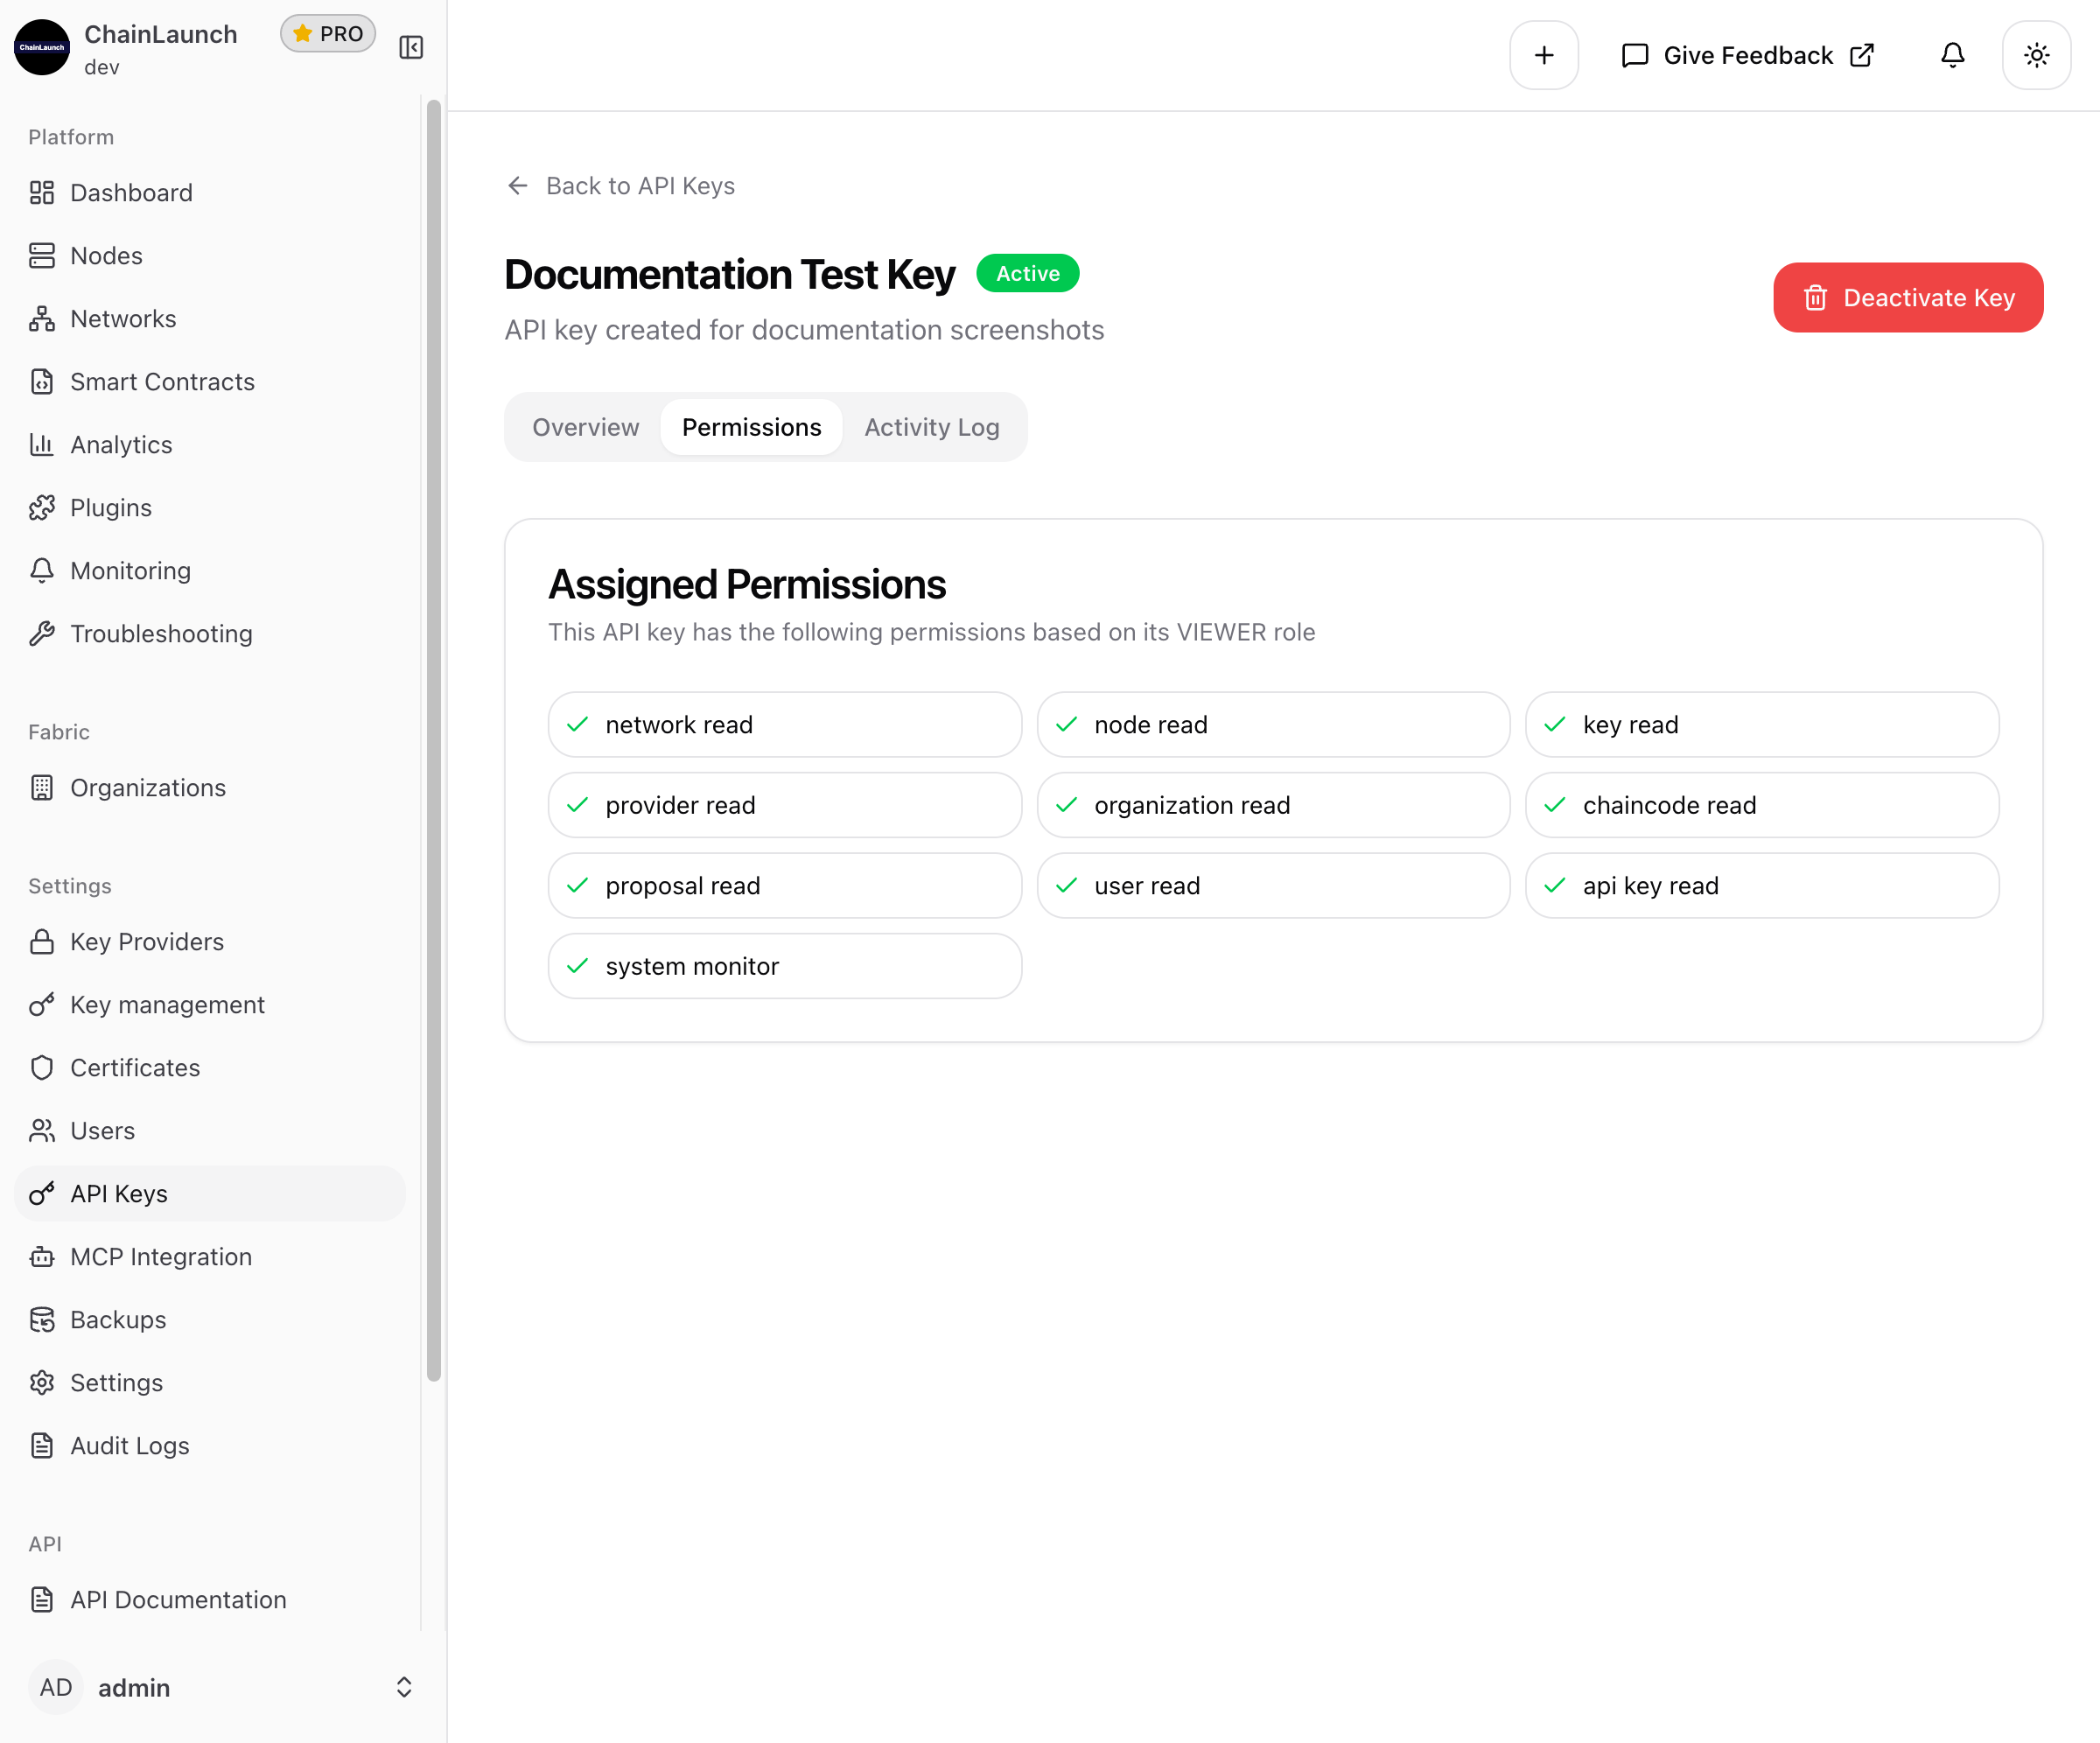
This shows the complete list of permissions the key has, making it easy to verify access levels.
Activity Log Tab
View the complete usage history of the API key for audit purposes.
Deactivating an API Key
To deactivate a compromised or unused API key:
- Navigate to Settings > API Keys
- Find the key you want to deactivate
- Click the actions menu (three dots)
- Select Deactivate
- Confirm the deactivation
Alternatively, from the key details page, click the red Deactivate Key button.
Warning: Deactivating a key is immediate. Any applications using that key will lose access instantly.
Using API Keys
Authentication Header
Include your API key in the Authorization header of your HTTP requests:
curl -X GET "https://your-chainlaunch-instance/api/v1/networks" \
  -H "Authorization: Bearer YOUR_API_KEY"
Example: List Networks
curl -X GET "http://localhost:8100/api/v1/networks" \
  -H "Authorization: Bearer clpro_abc123xyz789..."
Example: Get Node Status
curl -X GET "http://localhost:8100/api/v1/nodes/123" \
  -H "Authorization: Bearer clpro_abc123xyz789..."
Example: Create a Node (POST)
curl -X POST "http://localhost:8100/api/v1/nodes" \
  -H "Authorization: Bearer clpro_abc123xyz789..." \
  -H "Content-Type: application/json" \
  -d '{"name": "node1", "platform": "fabric"}'
Using API Keys with MCP Integration
API keys with the MCP role are specifically designed for AI assistant integrations. To use an API key with MCP:
- Create an API key with the MCP role
- Configure your AI tool with the MCP endpoint and API key
Claude Code Example
claude mcp add chainlaunch \
  --url http://localhost:8100/api/v1/mcp/stream \
  --header "Authorization: Bearer YOUR_API_KEY"
VS Code / Cursor Configuration
{
  "mcpServers": {
    "chainlaunch": {
      "command": "curl",
      "args": [
        "-X", "GET",
        "-H", "Authorization: Bearer YOUR_API_KEY",
        "http://localhost:8100/api/v1/mcp/stream"
      ]
    }
  }
}
For complete MCP integration instructions, see MCP Integration.
Security Best Practices
Key Management
- Use descriptive names: Make it easy to identify which application uses each key
- Set appropriate expiration: Shorter expiration periods reduce risk if a key is compromised
- Use minimum required permissions: Follow the principle of least privilege
- Rotate keys regularly: Replace keys periodically, especially for production systems
- Never share keys: Each application should have its own API key
Storage Guidelines
- Never commit API keys to version control
- Store keys in environment variables or secure vaults
- Use secrets management tools (e.g., HashiCorp Vault, AWS Secrets Manager)
- Encrypt keys at rest when storing locally
Monitoring
- Regularly review API key usage in Audit Logs
- Set up alerts for unusual API activity
- Monitor for failed authentication attempts
- Review and remove unused keys periodically
Troubleshooting
Common Issues
| Issue | Solution |
|---|---|
| 401 Unauthorized | Verify the API key is correct and not expired |
| 403 Forbidden | Check that the key has the required permissions for the operation |
| Key not working after creation | Ensure you copied the full key; it's only shown once |
| Rate limiting | Implement exponential backoff in your application |
Checking Key Validity
You can verify your API key is working by calling the authentication endpoint:
curl -X GET "http://localhost:8100/api/v1/auth/me" \
  -H "Authorization: Bearer YOUR_API_KEY"
A successful response confirms your key is valid and shows the associated permissions.
API Reference
For complete API documentation, navigate to API > API Documentation in ChainLaunch or visit /docs on your ChainLaunch instance. The interactive API documentation allows you to:
- Browse all available endpoints
- See request/response schemas
- Test API calls directly from the browser