How to create backups
Introduction
In this tutorial, you will learn how to create backup targets and schedules using the backup management system. This process is essential for ensuring that your data is securely backed up at regular intervals, allowing for easy recovery in case of data loss. By the end of this tutorial, you will have set up a backup target and scheduled automated backups.
ChainLaunch supports multiple backup providers:
- S3-compatible storage (AWS S3, MinIO, etc.) — uses Restic for efficient, encrypted, deduplicated backups
- EBS Snapshots (Enterprise) — for AWS EBS volumes, with support for static credentials, instance roles/IRSA, named profiles, and role assumption
- VMware Snapshots (Enterprise) — for VMware environments
The tutorial below demonstrates setting up an S3-compatible backup target using MinIO. Enterprise backup providers are configured similarly through the UI or API.
Prerequisites
- Access to the backup management system.
- Basic understanding of backup terminology (e.g., targets, schedules).
- Familiarity with using web applications.
Overview
This tutorial will guide you through:
- Navigating to the backups section.
- Creating a backup target.
- Setting up a backup schedule.
- Initiating a manual backup.
Step 1: Click on 'Backups'
To begin, navigate to the backups section of the application.
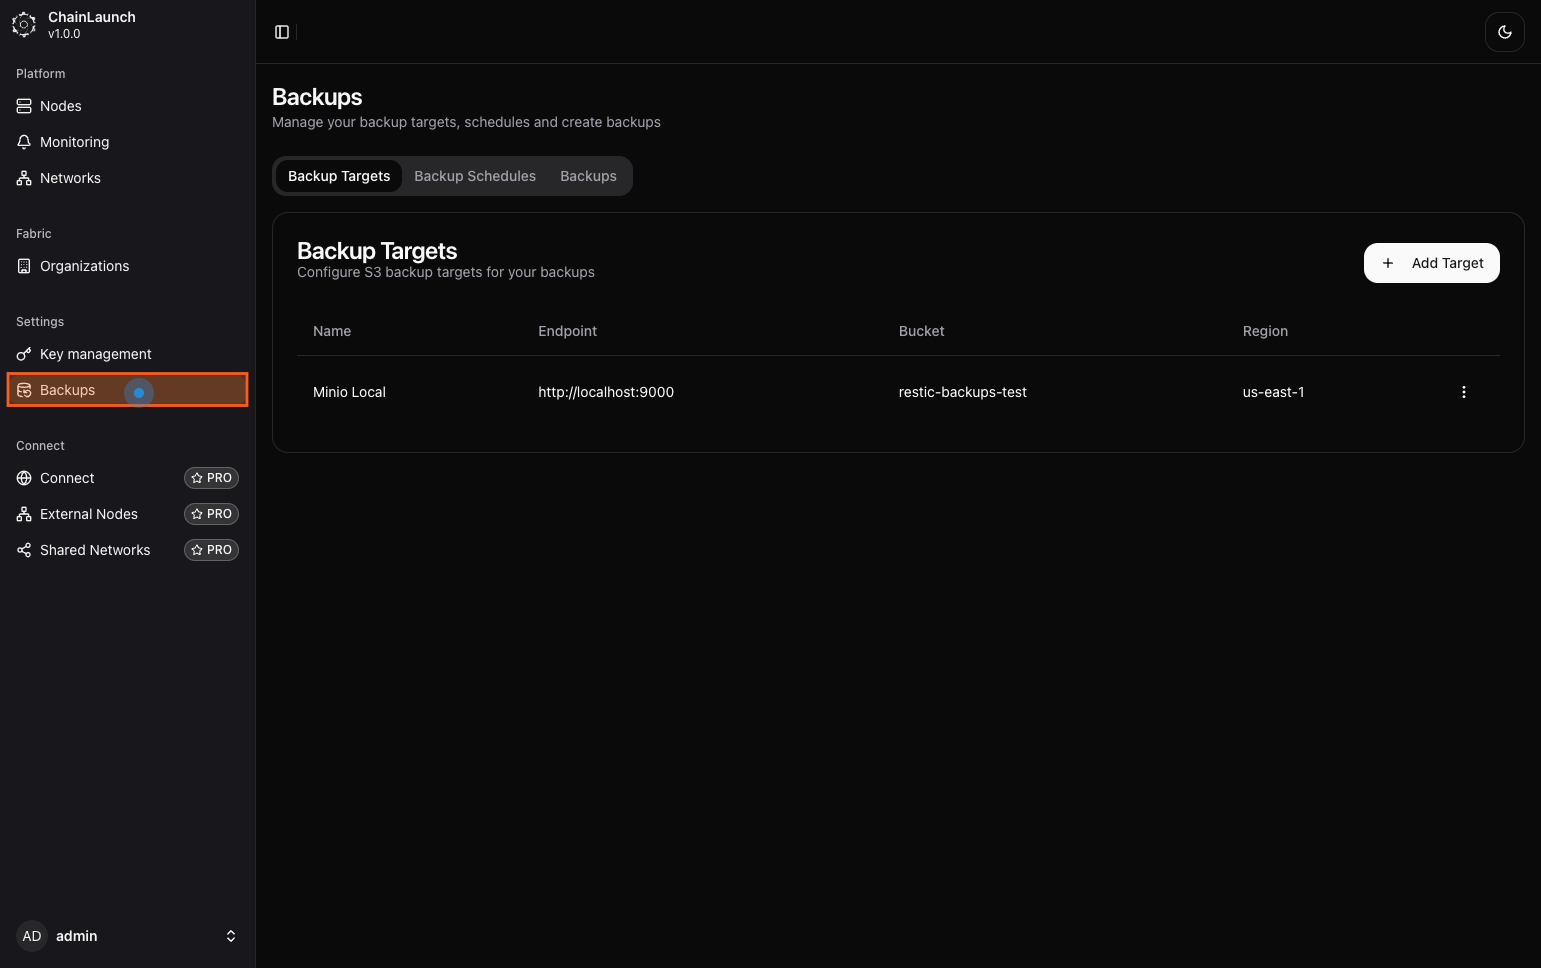
Explanation:
- You will see a sidebar with various menu options. Click on 'Backups' to access the backups management interface.
Tips:
- Ensure you are logged in with sufficient permissions to manage backups.
Step 2: Click on 'Add Target'
Next, you will add a new backup target.
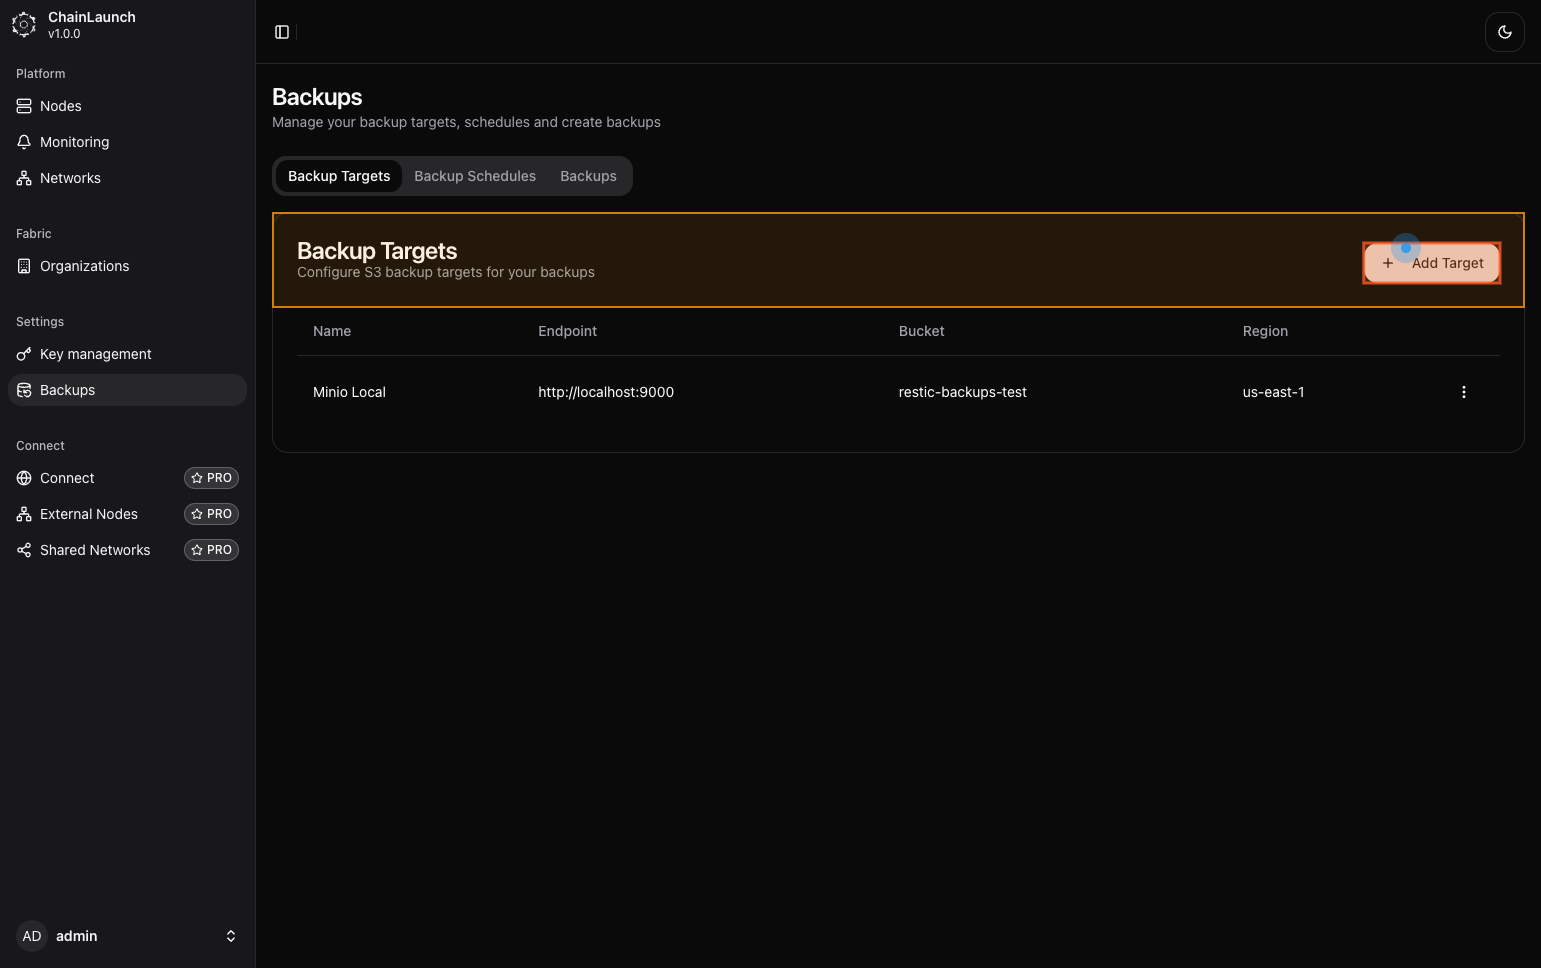
Explanation:
- After clicking on 'Backups', look for an option labeled 'Add Target' on the right side of the screen and click it.
Best Practices:
- Make sure you have all necessary information about your backup target ready (e.g., endpoint, access key).
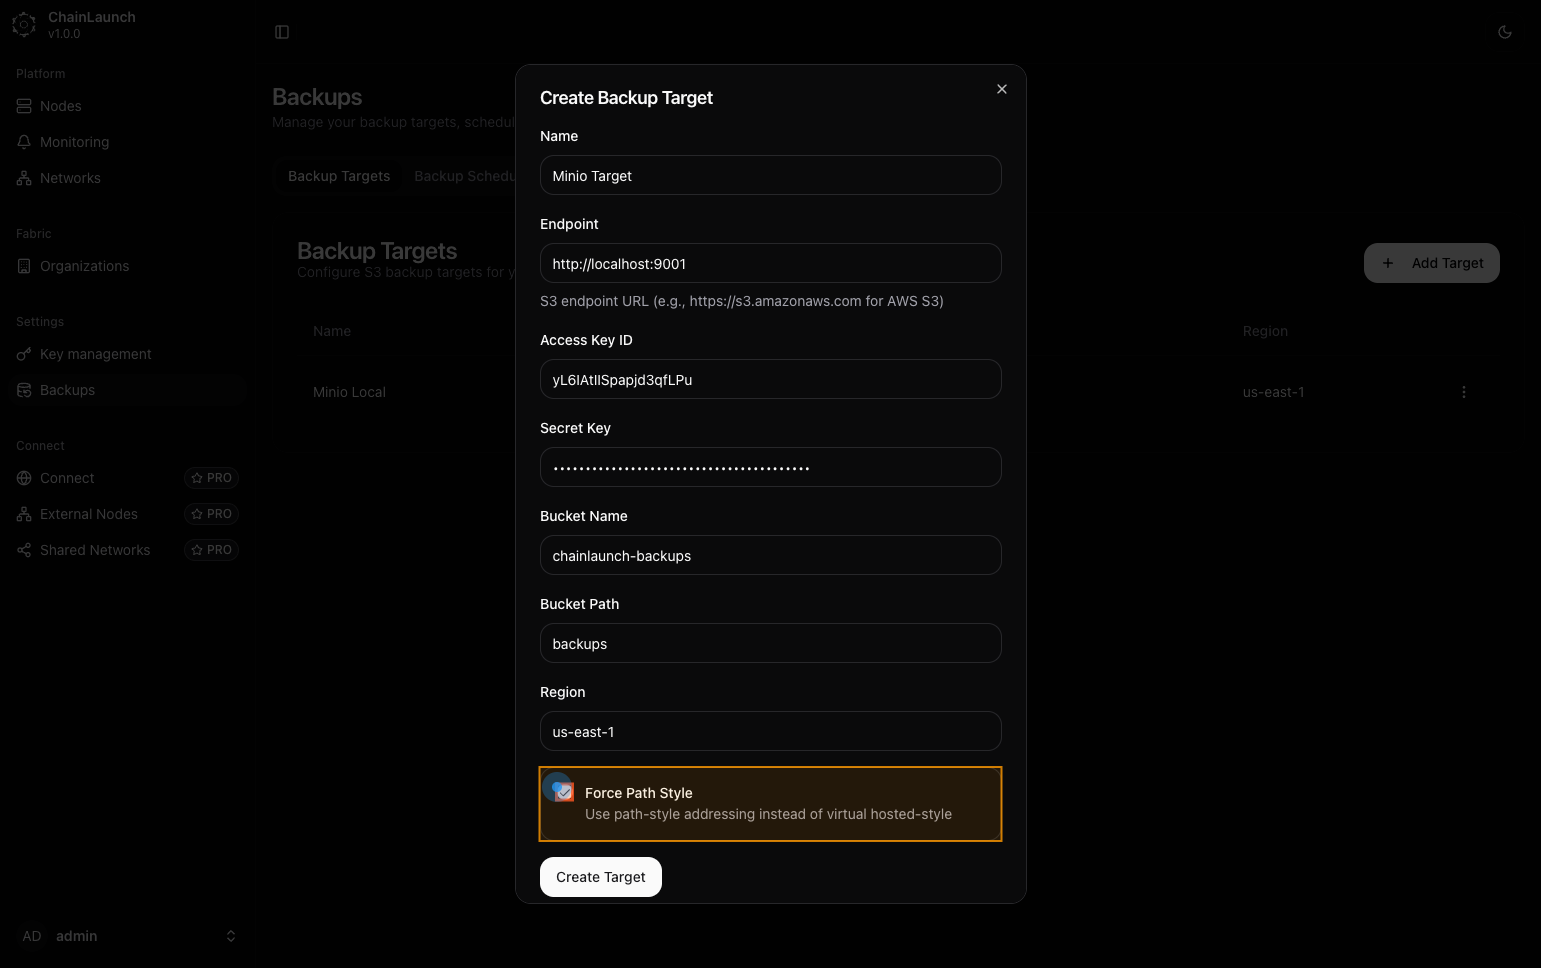
Step 3: Type 'Minio Target' in Name
Now, enter a name for your new backup target.
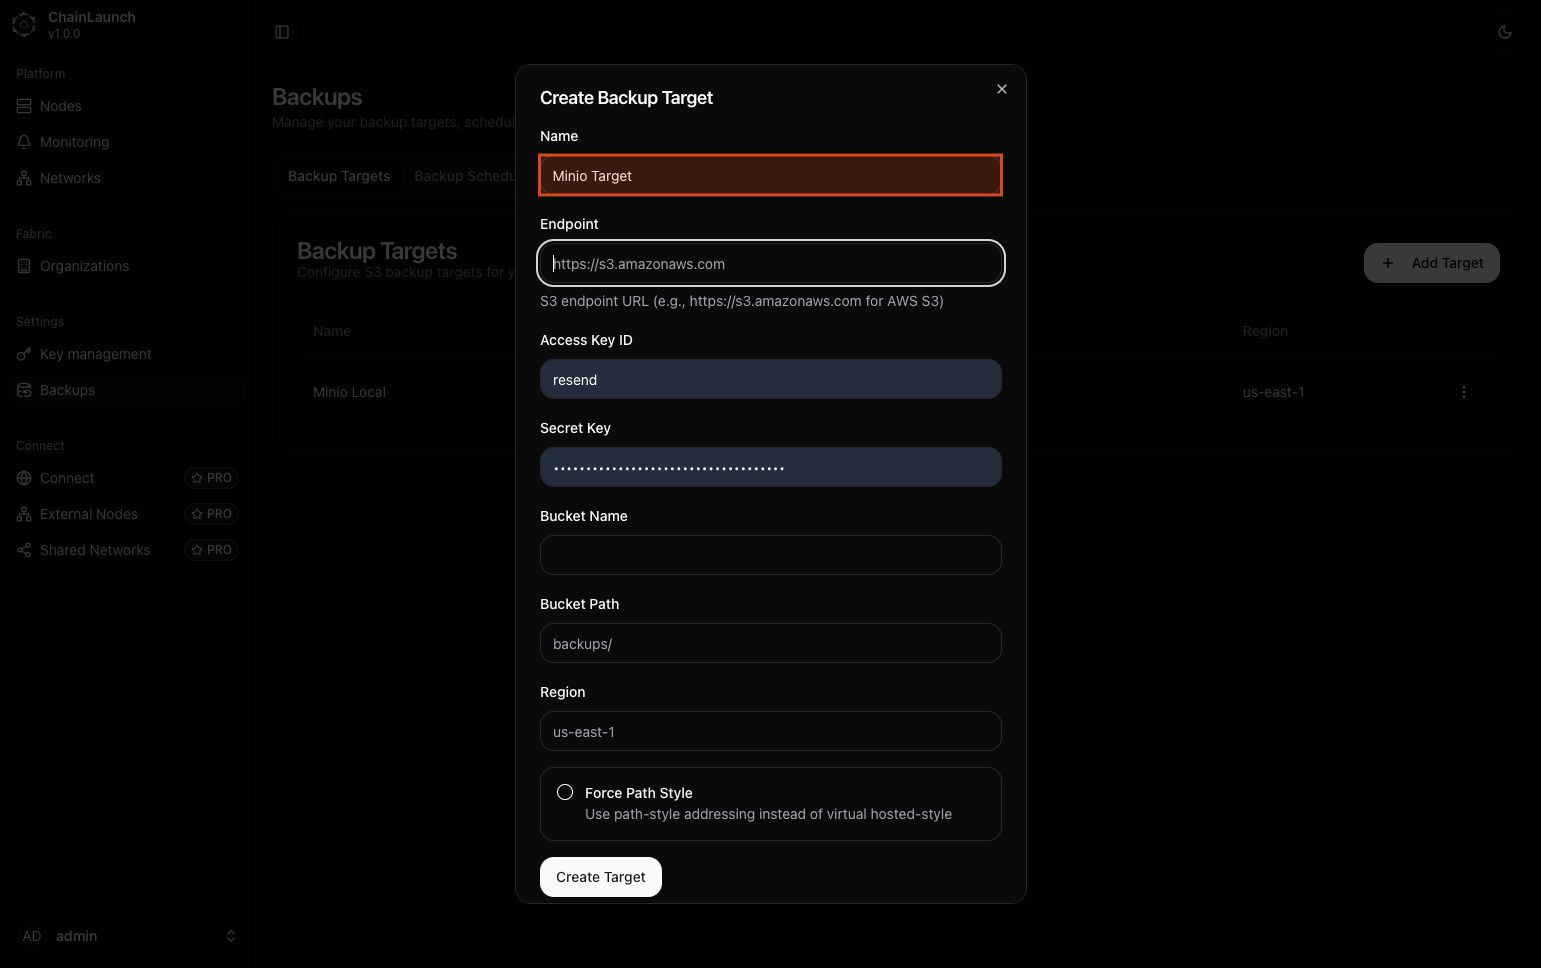
Explanation:
- In the dialog that appears, find the field labeled 'Name' and type 'Minio Target'. This name will help you identify this target later.
Warning:
- Choose a descriptive name to avoid confusion later.
Step 4: Click on 'Endpoint'
Next, set the endpoint for your backup target.
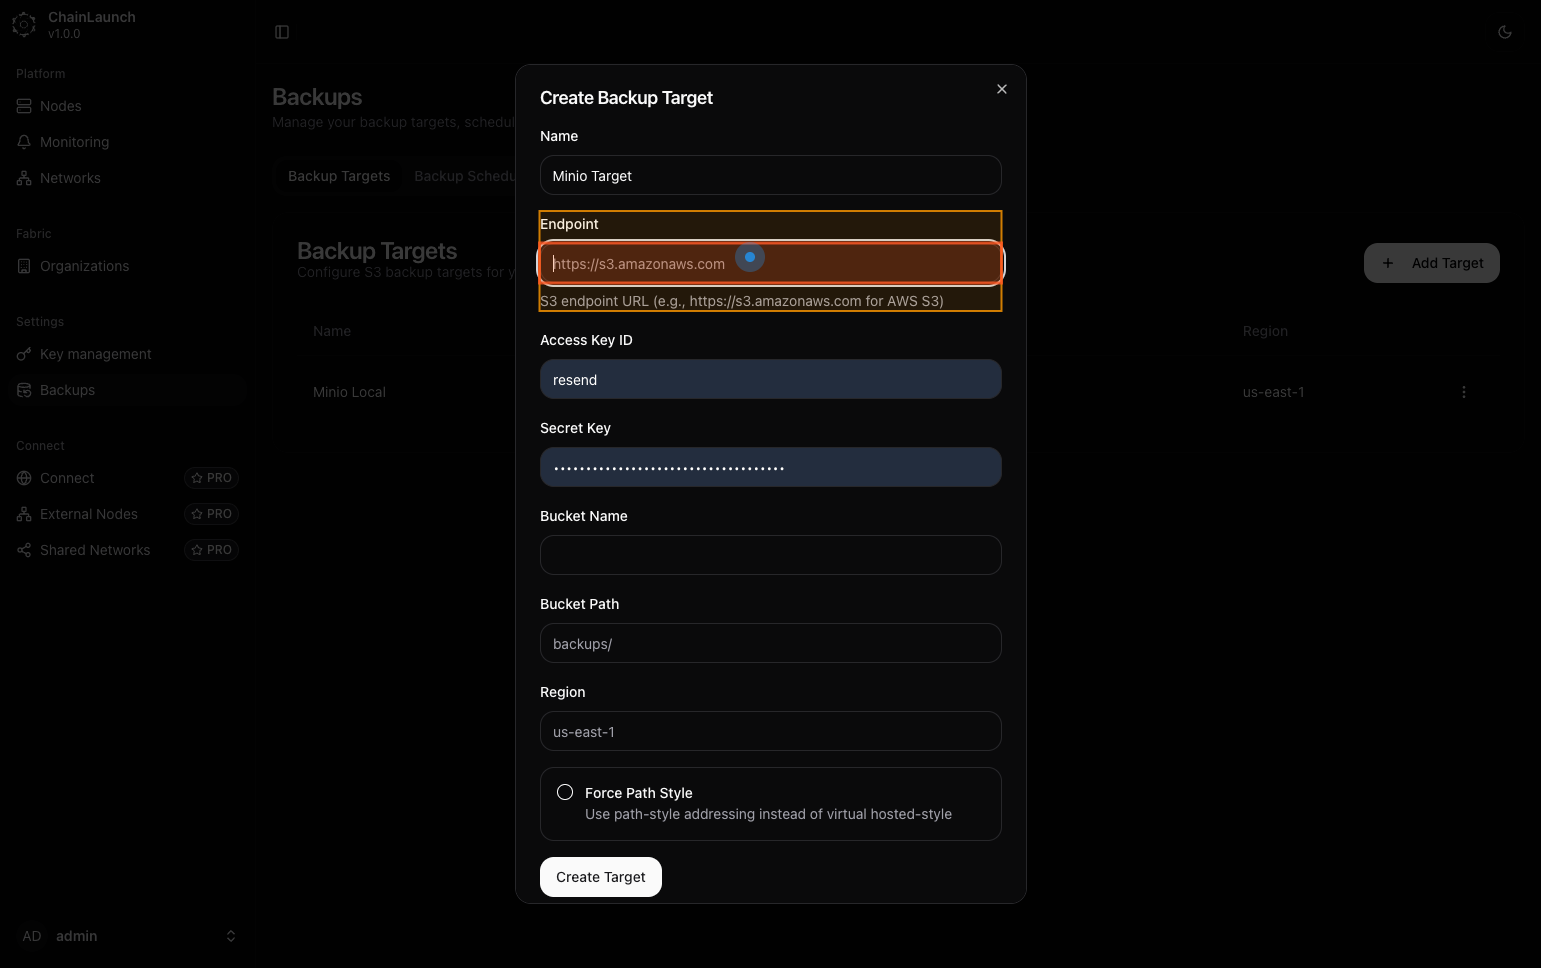
Explanation:
- Click in the 'Endpoint' field where you will enter the URL of your storage solution.
Step 5: Type 'http://localhost:9001' in Endpoint
Enter the endpoint URL for your Minio server.
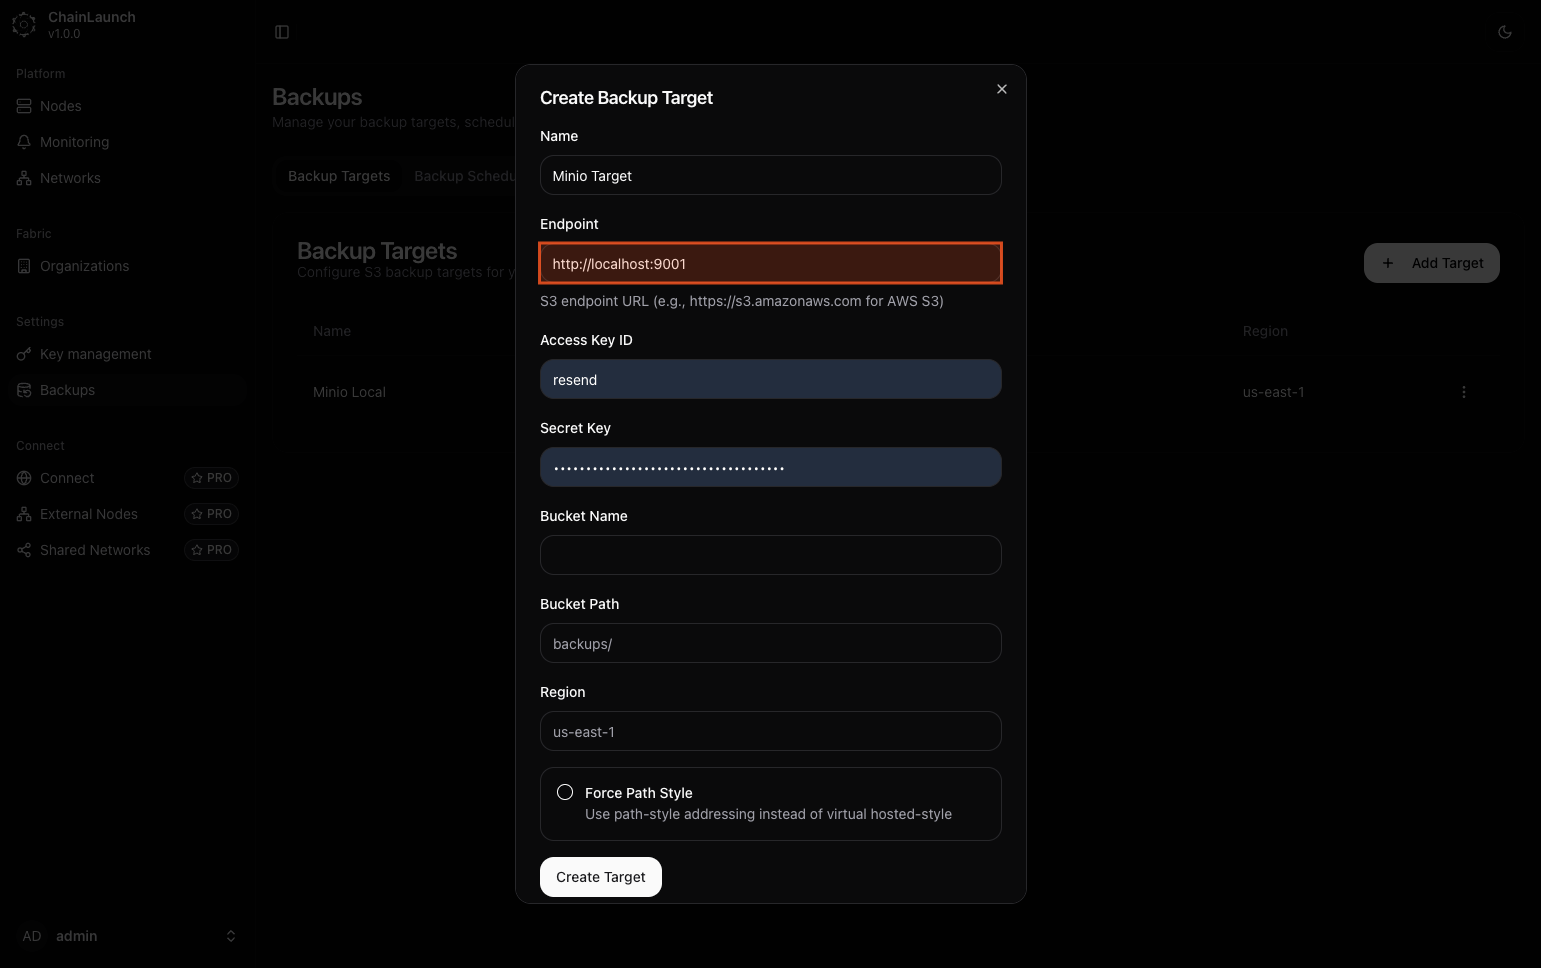
Explanation:
- In the 'Endpoint' field, type
http://localhost:9001. This URL points to your local Minio server where backups will be stored.
Step 6: Enter your Access Key ID
Next, enter your access key ID for authentication.
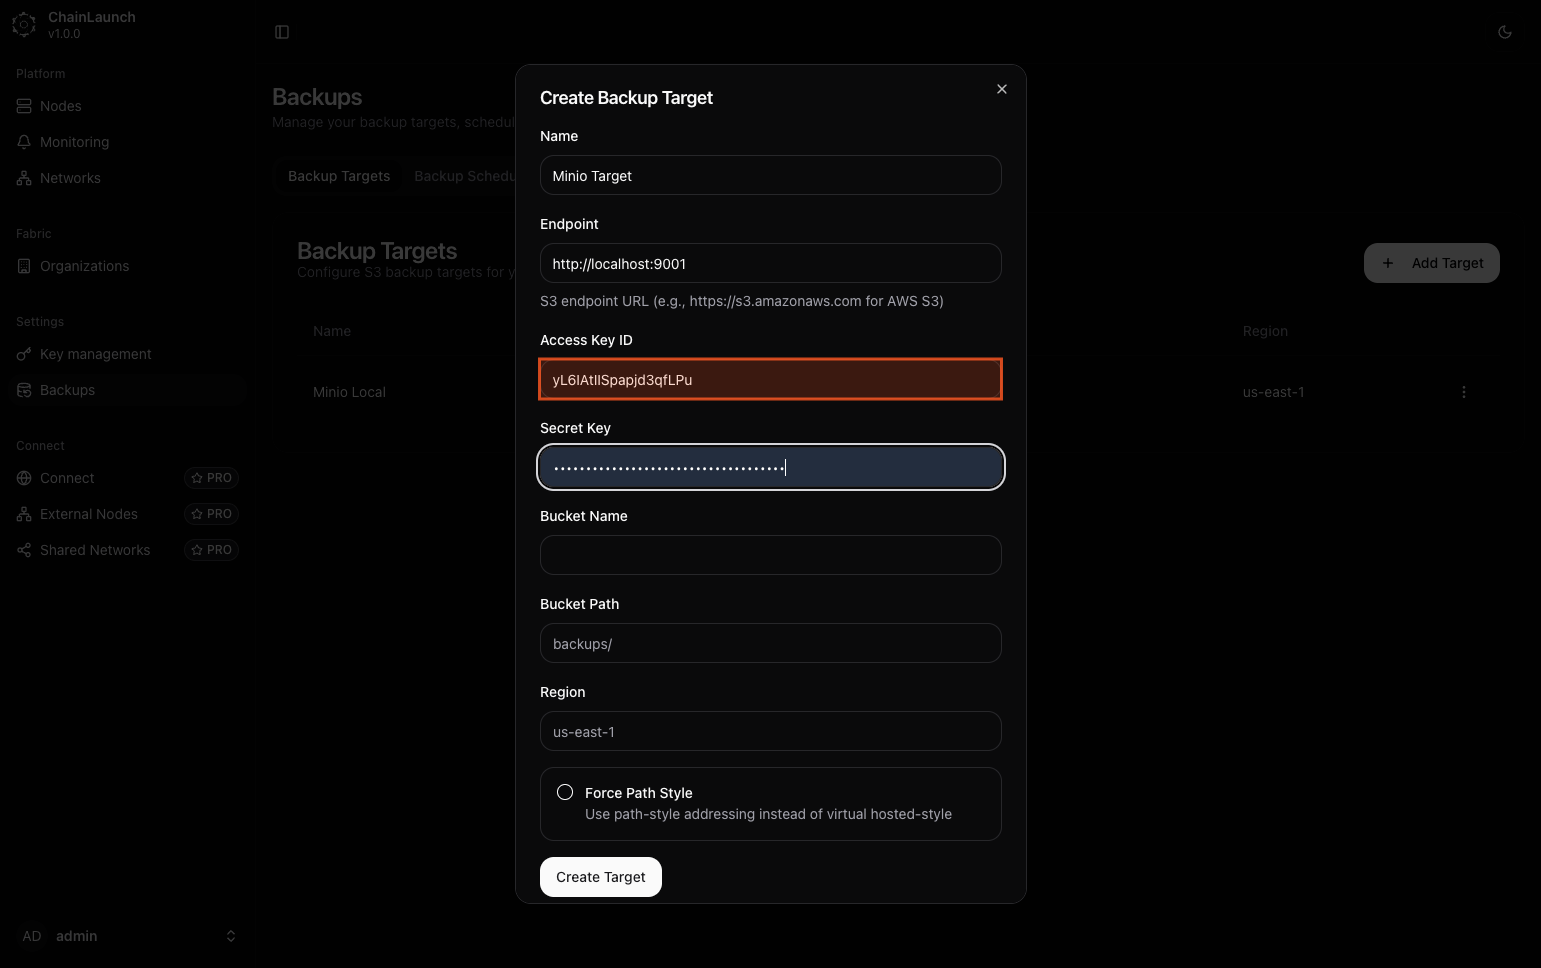
Explanation:
- Locate the 'Access Key ID' field and input your access key (e.g.,
YOUR_ACCESS_KEY_ID).
Step 7: Enter your Secret Key
Now, enter your secret key.
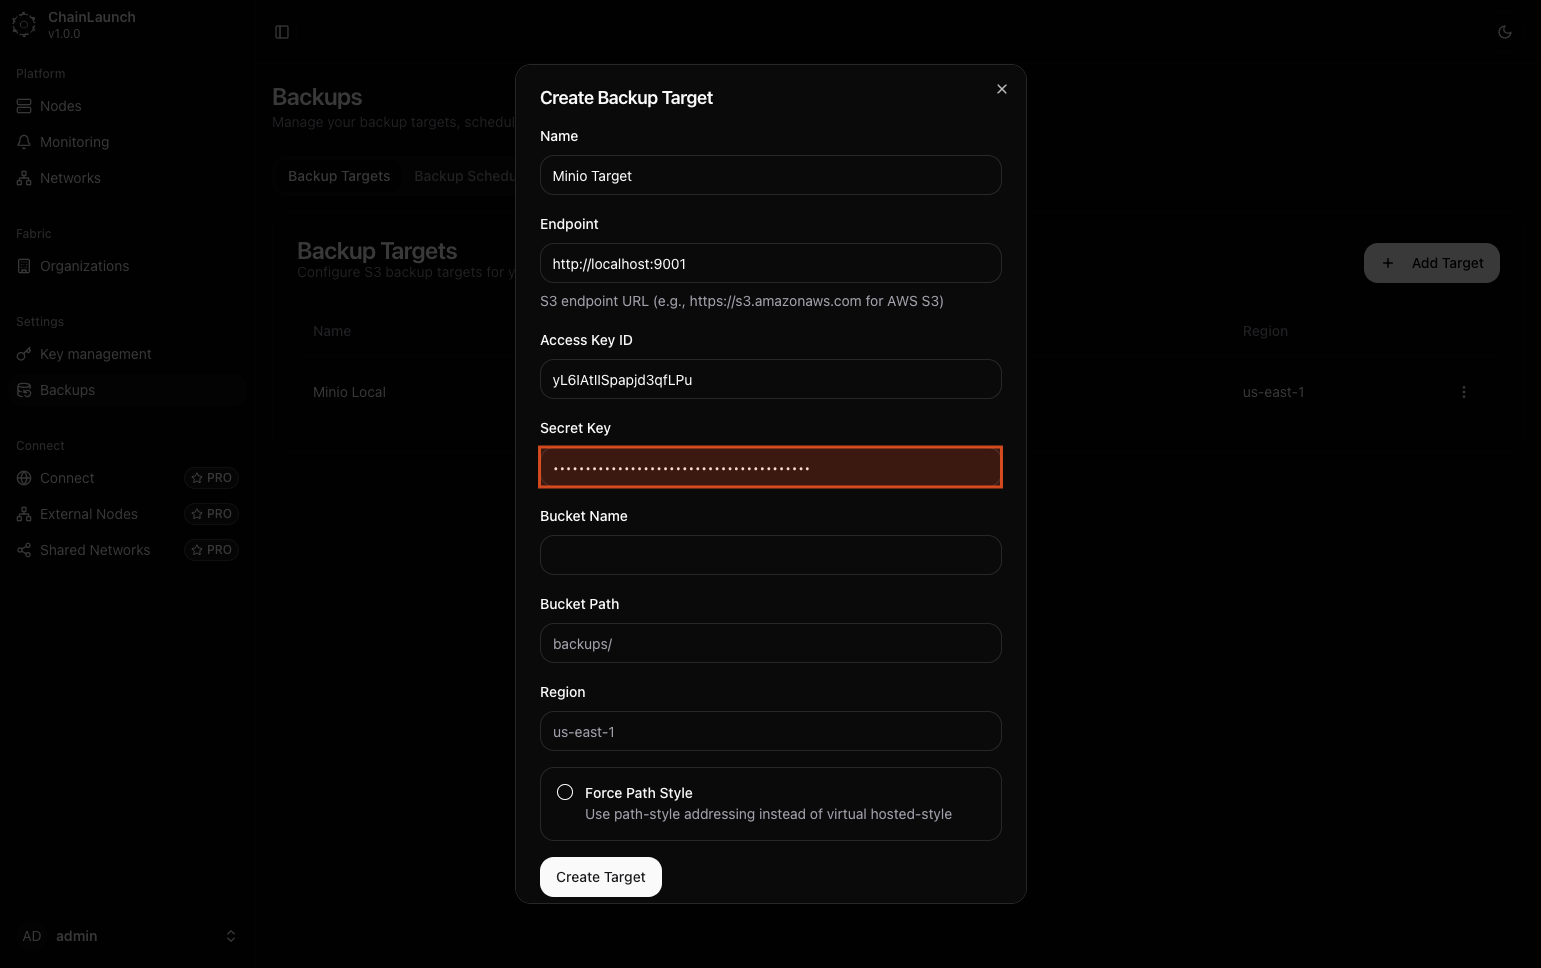
Explanation:
- In the 'Secret Key' field, type your secret access key (e.g.,
YOUR_SECRET_ACCESS_KEY).
Tips:
- Keep your secret key secure and do not share it publicly.
- Never commit credentials to version control or share them in documentation.
Step 8: Click on 'Bucket Name'
Next, select the bucket name field.
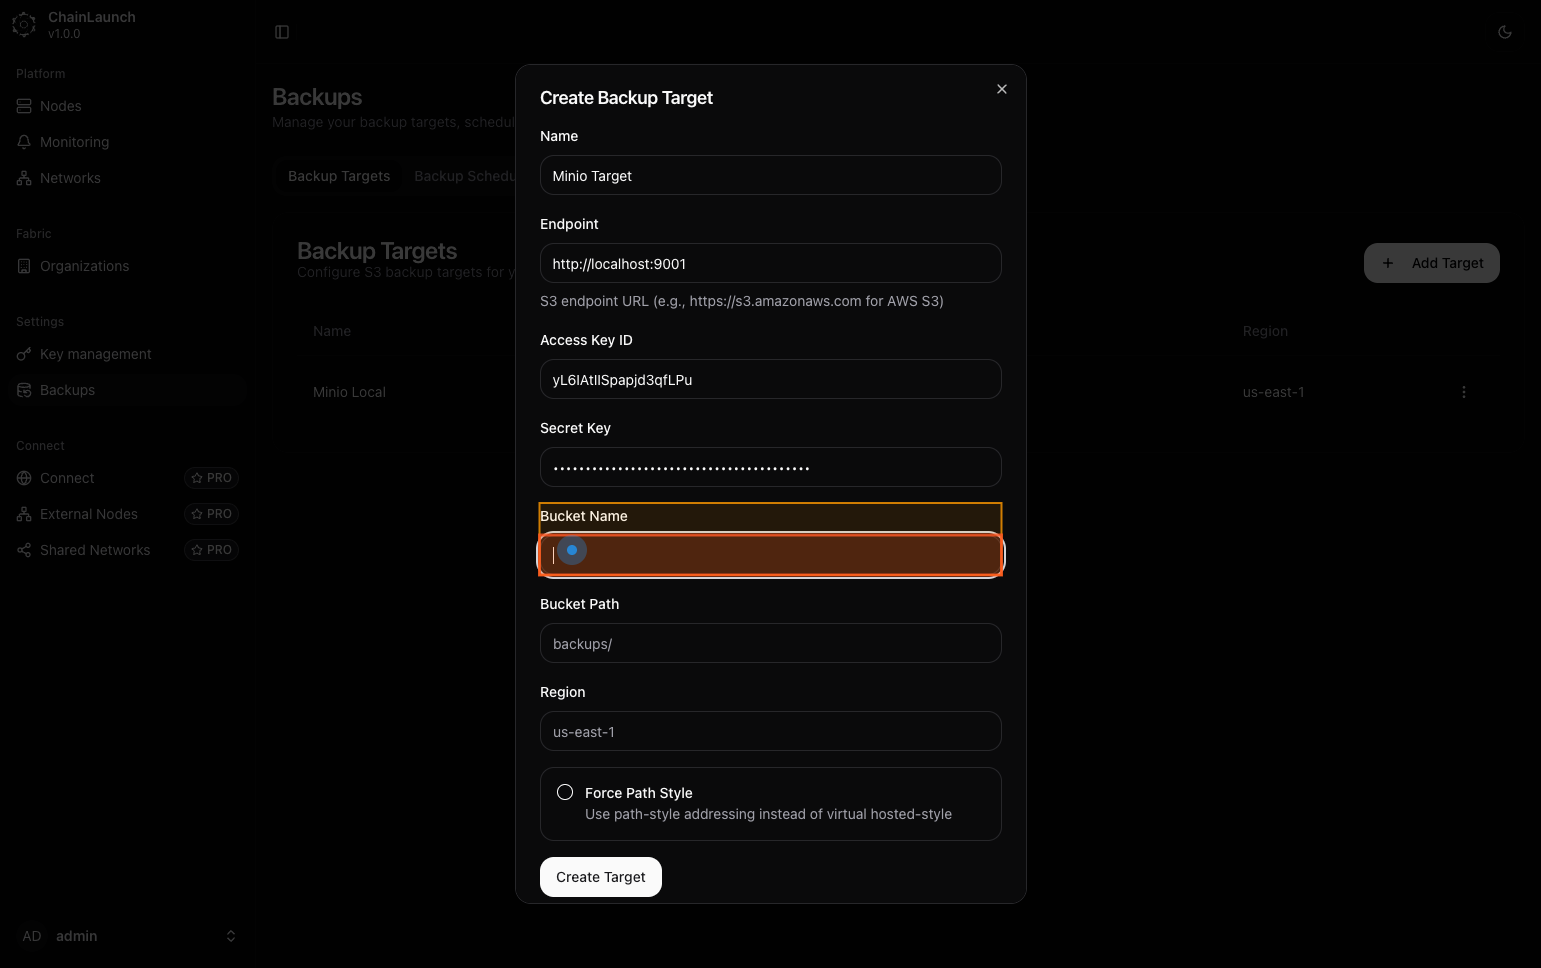
Explanation:
- Click in the 'Bucket Name' field where you will specify where backups will be stored within Minio.
Step 9: Type 'chainlaunch-backups' in Bucket Name
Enter a name for your bucket.
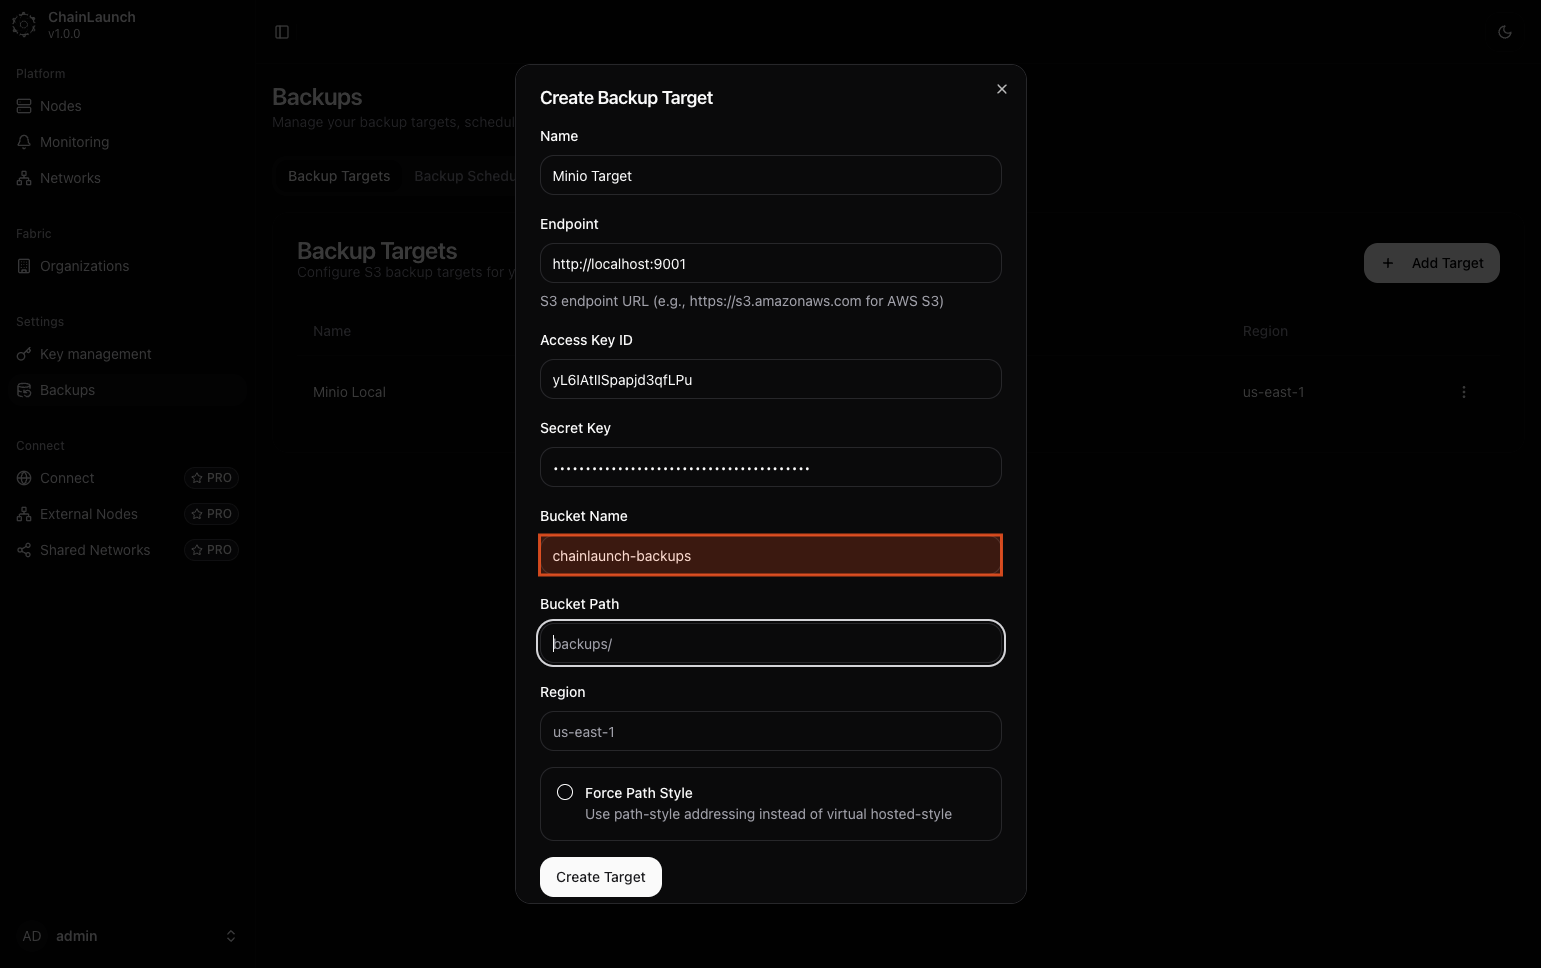
Explanation:
- In the 'Bucket Name' field, type
chainlaunch-backups.
Step 10: Type 'backups' in Bucket Path
Specify a path within your bucket (optional).
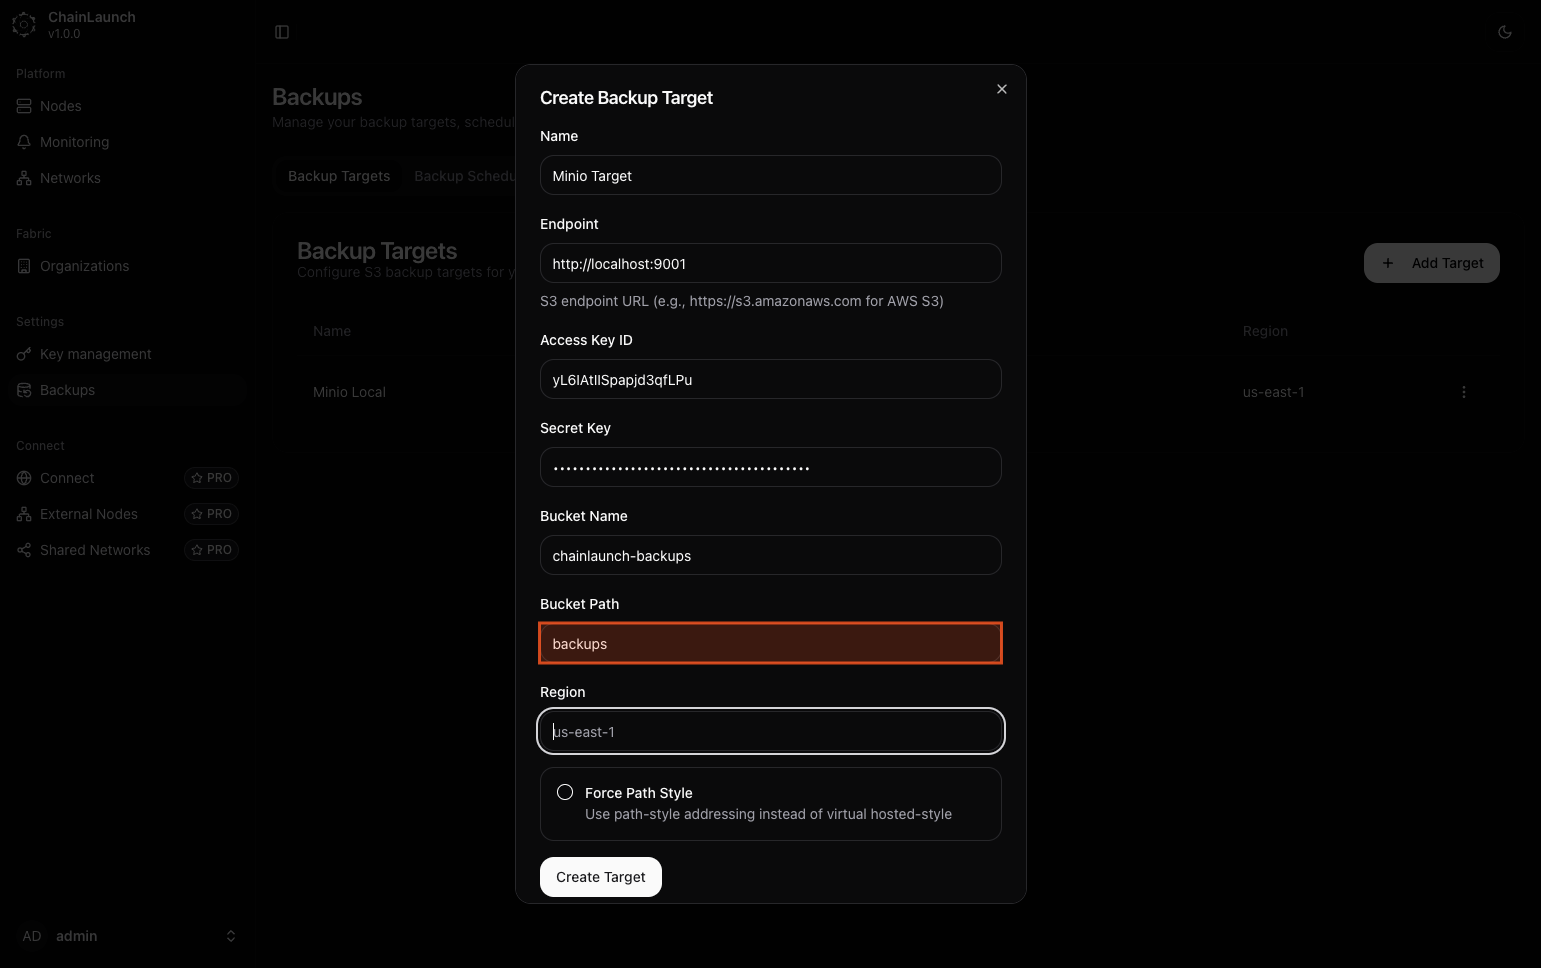
Explanation:
- In the 'Bucket Path', type
backupsto organize your backups under this path within the specified bucket.
Step 11: Click on 'Region'
Select the region for your bucket configuration.
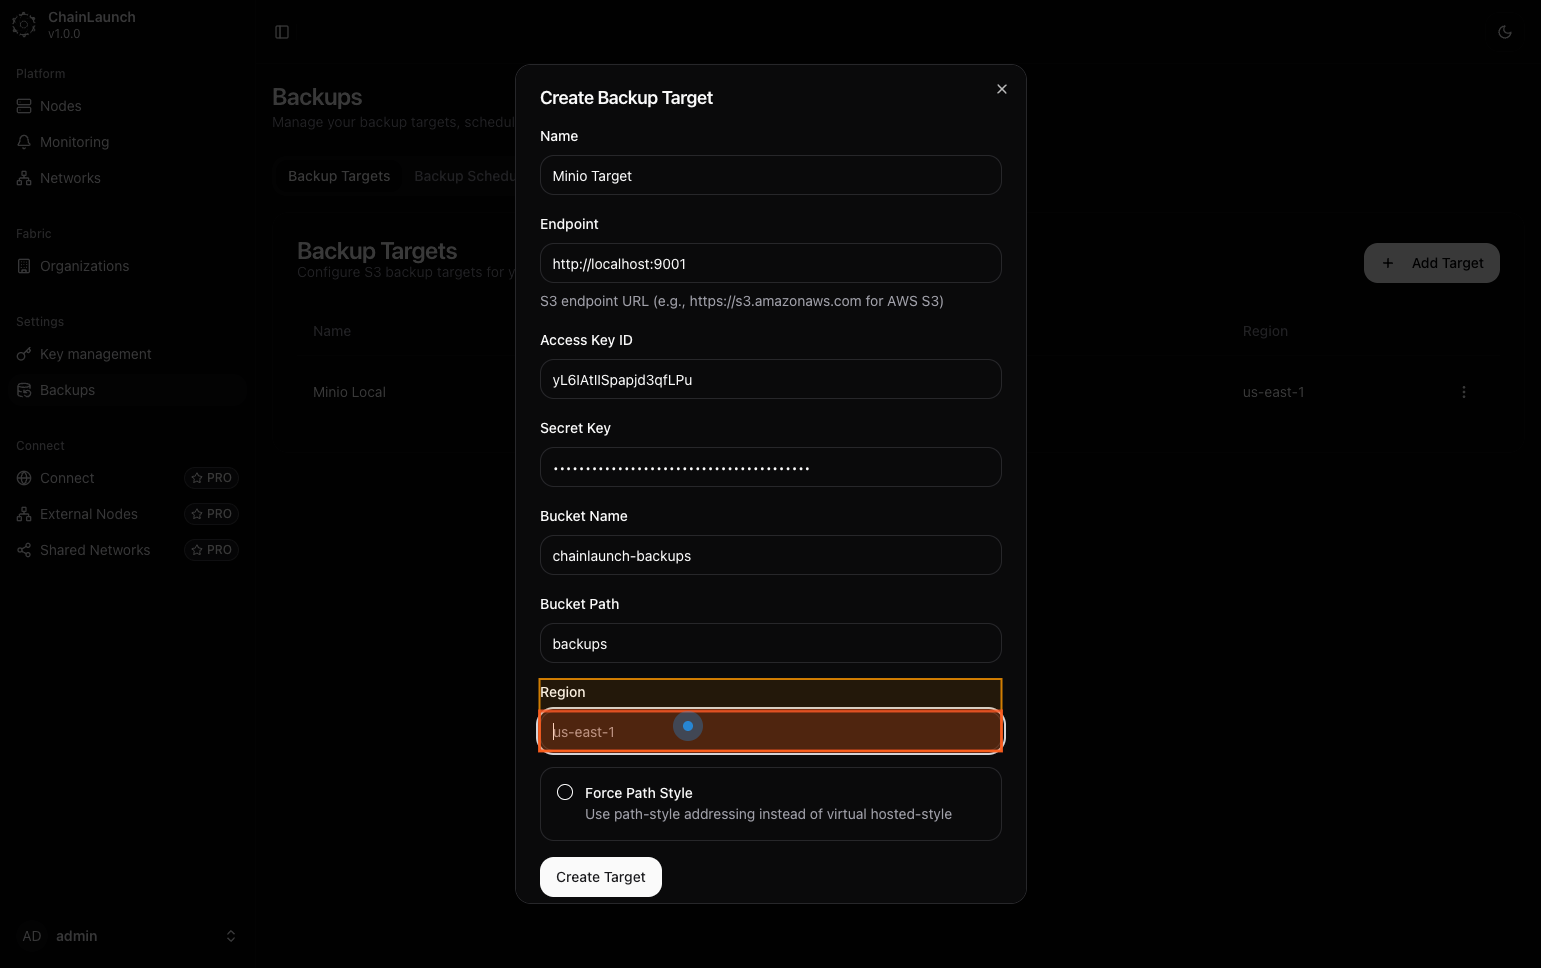
Explanation:
- Click on the 'Region' dropdown to specify where your bucket is located geographically.
Step 12: Type 'us-east-1' in Region
Enter the region for your bucket.
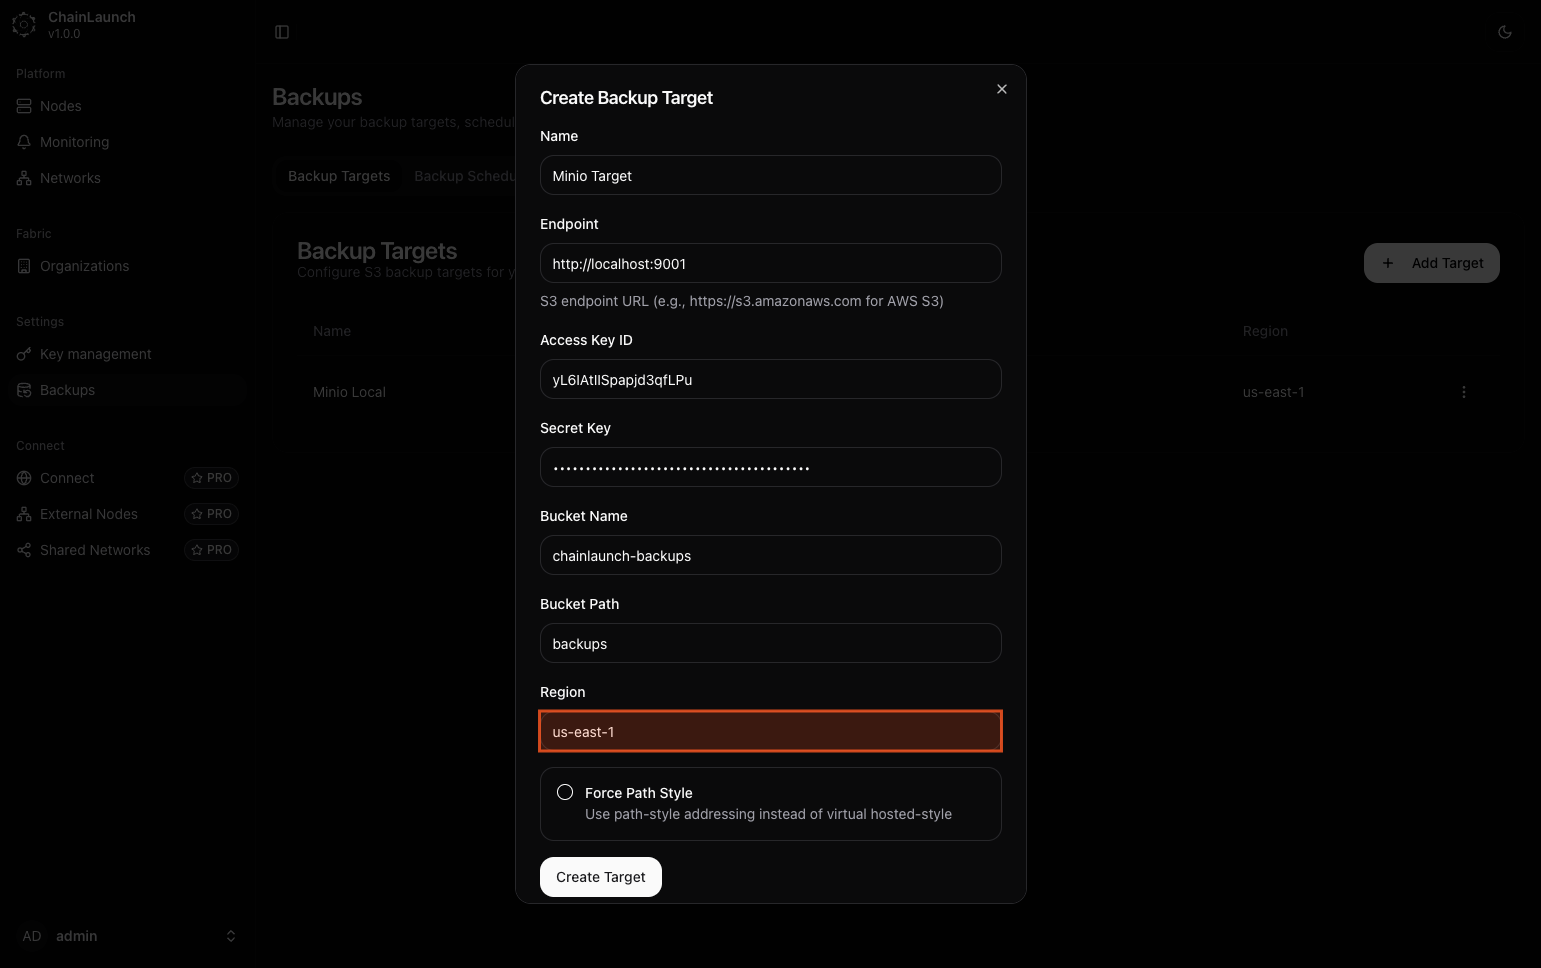
Explanation:
- In this field, type
us-east-1as your selected region.
Step 13: Click on 'Force Path Style'
Enable path-style addressing if necessary.
Explanation:
- Check or click on Force Path Style to ensure compatibility with certain S3 clients that require this addressing style.
Best Practice:
- Use force path style if you're unsure how your S3 client handles addressing styles.
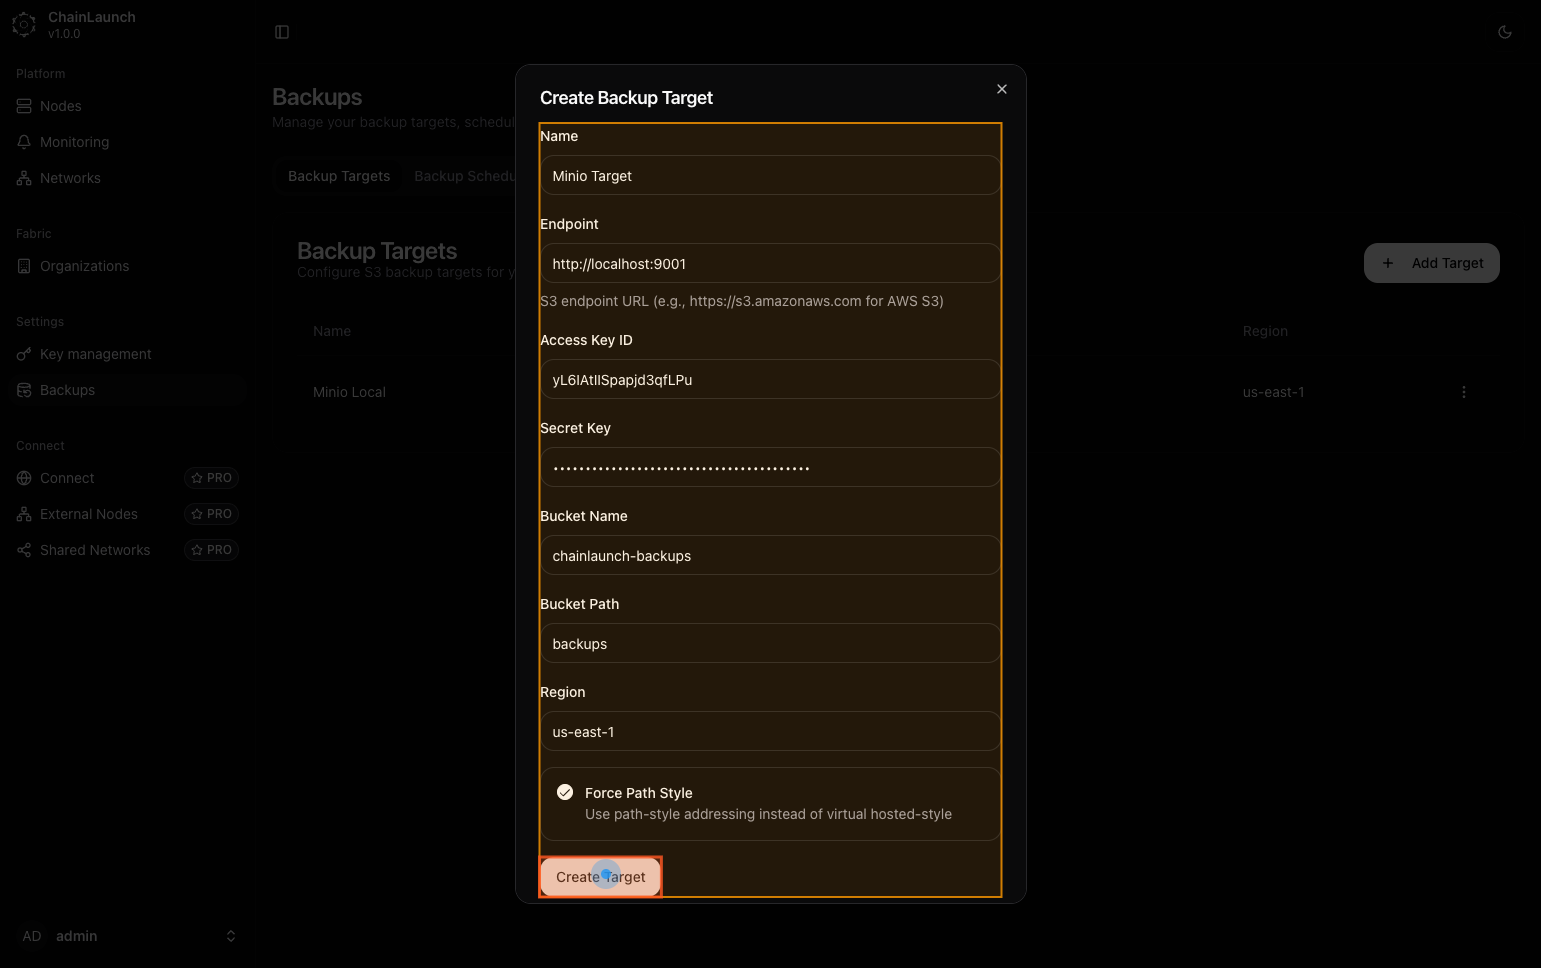
Step 14: Click on 'Create Target'
Finalize creating your backup target by clicking this button.
Explanation:
- This action submits all previously entered information and creates your new backup target.
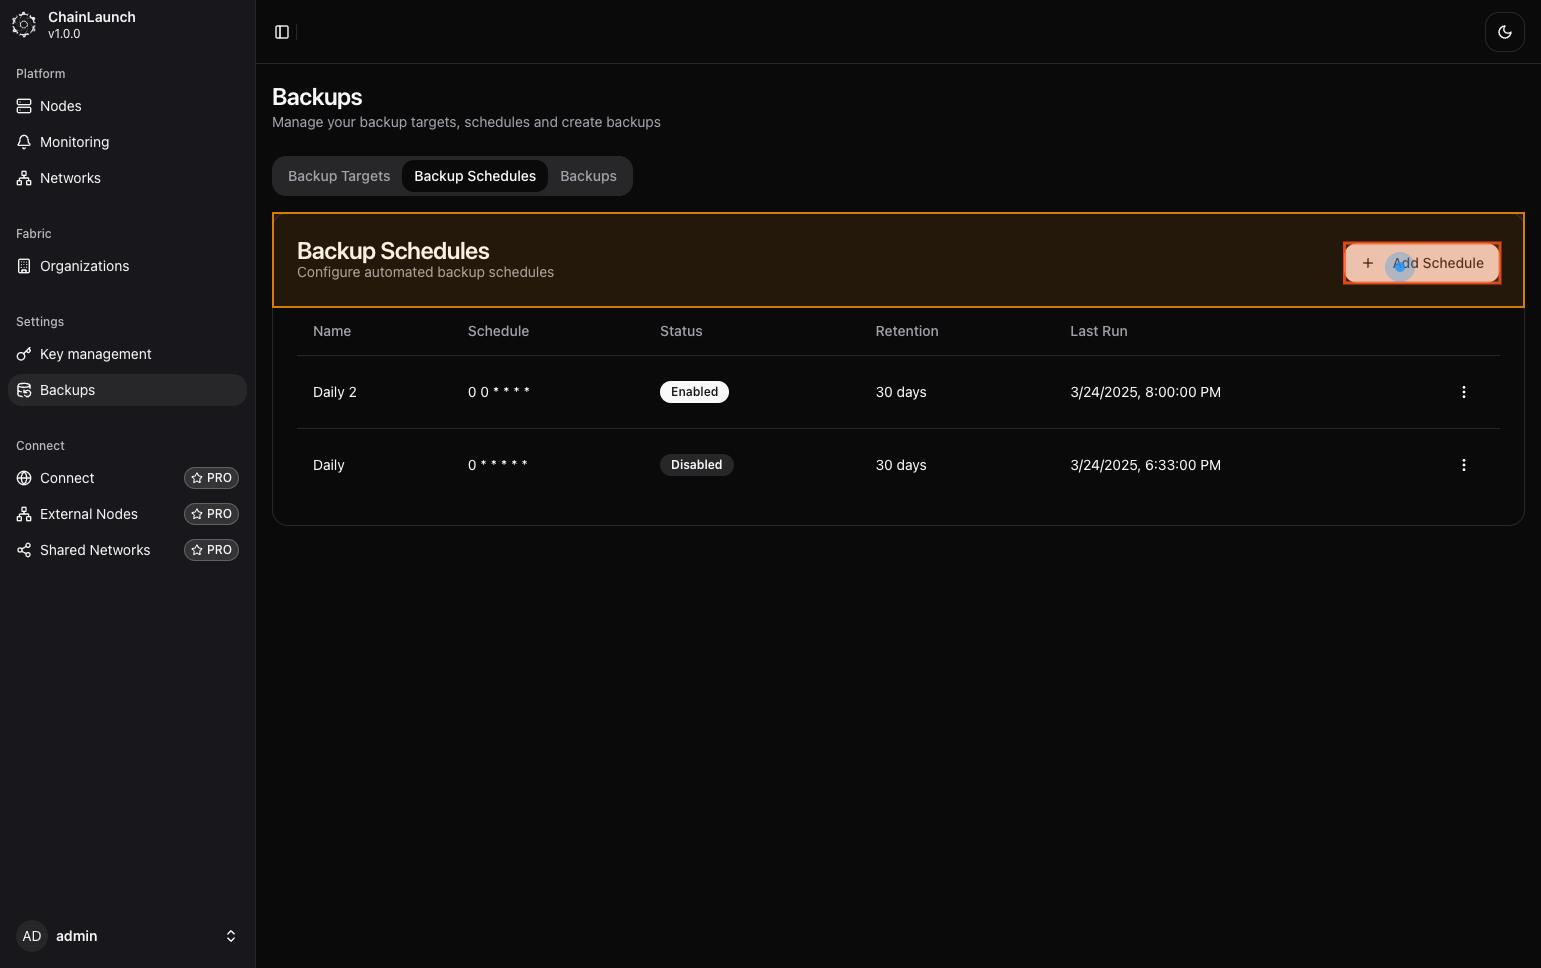
Step 15: Click on 'Backup Schedules'
Navigate to configure backup schedules next.

Explanation:
- After creating a target, click on Backup Schedules to manage when backups should occur based on schedules you create or modify.
Step 16: Click on 'Add Schedule'
Begin adding a new schedule for backups.
Explanation:
- Look for an option titled Add Schedule, usually located near existing schedules or at the top right of the schedule management area.
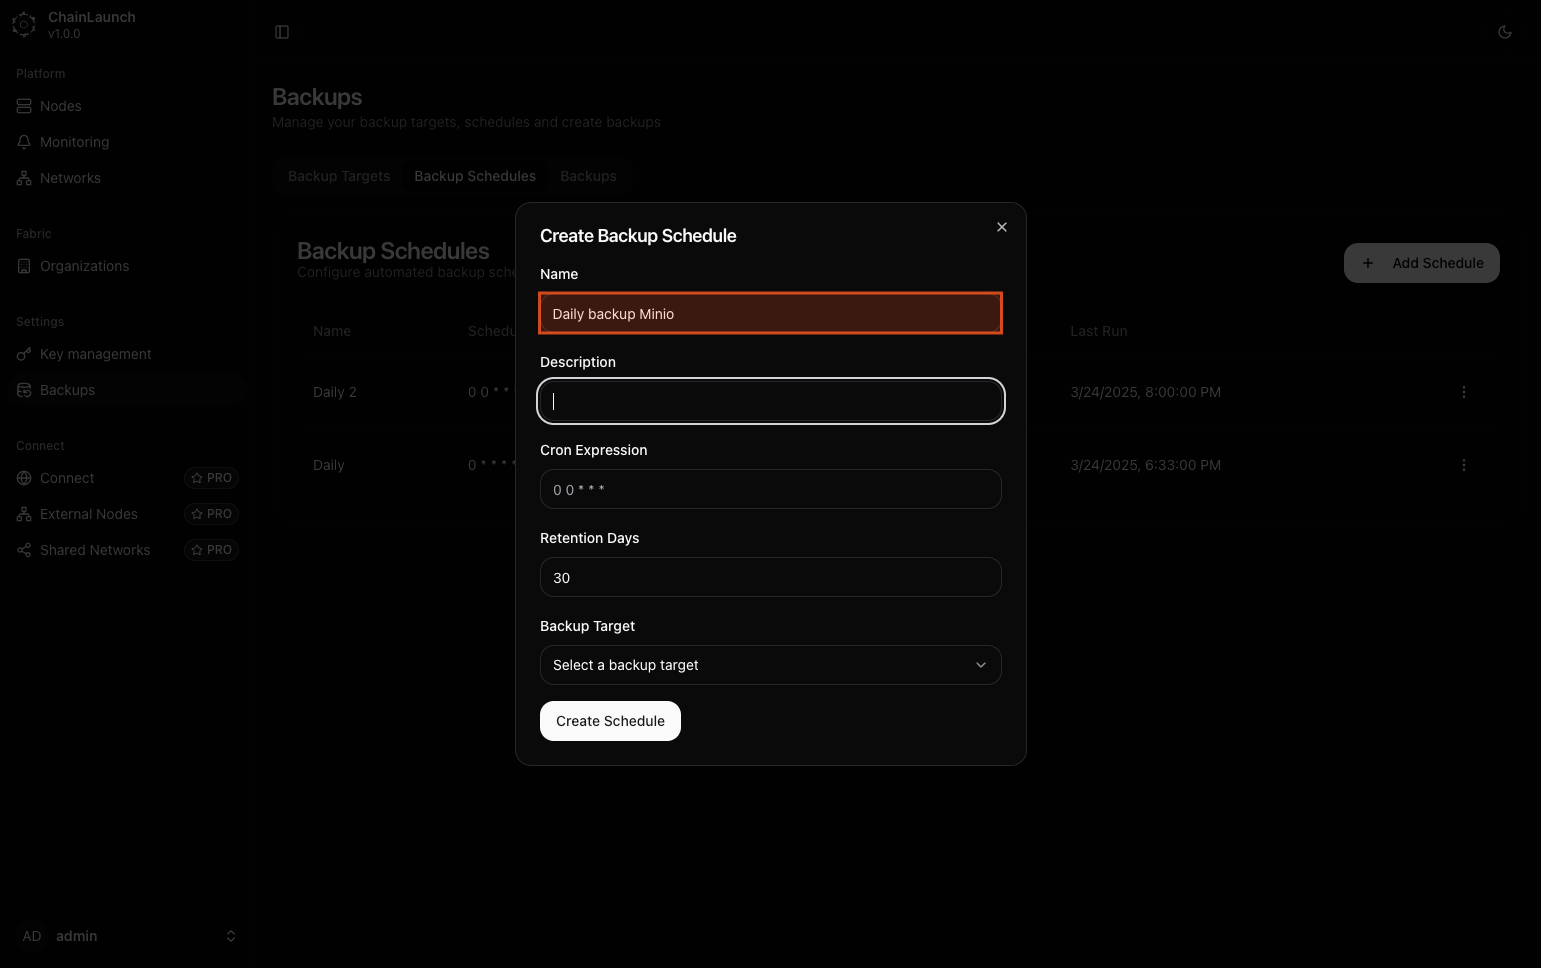
Step 17: Type 'Daily backup Minio' in Name
Enter a descriptive name for your backup schedule.
Explanation:
- In the prompt that appears, fill out the Name field with
Daily backup Minio.
Tip:
- Use clear naming conventions to easily identify various schedules later.
Step 18: Type '' in Description
You may choose to leave this empty or provide additional context about what this schedule does.
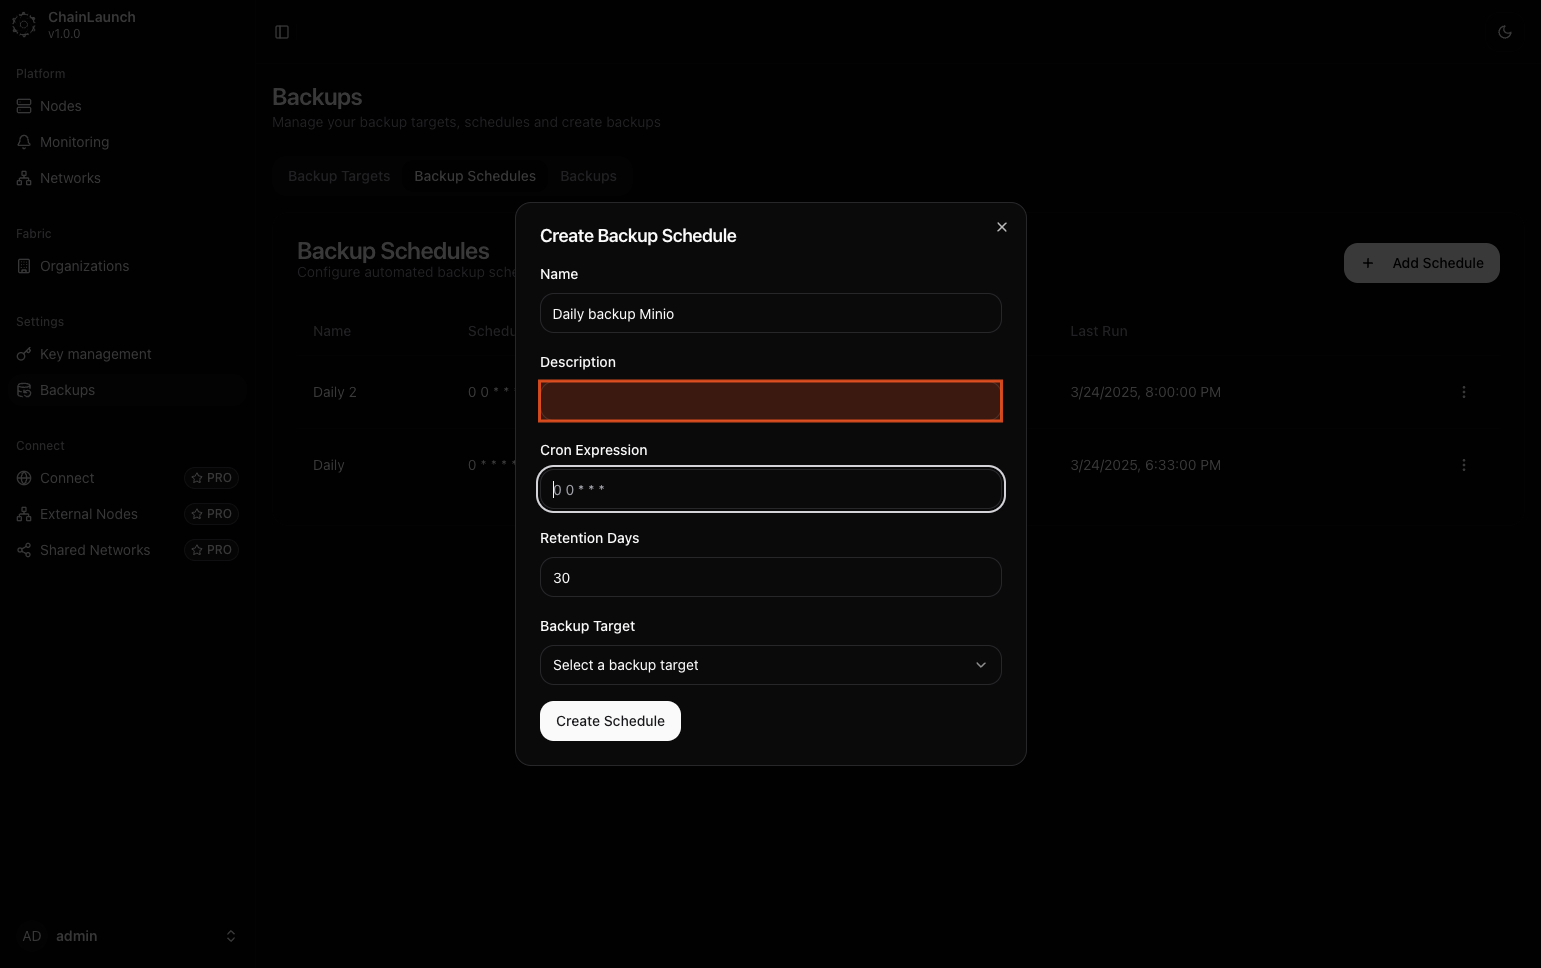
Explanation:
- The description is optional but can help clarify what this schedule is intended for. If desired, provide additional context here; otherwise, you can leave it blank.
Step 19: Type '0 0 * * * *' in Cron Expression
Define when backups should occur using cron syntax.
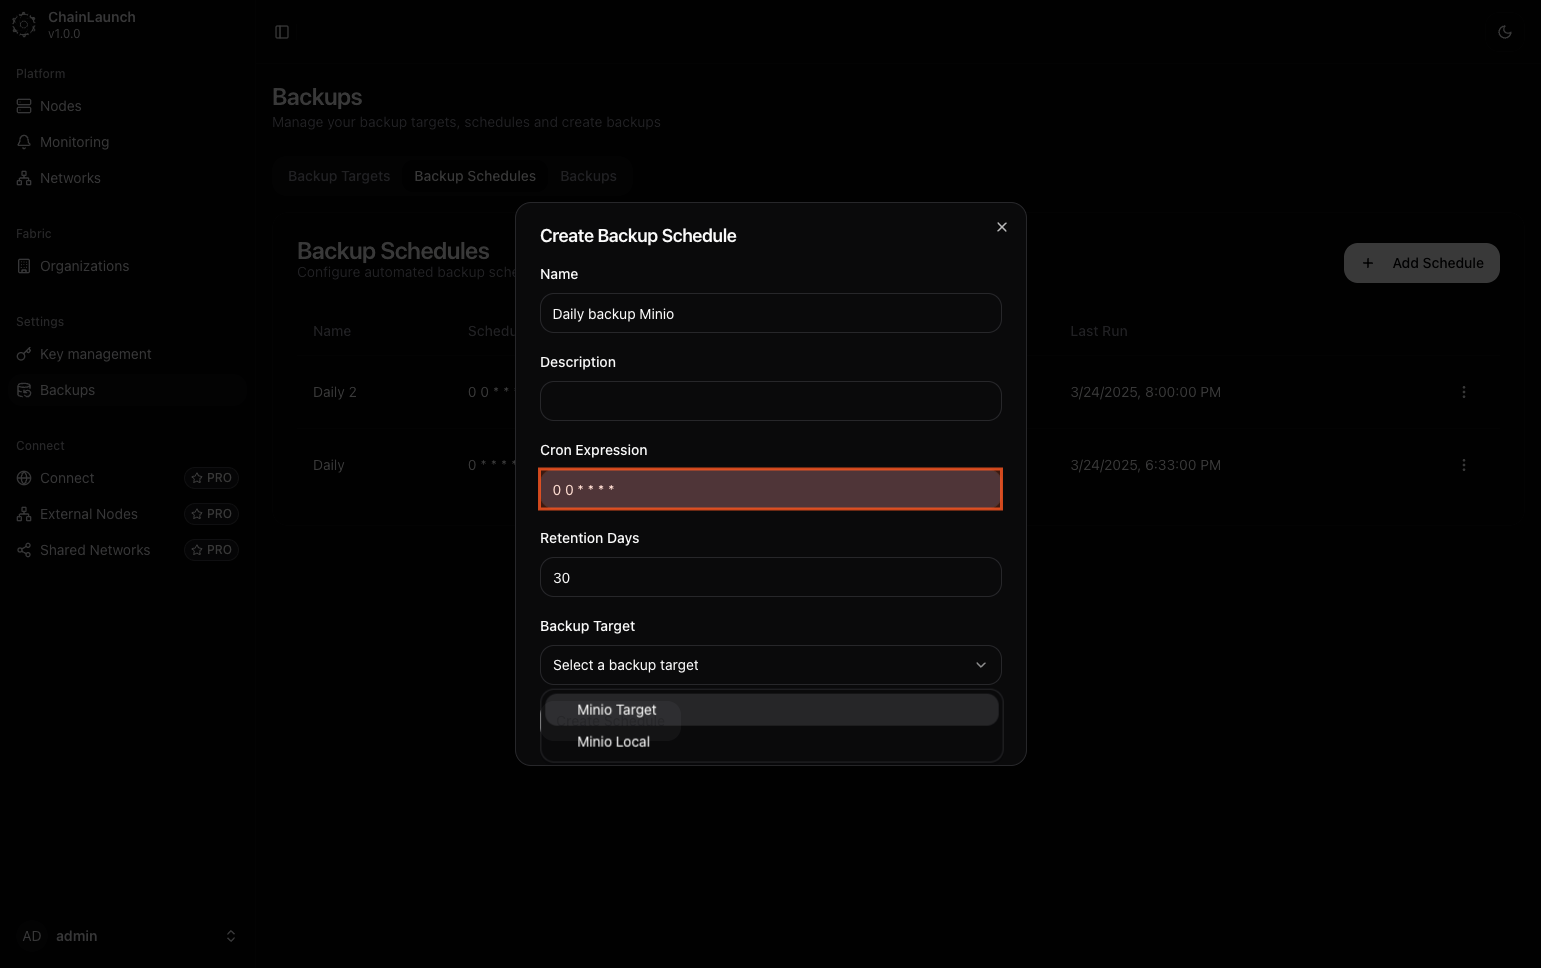
Explanation:
- Enter
0 0 * * * *into the Cron Expression field. This configuration means that backups will run at midnight every day.
Warning:
- Ensure that you understand cron syntax as it dictates when and how often tasks run.
Step 20: Select 'Minio Target' from dropdown
Choose which target this schedule applies to from the dropdown list.
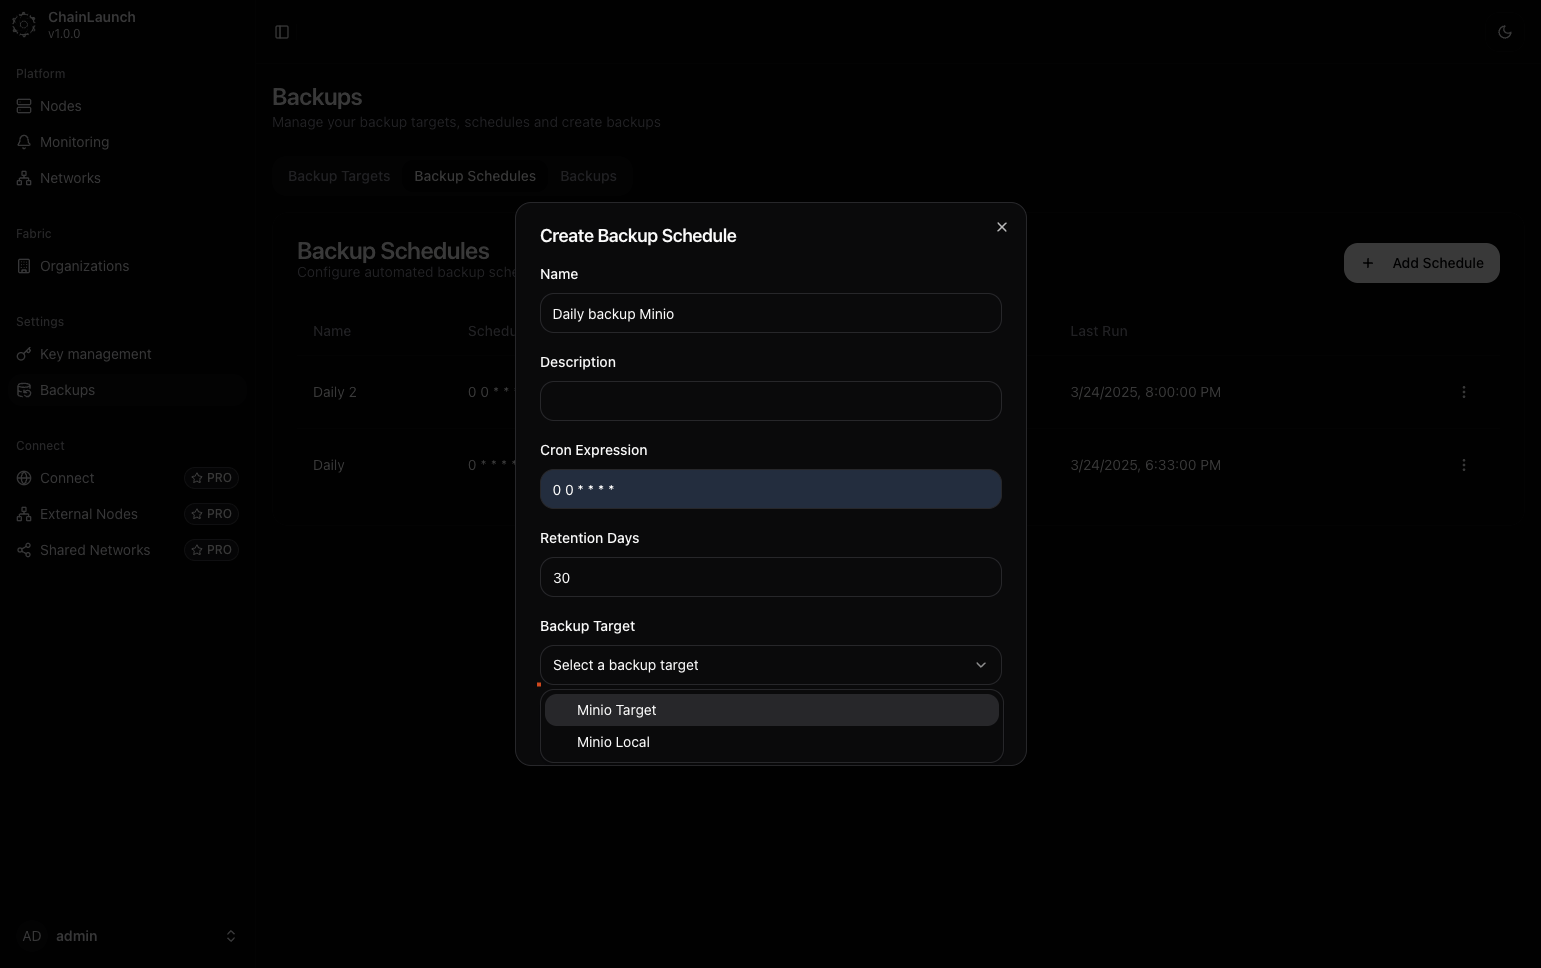
Explanation:
- From the dropdown menu labeled "Select a backup target", select Minio Target, which you created earlier.
Step 21: Click on 'Create Schedule'
Finalize creating your new backup schedule by clicking this button.
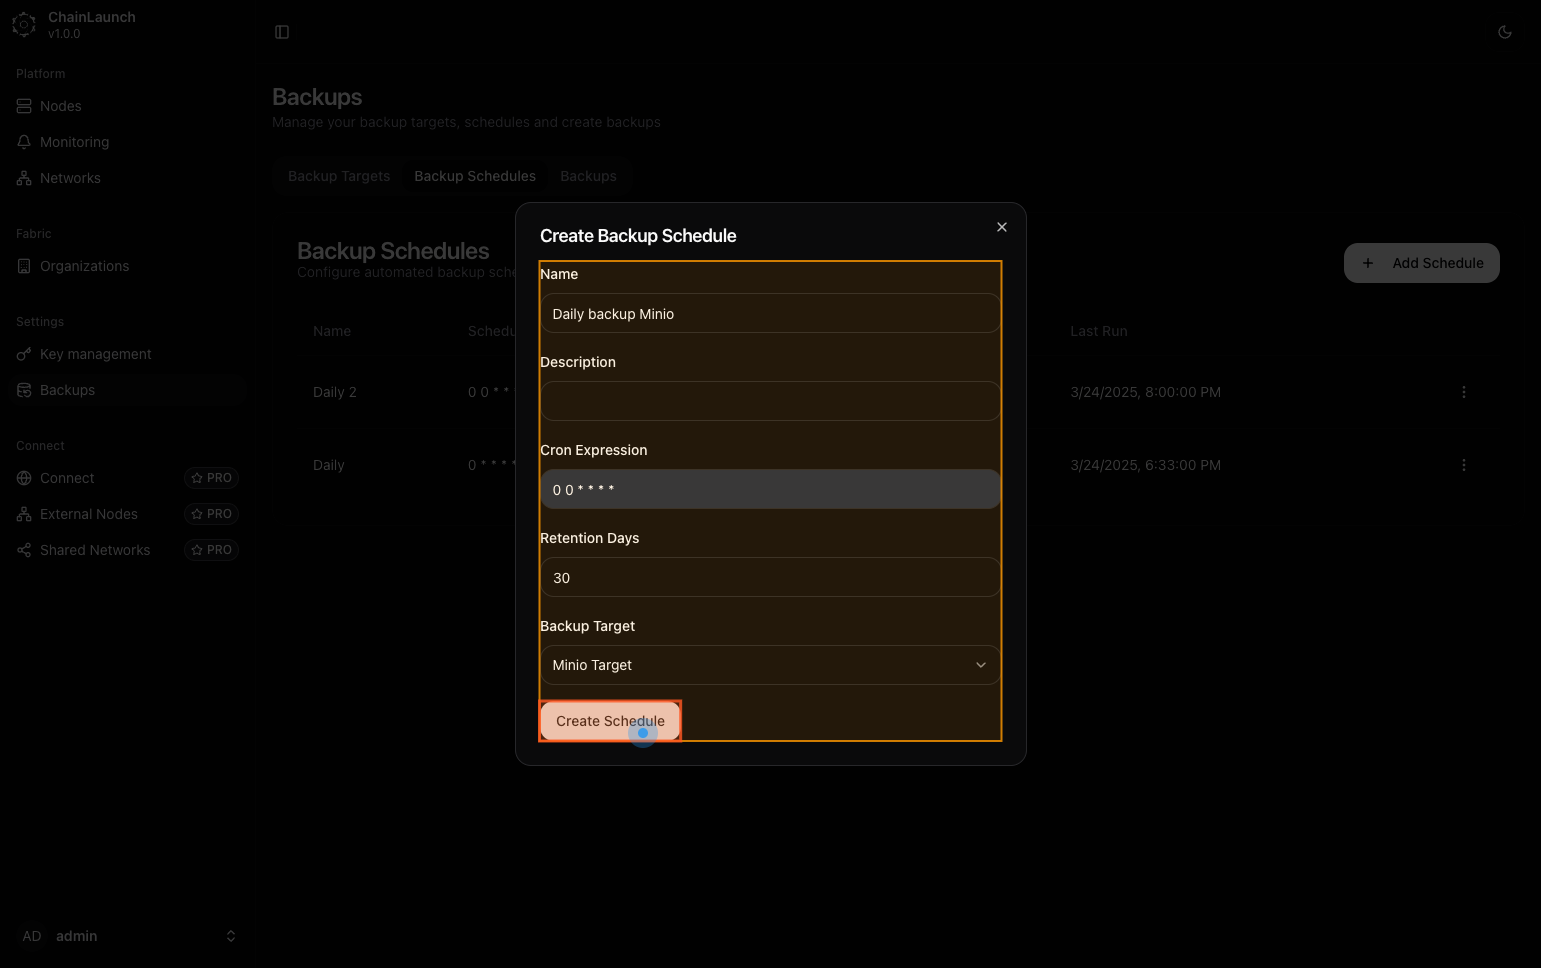
Explanation:
- Clicking this button submits all information provided and creates your scheduled task for automatic backups based on defined criteria.
Best Practice:
- Double-check all inputs before finalizing to ensure accuracy.
Step 22: Click on 'Backups'
After creating schedules, return to manage backups directly by clicking here again.
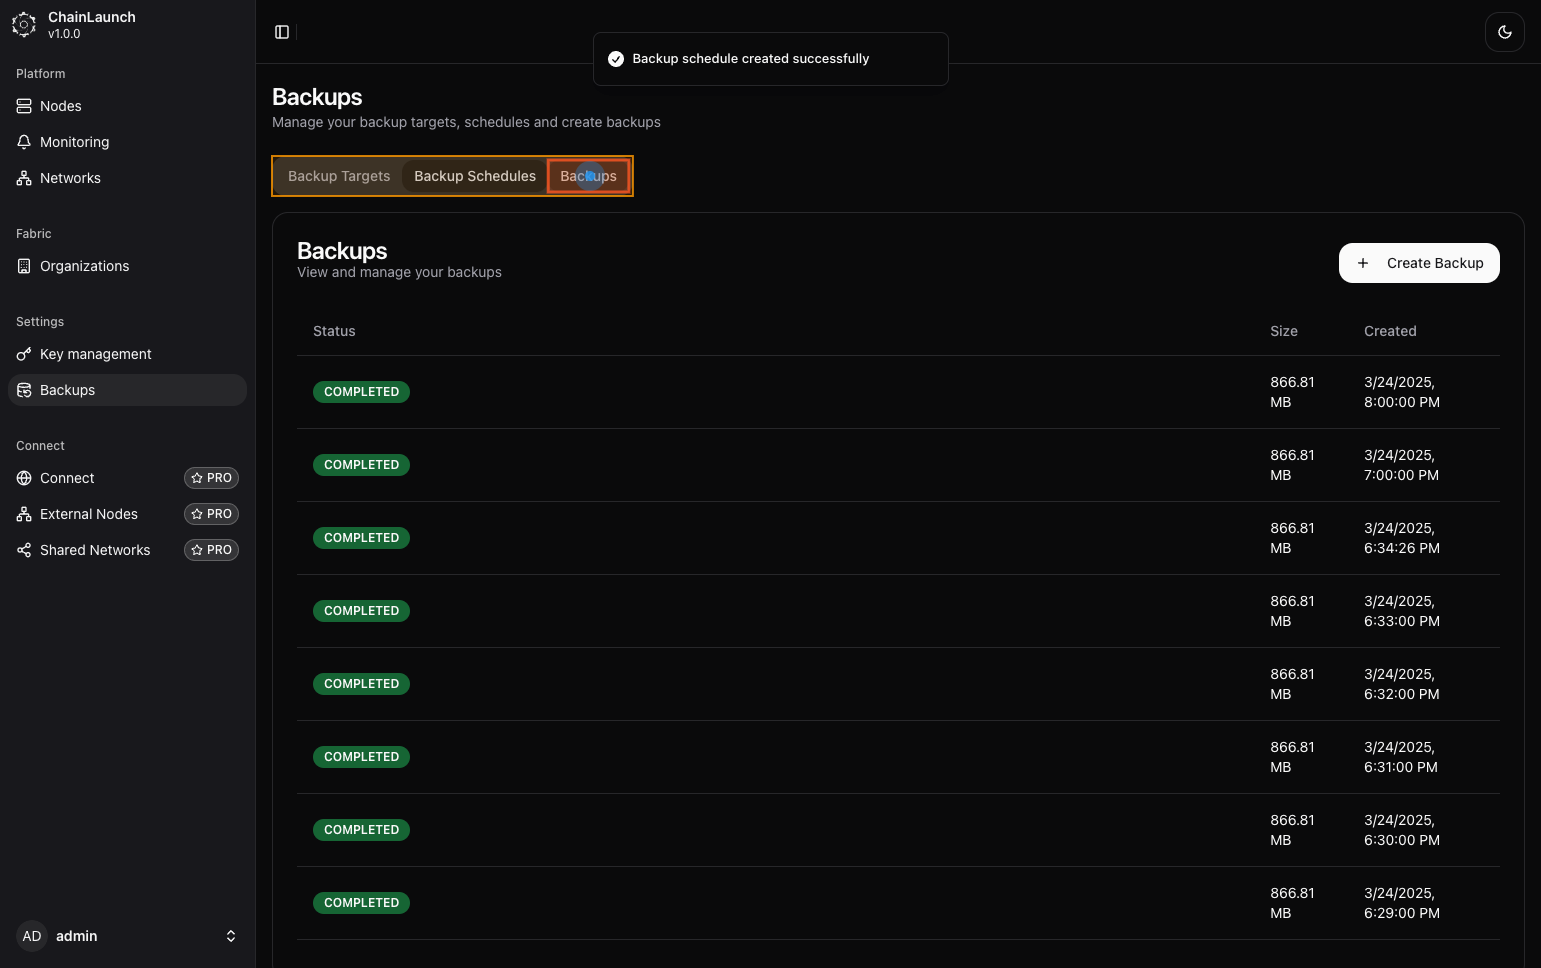
Explanation:
- Navigate back by selecting Backups, which allows you to see all current and past backups including their statuses.
Step 23: Click on 'Create Backup'
Initiate a manual backup process by clicking here.
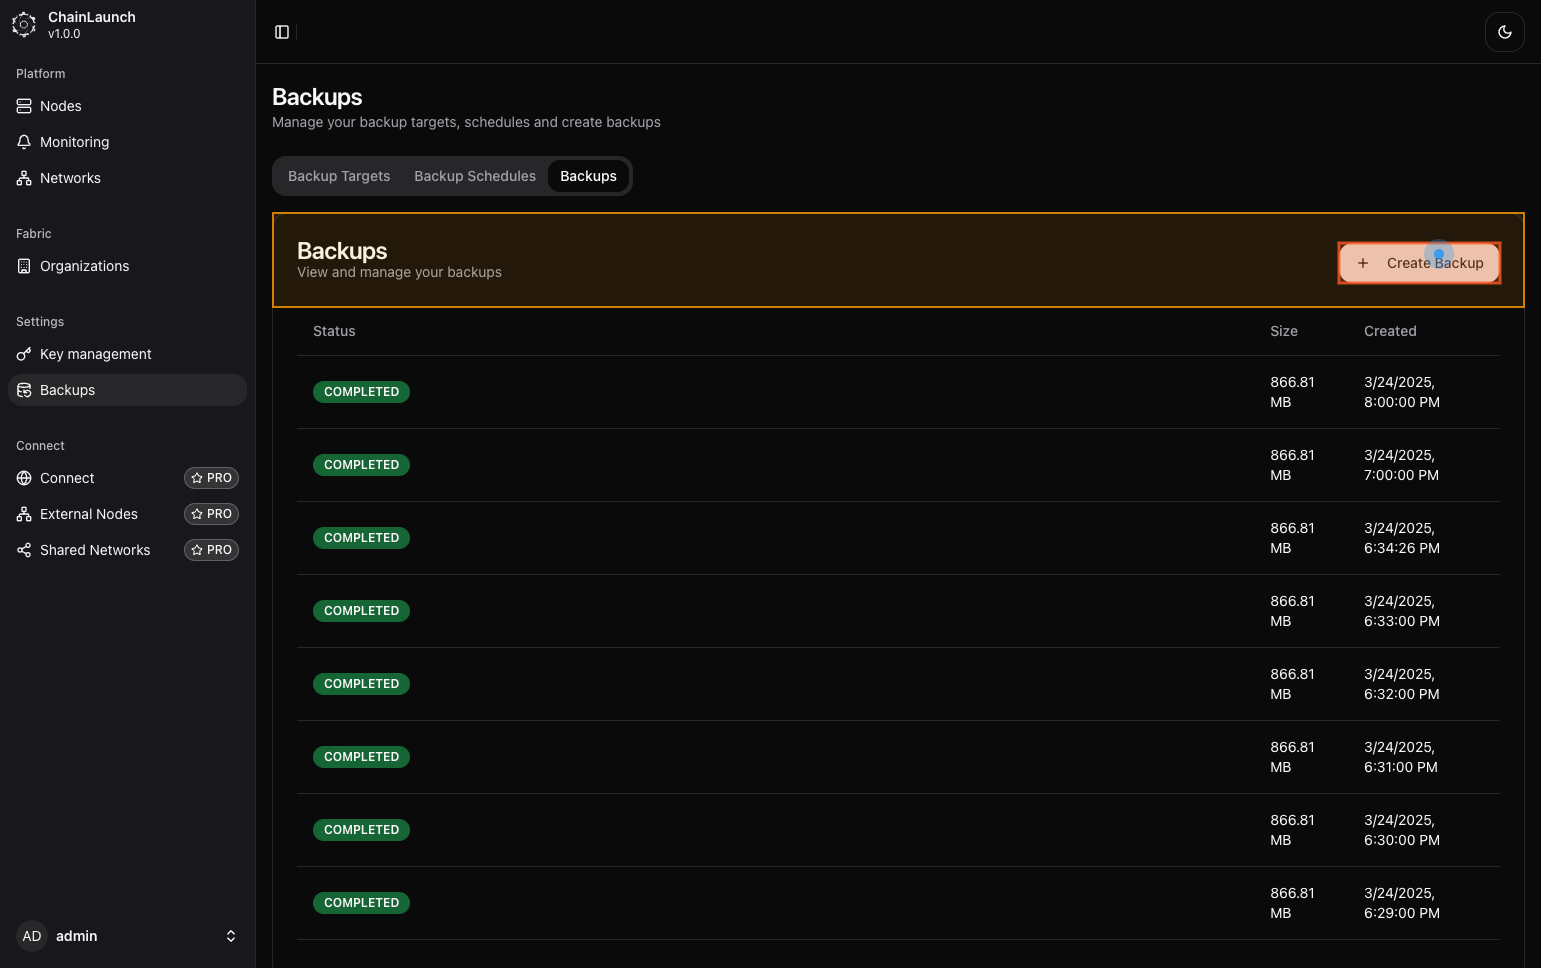
Explanation:
- This button allows you to start an immediate backup rather than waiting for scheduled times to occur.
Step 24: Select 'Minio Target' from dropdown
Confirm which target you'd like to use for this manual backup operation by selecting it from available options.
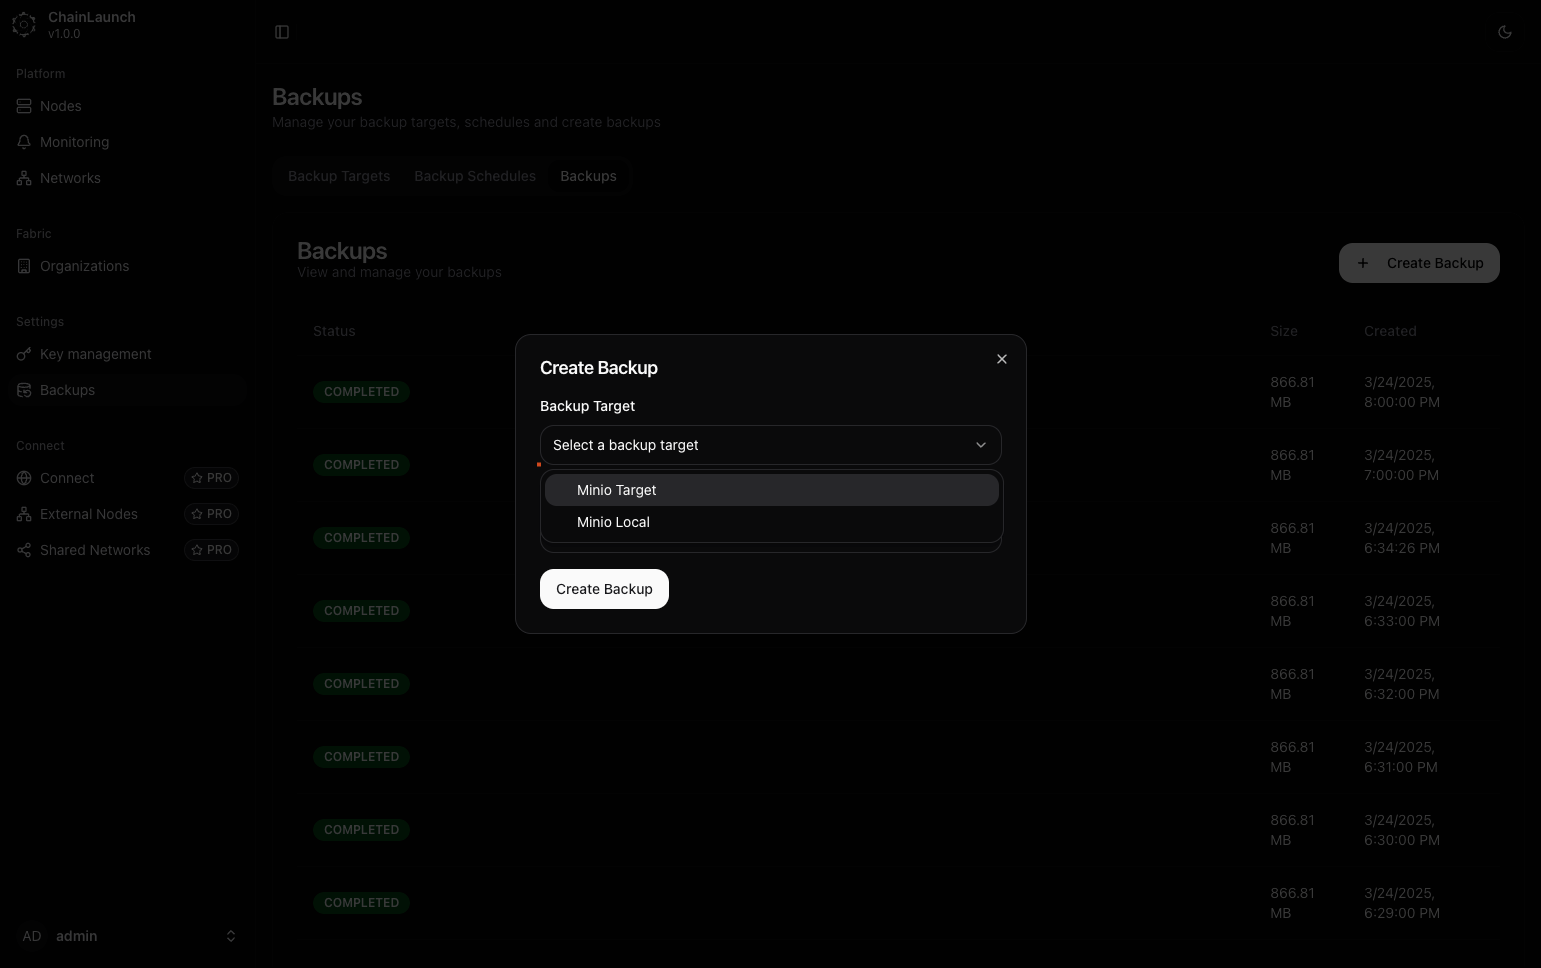
Explanation:
- Choose Minio Target, which was set up earlier as part of our configurations.
Step 25: Select 'Daily backup Minio' from dropdown
Select which schedule you'd like associated with this manual operation if applicable (optional).
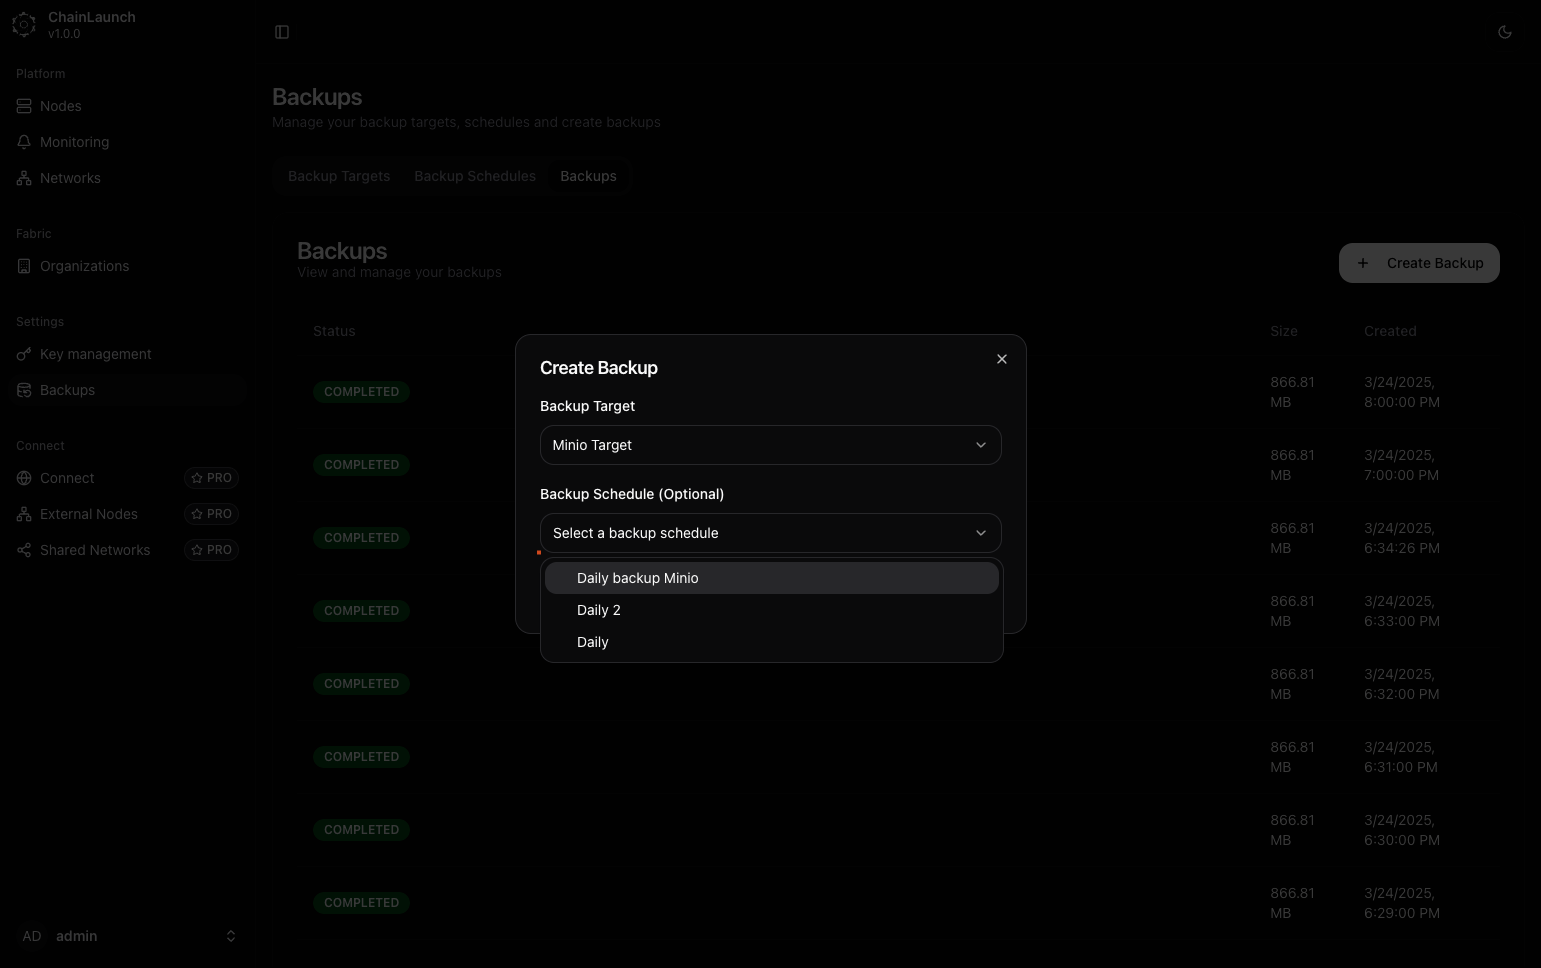
Explanation:
- Choose Daily backup Minio, which specifies that it should follow that defined schedule's criteria during execution if needed.
Step 26: Click on ‘Create Backup’
Finalize initiating this manual operation by submitting it through this button click!
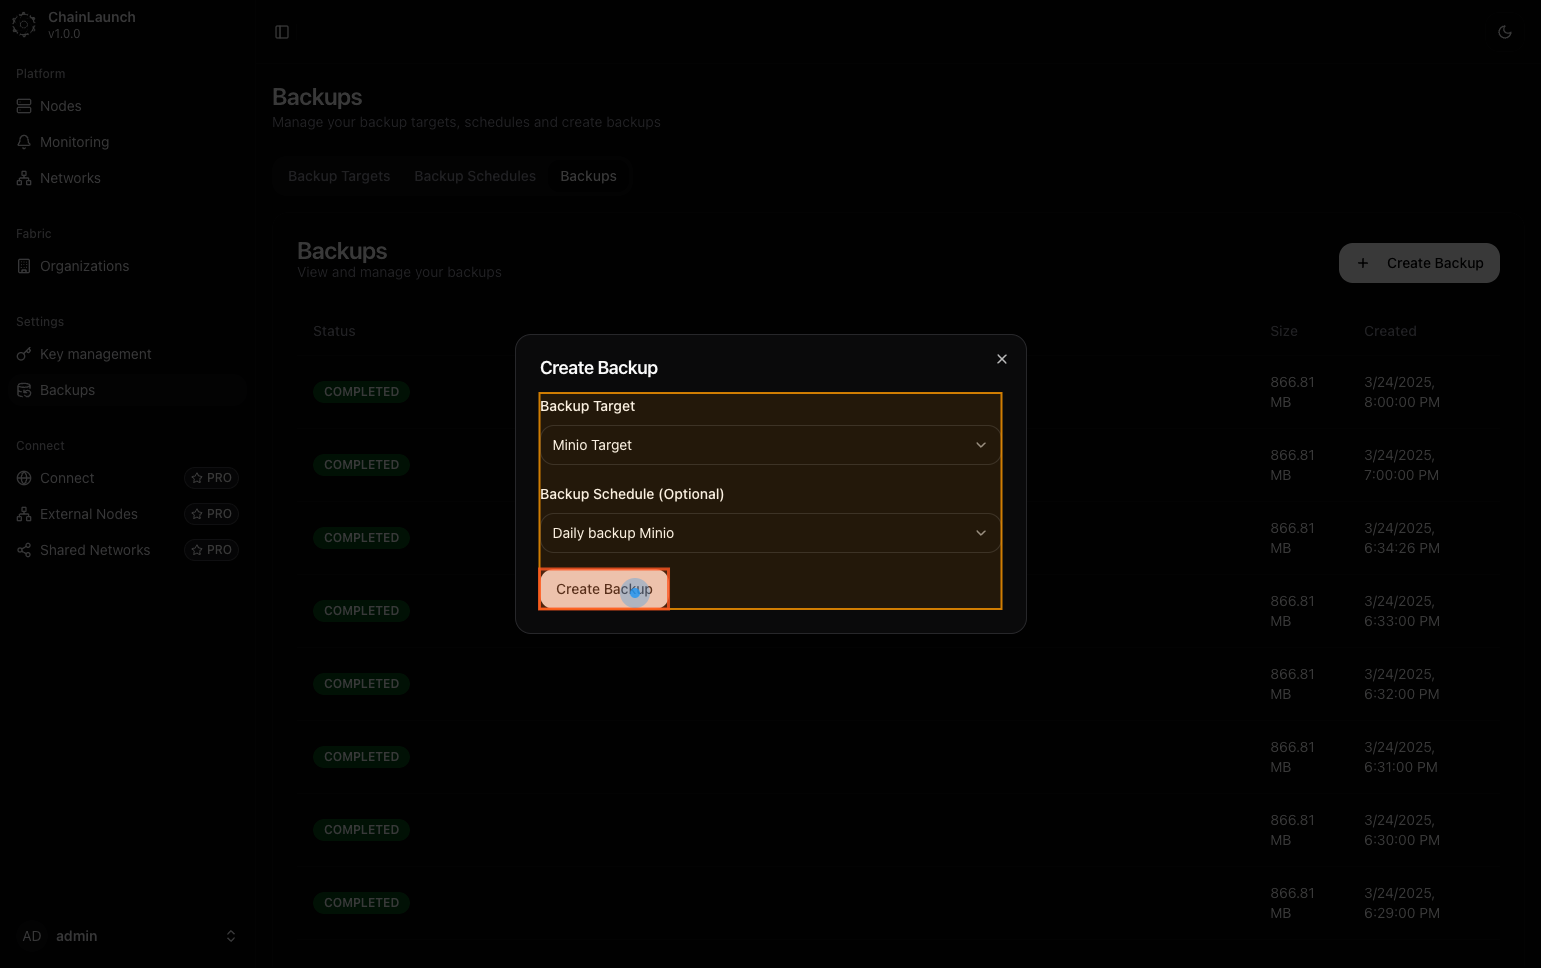
Explanation:
- By clicking here, you're confirming all selections made thus far and launching an immediate backup based upon those configurations entered previously.
Step 27: Capture completed
The final capture shows that you've successfully initiated a new process!
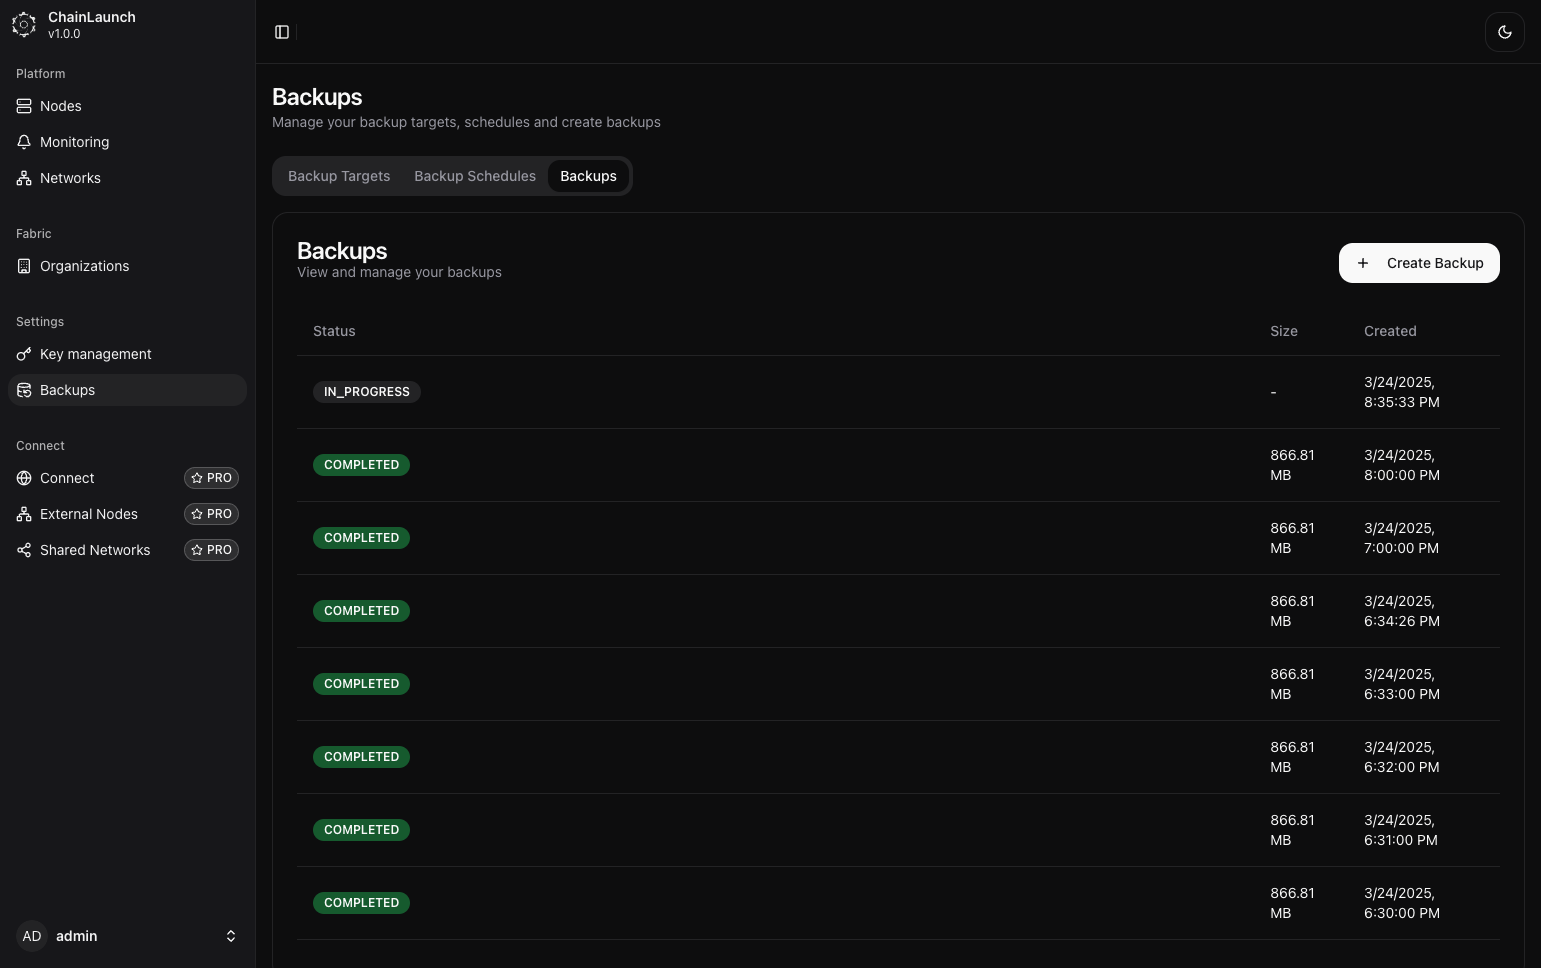
Explanation:
- The status indicates that a new operation is currently underway as indicated by “IN_PROGRESS”. This means everything has been set up correctly and is functioning as expected!
Tips:
- Monitor ongoing operations closely through dashboard notifications or logs for performance insight!
Backup API Endpoints
In addition to the UI, ChainLaunch provides a REST API for managing backups programmatically. Below are the key endpoints:
| Method | Endpoint | Description |
|---|---|---|
POST | /api/v1/backups/targets | Create a new backup target |
GET | /api/v1/backups/targets | List all backup targets |
POST | /api/v1/backups/schedules | Create a backup schedule |
POST | /api/v1/backups | Create a manual backup |
GET | /api/v1/backups | List all backups |
Example: Create a backup target via API
curl -X POST http://localhost:8100/api/v1/backups/targets \
  -H "Content-Type: application/json" \
  -d '{
    "name": "My S3 Target",
    "endpoint": "http://localhost:9001",
    "bucket_name": "chainlaunch-backups",
    "bucket_path": "backups",
    "region": "us-east-1",
    "access_key_id": "YOUR_ACCESS_KEY_ID",
    "secret_access_key": "YOUR_SECRET_ACCESS_KEY",
    "force_path_style": true
  }'
Example: Create a manual backup via API
curl -X POST http://localhost:8100/api/v1/backups \
  -H "Content-Type: application/json" \
  -d '{
    "target_id": 1
  }'
For full API documentation, refer to the Swagger/OpenAPI specification available at http://localhost:8100/swagger/.
S3 Authentication Methods
ChainLaunch supports four authentication methods for S3 backup targets. Choose the method that best fits your infrastructure.
1. Static Credentials (Access Key + Secret Key)
The simplest method — provide an IAM user's access key and secret key directly. Best for MinIO, development, or environments without IAM roles.
2. Instance Role / IRSA
Uses the EC2 instance profile, ECS task role, or EKS IRSA (IAM Roles for Service Accounts) to authenticate automatically. No credentials need to be provided — the AWS SDK discovers them from the instance metadata service.
Best for: ChainLaunch running on EC2, ECS, or EKS where the compute already has an IAM role attached.
3. IAM Role Assumption (STS AssumeRole)
Assumes a specific IAM role via AWS STS. This is the recommended approach for:
- Cross-account backups — backup to an S3 bucket in a different AWS account
- Least-privilege access — use a dedicated role with only backup permissions
- Temporary credentials — STS issues short-lived tokens automatically
Can be combined with static credentials or instance role as the base credentials for the AssumeRole call.
4. Named Profile (SSO)
Uses a named AWS profile from ~/.aws/credentials or ~/.aws/config. Supports SSO profiles configured via aws configure sso.
Required IAM Permissions for S3 Backups
ChainLaunch uses Restic for S3 backups, which requires the following S3 permissions on the backup bucket.
Minimum IAM Policy
{
  "Version": "2012-10-17",
  "Statement": [
    {
      "Sid": "ChainLaunchBackupAccess",
      "Effect": "Allow",
      "Action": [
        "s3:GetObject",
        "s3:PutObject",
        "s3:DeleteObject",
        "s3:ListBucket",
        "s3:GetBucketLocation"
      ],
      "Resource": [
        "arn:aws:s3:::YOUR_BUCKET_NAME",
        "arn:aws:s3:::YOUR_BUCKET_NAME/*"
      ]
    }
  ]
}
Replace YOUR_BUCKET_NAME with your actual bucket name.
| Permission | Why it's needed |
|---|---|
s3:GetObject | Read backup data and repository metadata during restore and verification |
s3:PutObject | Write backup snapshots and data chunks |
s3:DeleteObject | Remove old snapshots during retention cleanup |
s3:ListBucket | List repository contents (snapshots, data, keys) |
s3:GetBucketLocation | Determine bucket region for correct endpoint routing |
Additional Permissions for Role Assumption
If using IAM Role Assumption, the base credentials (instance role or static keys) need permission to assume the target role:
{
  "Version": "2012-10-17",
  "Statement": [
    {
      "Sid": "AllowAssumeBackupRole",
      "Effect": "Allow",
      "Action": "sts:AssumeRole",
      "Resource": "arn:aws:iam::BACKUP_ACCOUNT_ID:role/BACKUP_ROLE_NAME"
    }
  ]
}
And the target role's trust policy must allow the assumption:
{
  "Version": "2012-10-17",
  "Statement": [
    {
      "Effect": "Allow",
      "Principal": {
        "AWS": "arn:aws:iam::SOURCE_ACCOUNT_ID:root"
      },
      "Action": "sts:AssumeRole",
      "Condition": {
        "StringEquals": {
          "sts:ExternalId": "YOUR_EXTERNAL_ID"
        }
      }
    }
  ]
}
The externalId field is optional but recommended for cross-account access. It prevents the confused deputy problem. If you set an External ID in ChainLaunch, it must match the trust policy condition.
Example: Create a backup target with role assumption via API
curl -X POST http://localhost:8100/api/v1/backups/targets \
  -u admin:admin123 \
  -H "Content-Type: application/json" \
  -d '{
    "name": "Cross-Account S3 Backup",
    "type": "S3",
    "config": {
      "bucketName": "backup-bucket",
      "region": "us-east-1",
      "bucketPath": "chainlaunch/",
      "endpoint": "https://s3.us-east-1.amazonaws.com",
      "useInstanceRole": true,
      "roleArn": "arn:aws:iam::123456789012:role/ChainLaunchBackupRole",
      "externalId": "chainlaunch-backup-2024",
      "forcePathStyle": false
    }
  }'
Example: Create a backup target with instance role via API
curl -X POST http://localhost:8100/api/v1/backups/targets \
  -u admin:admin123 \
  -H "Content-Type: application/json" \
  -d '{
    "name": "EC2 Instance Role Backup",
    "type": "S3",
    "config": {
      "bucketName": "backup-bucket",
      "region": "us-east-1",
      "bucketPath": "chainlaunch/",
      "endpoint": "https://s3.us-east-1.amazonaws.com",
      "useInstanceRole": true,
      "forcePathStyle": false
    }
  }'